Tuesday, 7 November 2017

Wet Felting Incorporating Other Materials


So moving on from my sample piece, I decided to go for it. This time I did things slightly differently, hopefully learning from the first piece. I laid out the materials as above. I just kept going until I was happy with how it looked as I wasn't actually aiming to make anything from the finished piece.


This is what I ended up with once I I'd finished felting and shrinking it. I was much happier with what happened this time, however, it's not dry yet!


This is the piece of silk fabric that all puckered up with a piece of the silk throw underneath.


This is another piece of farbic, not sure what it is, some sort of polyester or viscose, but it puckered up nicely too.


And this is the piece of cotton fabric, again love how it's puckered and grabbed the other fibres.


This is the silk throwster waste.


This is the silk spectrum, it reminds me of slub, but thicker.


This is the silk throwster dyed waste.

I also used some dyed silk tops and some angelina fibres.

All the above photos were taken whilst it was still wet.


This is how it looks now it's fully dried and I'm really pleased with it.


This is a close up of the cotton scrim, love how it's all puckered up.


This is a close up of the silk, again it puckered up really nicely and has left a fabulous texture.


This is the piece of viscose/polyester and it's puckered up lovely too.


The green, blue and patch of purple is the silk throwster waste.


This has the silk spectrum clump middle left, the darker patch, and it's quite soft considering what it starts off as.


The purple area is silk tops and there is also some angelina fibre in there too.


I not only love the end product, but really enjoyed the process.

Monday, 6 November 2017

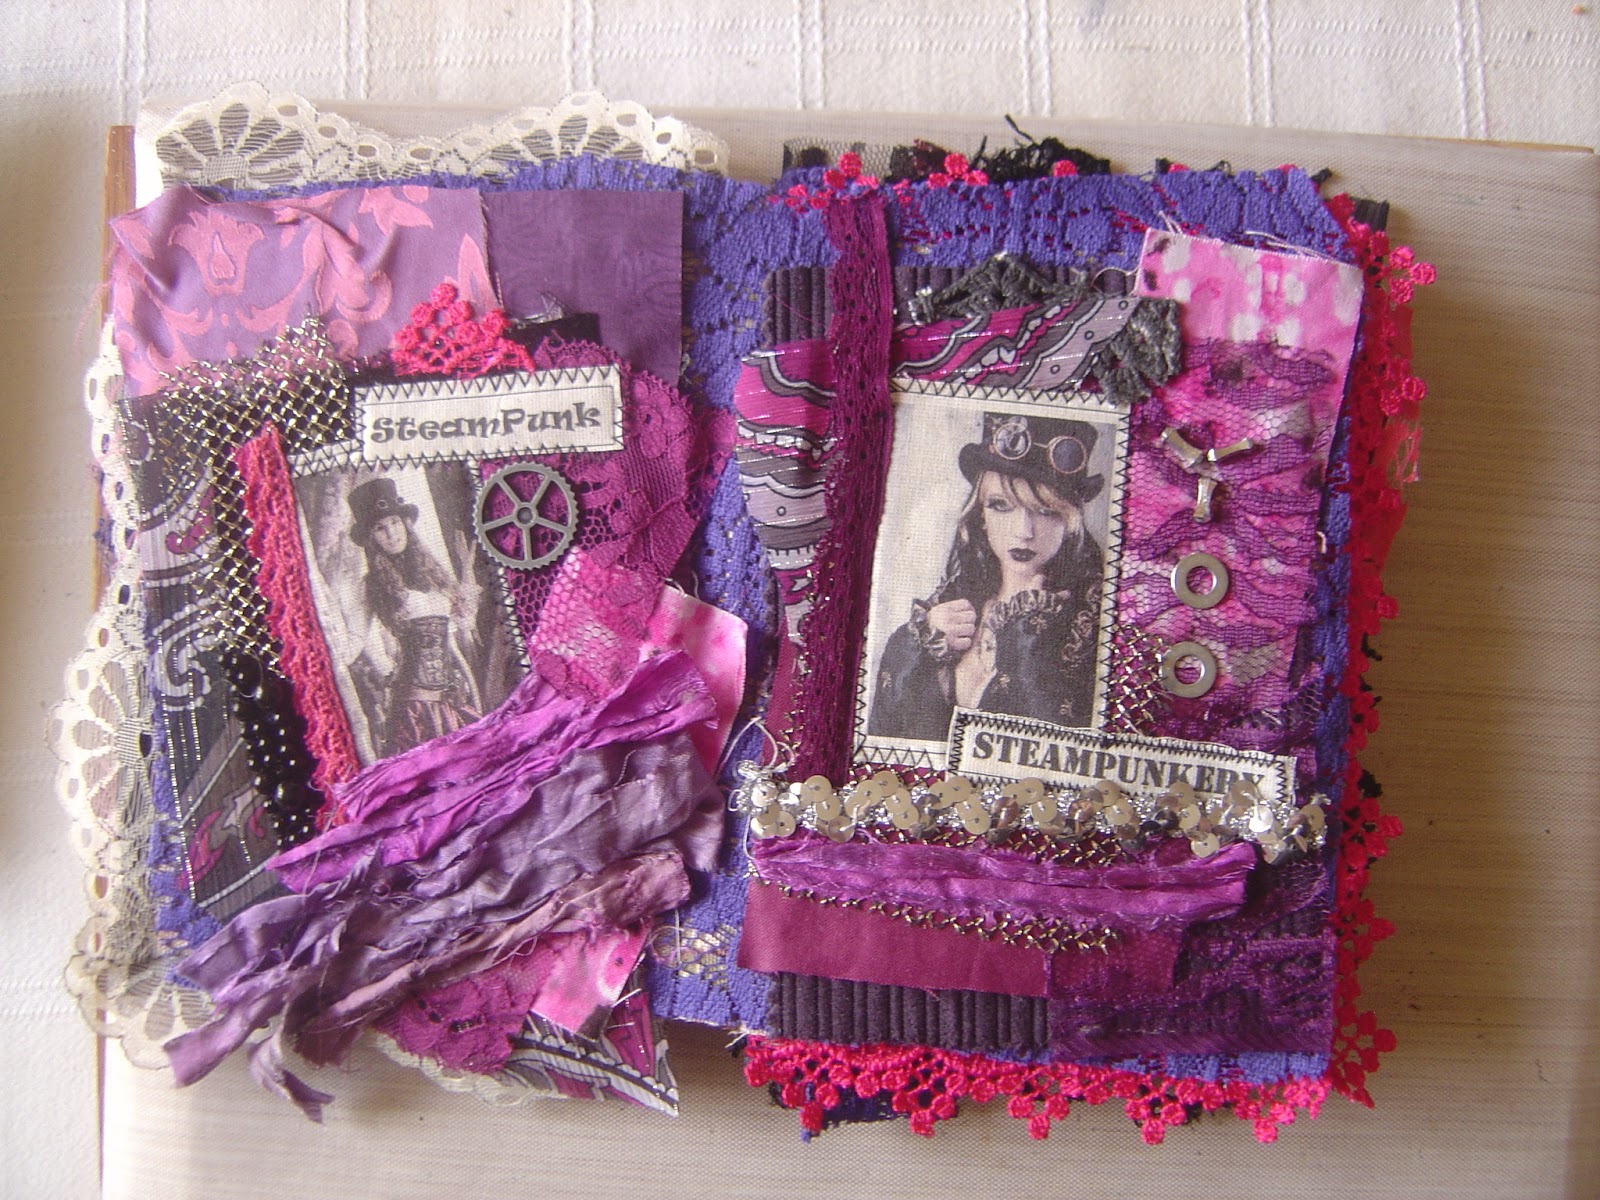
Small Fabric Steampunk / Gothic Book


After I'd printed some images onto fabric and cut them up, I started to lay fabric and trims around them to start to build up a page.


I did the same for all of them and added a few emblishments.


Nothing is stuck down yet as I was still playing around with placement etc.


Ribbons, lace and ric-rak.


Once everything was glued down on the pages I played around with the placement of them and paired them up.


Then the pinkish set of pages.


And the next two pages, these are five and six.


And the last two pages.


I put the pages together in the same way I'd made the other two books sandwiching lace inbetween the layers. I laid out the pieces for the front and back covers. At this point, nothing is stuck down.


This is the front cover stitched and glued down with all embellishments attached.


And the back cover which I've left pretty plain as it needs to be flat when laid down.


And this is the spine which has been re-inforced with cardboard to give it extra strength.


And finally a view from the top with the book closed.


And this is the bottom.

This was a thank you gift for Sheilagh who very generously posted me a huge stash of fabric. I made her this because she showed an interest in the first one I'd made, but I couldn't give that one away.
This one is a little smaller and measures approx 6.5" x 9". I just hope she likes this one as much as the first one.

Sample Wet Felting Piece


I've been watching a Youtube tutorial (from Living Felt) about adding silk and other fabrics into pieces of wool and felting them, so I decided to try it out and made a sample.


And this is the back. You can see one of the silk pieces bottom left and the other more or less in the centre.


This is a close up of the piece with the silk throws and the angelina fibre which is what gives the metalic effect.


This section has a piece of green cotton, two pieces of green silk, silk throws, bamboo fibres and silk throwsters waste. I have no idea what any of the latter are, I bought them from the Knit & Stitch show seven years ago but I wanted to see how they would felt.


And if you look very closely, top middle you can just see the piece of cotton. The very light green whisps on the left and the right is the bamboo fibres.

I learnt lots from making this sample piece. Mostly that I didn't put a big enough piece of fabric on and I used too much wool to pin it down with. It's also best to use contrasting colours. Also I didn't rub it enough to get some textures into the fabrics. But it was a very good exercise.

Saturday, 4 November 2017

Fabric Cover


I was asked to make a fabric cover, the same sort as the books but without the pages. So I started by making some pillows.


In various different shapes and sizes.


And I moved them around to create the overall size and shape I wanted.


This is what I decided upon for the front cover, so I sewed them all together.


And this for the back cover.


Inside of the back cover all sewn together.


And the inside of the front cover.


The front and back cover sewn together which is no mean feat!! Making sure they are tight and sewn together but not too tight so they won't bend at the spine, whilst still trying to keep the overall shape.


And the insides of them sewn together.


And the front cover once everything was sewn. I just had to put eyelets in and then it was finished.


And the back cover all fully sewn together.

I'm pleased to say that after it travelling half way around the world to Australia, it has safely been received and the recipient loves it.

Friday, 3 November 2017

Junk Journal


Front cover of a junk journal that I've made. The hard back book cover is covered in fabrics and stamped images. 


This is the inside of the front cover and the first page.


Some of the recycled envelopes have windows which is quite useful.


Strips of fabric have been sewn down the edges of some pages.


Some of the pages are from magazines.


Map pages have also been included in the journal.


Fabric stamped images are also incorporated on some pages.


Some images were stamped on magazine papers and cut out.


Map page.


Back inside cover.


Back cover of the junk journal.

This is for sale in my Etsy shop - https://www.etsy.com/uk/shop/SamsHandmadeStore

Blog Archive