Showing posts with label Crunchy Waxed Kraft Paper. Show all posts

Friday, 14 August 2015

Journal Page for PA Challenge


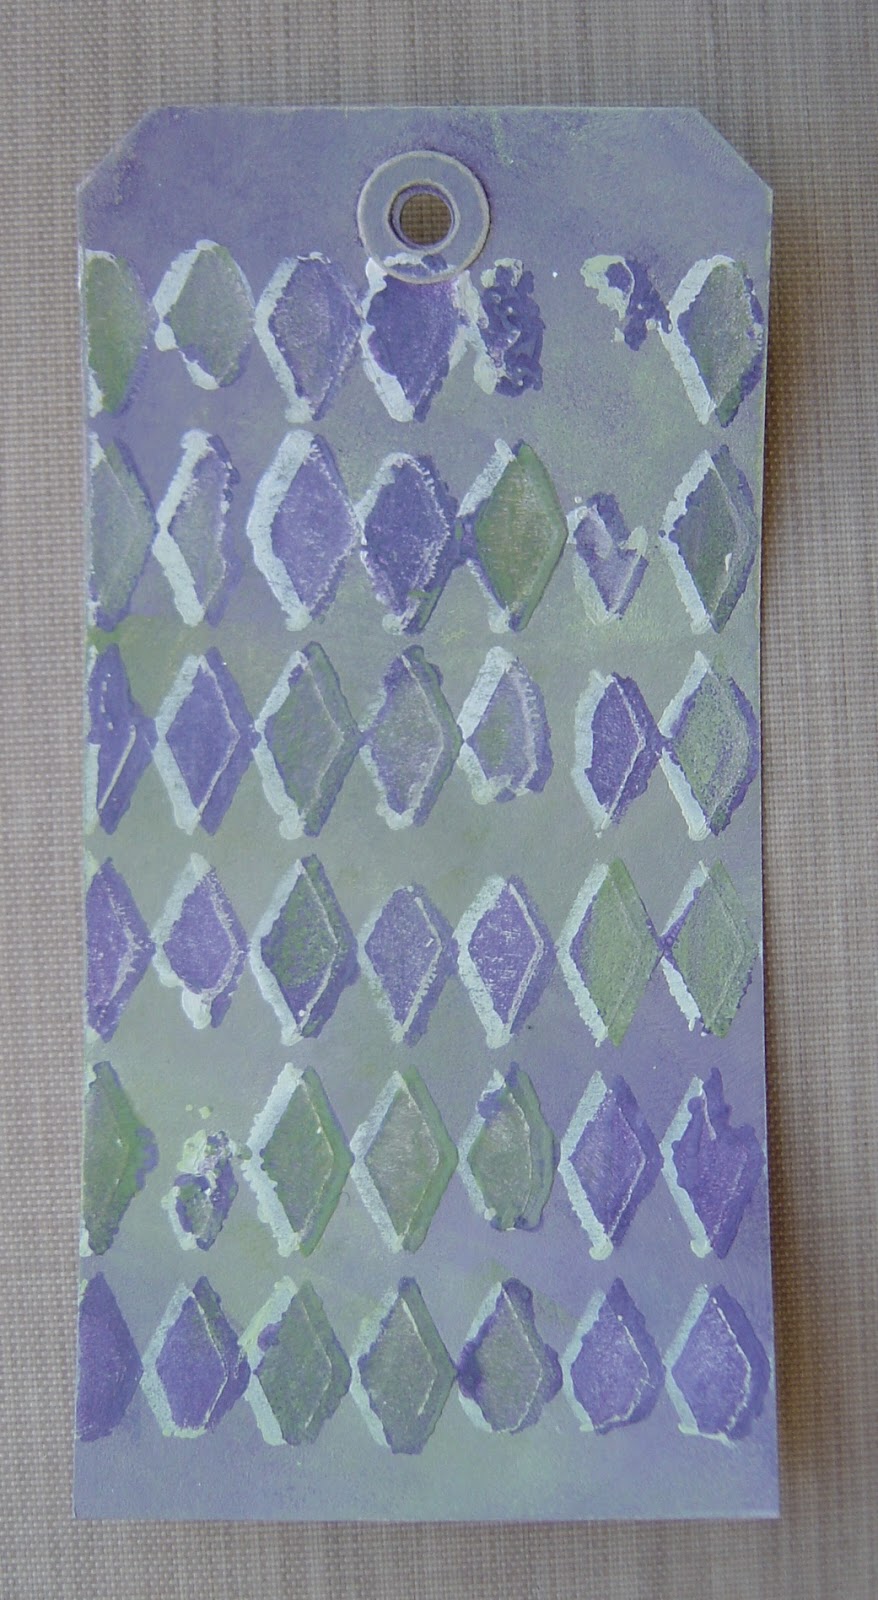
Over on the PA blog they have a theme of gels and mediums. Lin Brown did a fab video incorporating Lindys Stampgang sprays and golden gloss medium. I didn't have either of these, so had to improvise. I used DA clear crackle paste through a diamond stencil onto the crunchy wax paper.


And did exactly the same on a journal page which already had some black paint on it.


As I've said, not got any of the sprays, or so I though, I found this Lindys smoky sapphire one in my stash and chose a Dylusions with mica in it.


This has had two coats of each colour, allowing drying in-between coats.


And exactly the same process on the journal page.


Then I tickled the raised areas with pewter treasure gold.


And the same for the crunchy waxed paper.


So I then went on to create this page, using some of the crunchy waxed paper at the bottom of the collage.

It's not actually as dark as it looks, but it is outside!

Wednesday, 23 April 2014

PA Guest Designer - Huge Tag Using LP & EV Stamps


Evening all. I was asked by the PA team if I would like to make something for their blog, and to keep it quick, simple and easy to do. If you've not seen it, check it out here and if you join in with any of the weeks projects you could be picked at random to win a stamp plate of your choice.


I brayered the above colours onto a size #12 tag, starting with the caramel, then the new colour of autumn fire and finally a splash of blood orange.


Stamped the sketchy rectangle from the EEV02 set all over the background in black archival.


I took the white Posca pen and high-lighted some of the lines.


Close up of the background.


Next I took a size #8 tag in corrugated card, peeled back some of the top layer and painted it in blood orange fresco paint.


I stamped some LP images onto white card in black and blaze red stazon and mounted them onto the corrugated tag, using the butterfly to lay over the same piece on the main image.


Die cut the pediments in Prima resist checkered canvas.


Scribbled over the canvas with the red portfolio pastel and blended it with a baby wipe. Taking a clean piece of the baby wipe, wipe over the resist part to reveal the white.

I scrunched up a piece of crunchy wax paper, brayered it with blood orange fresco paint and stamped it with oriental script from the Ink and the Dog Asian plate #3. I stamped the symbol from Asian plate #4 and added a few to the tag.

Finally I outlined the tag with a black marker pen, punched a hole and added a reinforcer and some ribbon.

Friday, 24 January 2014

Jo Inspired House


Jo Myhill is back on the PA Blog with a DT spot and she's decorated a wooden plaque in the shape of a house which you can see here. I used the above wooden shape for my make.


I pretty much followed what she did with the technique and colours, but used different minis.


Instead of using UTEE on the heart, I gave it three coats of PA glossy glaze and as I'd used adirondack wild plum to stamp the flourish it reacted with the glaze.


Here is a close up of the heart and flourish image.

I'm also entering into this weeks PanPastelUk challenge which is to use a base other than card or paper.

**Edited**
Just for the record, no pink was used in this make!!!!

Friday, 1 November 2013

Industrial Tags


I took a piece of sticky silver foil and covered a tag with it.


I ran the tag through the Big Shot using the clockworks layering stencil and coloured it firstly with evergreen bough distress paint, dried it, then added a bit of black soot paint and again dried it.  I also ran the timber brown stazon ink pad over the top for further definition.


And this is my finished tag using a TH stamp as the main image.


And for this one I made the background in the same way as this tag here, stamped the TH image, cut it out and coloured it with iced spruce distress ink, added crunchy wax paper, wire mesh and linen ribbon.


So here are my pair of industrial tags for the Paper Play forum tag swap.

Saturday, 5 October 2013

Dragons Dream - TIO Recipe Inspired by Jo - PA


Over at PaperArtsy this week the new GD is the lovely Jo, who I met for only the second time last Sunday as she popped into our workshop with Lin, but kept stummm about the PA DT.  Jo made 3 projects and I've pinched some from each, the first being the grunge paste over the heart die cut shape from project #1.


Coloured the tag with mocha mousse fresco, added grunge paste through the roman letters stencil and painted the heart shape in stone. I covered the tag in a mix of renaissance and onyxite treasure gold but forgot to take a photo - duh!!!  This is from project #3.


And then I went my own way with it because I didn't want to add any stamping to the heart because I loved the texture created by the grunge paste, which I painted in brown shed fresco, and applied more TG and added French roast around the edges. 


I stamped the word fragile onto a piece of crunchy wax paper in timber brown stazon.  I painted lots of different coloured layers on the background, chocolate pudding, Irish cream, cinnamon and more mocha mousee until I was happy with the colour and hi-lighted with French roast.  I added some script in timber brown stazon from PA the ESN03 word plate.


I attached the crunchy wax paper with a couple of brads.

Dragons Dream - TIO have a recipe of brown, layers, die cut and a word, and it goes without saying, at least one real stamp so I combined the two.

Friday, 17 May 2013

DD TIO & PA Inspiration


This tag is a bit of a combination of a technique that France showed us over on day #1 of the PA blog using crunchy wax paper and a brayer and the recipe over at Dragons Dream TIO blog of a light bulb, yellow and wire.

I used haystack fresco paints for the background, I used mustard stazon to stamp the TH cog images.  Various yellows (zesty zing, pumpkin soup) were used on the crunchy wax paper, the TH light bulb was stamped in timber brown stazon onto acetate and painted from the back with haystack fresco paint. This was mounted onto 3d foam and attached to the tag.  The wire has been bent into shape and placed over the top of the stamped image.

Sunday, 12 May 2013

Lady of Pearls


Over at Anything but a Card they have the theme of Atc's.  I needed to make some for a swap being hosted on the PaperPlay forum.  

I used a Lynne Perrella Stamp, coloured it with distressed ink markers and a water brush, and hi-lighted areas with my white posca pen.  To finish I added lots (for me) of pearls as the PaperPlay theme is decorate, so I have decorated my lady in pearls!!!

Friday, 15 February 2013

Locked Up


Over at Out of a Hat Creations this week they are asking for birds and/or butterflies.  I don't normally like birds but for some reason I love the row on the TH plate I recently bought.  I also wanted to use the remaining stamp off the blue print industrial stamp plate.

Using the techniques shown by Helen over on this weeks PaperArtsy blog, this time I chose a different technique and scrunched a piece of crunchy waxed kraft paper, unfolded it and painted it with a blend of haystack, Christmas pudding and Irish cream.  I scrunched it up again and rubbed over it with black stazon to hi-lite the creases.  I stamped the image 3 times and painted the acetate layer with nougat.  The corrugated cardboard strip across the bottom is stamped with black stazon and lightly coloured with Irish cream and added 3 metal buttons.  

Monday, 11 February 2013

In a Flash


Over at the PaperArtsy blog Helen is back again and she's been playing with the Crunchy Waxed Kraft Paper.  She's showcased loads of techniques which you can find here.

I decided to use the very first one by painting it with nougat and irish cream fresco paints and I scrunched it up.  I then used another of the techniques by rubbing the surface with walnut distress ink and inking it off on another piece of card.

I'd also received my new (to me) T!m stamp plates so I had a play with those too. I stamped the light bulb 3 times, the last time onto acetate and painted the back with nougat fresco paint.  The heart is die cut from the metal card and stamped in black stazon with PA mini #44 script, as is the crown.  The bottom piece of crunchy waxed kraft paper is scrunched up and coloured with onyxite treasure gold.

Thursday, 17 January 2013

Sand Paper meets Artbars


Over at the PaperArtsy blog the guest designer has been sharing more techniques, this time using sand paper and pastels.  You can find the full instructions here.  I used Artbars as I don't have the portfolio pastels. I used green(A18), turquoise (A15) and cyan (A13).


This is a close up after having used the sand paper, but I only had 1 grade which was fine, probably could of done with a bit more ruffage!!!  Don't even know if you can see it very well.


I used the stencil bump technique on the background, stamped some script from the PA Ink and the dog background #2 plate and used the main images off the LP collection 005 plate.  The crunchy waxed kraft paper has been coated in treasure gold, aquamarine, sapphire, olive bronze and a bit of onyxite thrown in too and attached with T!m's tiny attacher.  Fibres added to finish.

Thursday, 27 December 2012

Behind Closed Doors


Over at Dragons Dream TIO they have the theme of 'behind closed doors' and the recipe is, a key, a lock and a door.  I used my Stamptoqie door, which has a ready made lock on it, my new on the edge fence die and some crunchy waxed kraft paper.  The background for the tag and fence are pieces from the gelli plate class.  The keys are a Hero Arts cling stamp, stamped in timber brown stazon.


And behind the door we have the Stampotique boys.  The background for them was scribbled with various shades of green distress ink markers. 

Monday, 17 December 2012

Bumping on Bumping


I used the Leandra bump technique for this tag, but I did dark on light and I should of done it the other way round to give myself a lighter background to stamp on.


So Leandra suggested that I did a double bump, ie do it again.  This time I used South Pacific first and went over the top with Nougat which really lightened it up.


And I finished it off with PaperArtsy script and an LP image stamped onto a mini tag in black stazon, mounted onto a piece of black tissue paper.  I lightly coloured the tag with aged mahogany distress ink.  Finished with fibres at the top and a piece of crunchy waxed crackle paper at the bottom.

Sunday, 16 December 2012

A Dreamy Tag


I mixed puff paint with texture paste and fed the mixture through a stencil and heated it so it puffed.


I painted the tag with claret, autumn fire, london bus and smoked paprika and accented it with renaissance treasure gold. I stamped a script with black stazon.  I used one of the Darkroom Door stamps I picked up for a bargain at the weekend.  Although I was slightly stunned at how they arrive, ie for the amount of money they usually are I thought they would come cut and mounted, but they don't, they come unmounted in a slab!! I wasn't impressed!!

Unfortunately the treasure gold doesn't show up very well in the photo, I don't know why as there is loads on there!!!

Saturday, 15 December 2012

Christmas Tag


More bumping!!!  See here if you want to know more!!!


The Dragons Dream TIO theme this week is Christmas.  I crackled one of T!m's lamp posts with nougat and chocolate pudding.  I went over it with renaissance treasure gold.  I stamped the Merry Christmas in black stazon and again rubbed over the whole tag in the treasure gold which unfortunately you can't really see on the photo.

Monday, 26 November 2012

Music Tag


Over at Out of a Hat Creations this week they are asking for 'music'. Was a bit stumped with this one as I don't have much in the way of musical things, but the lovely Helen sent me some of T!m's tissue wrap (melange) in the post and it just happened to be of the music variety.  So I cut a piece big enough to wrinkle over a tag. I gave it a coat of brushed corduroy distress ink.  I stamped the Hampton Arts image in black Stazon and cut it with a spellbinder nesties die.  Added a piece of card which had been run through the rough diamond Cuttlebug embossing folder, stapled on a piece of crumpled crunchy wax paper and covered the mini staples with T!m's music tissue tape.  Everything was edged with onyxite treasure gold from Paperartsy.

Monday, 19 November 2012

Dare to Dream


Left side embossed background is fresco paint and right side background is Dylusion sprays, both have been swiped with treasure gold.  The main image is from PaperArtsy, the eye has been coloured with a green distress ink marker, more treasure gold added and the crunchy wax paper has been stapled to the right hand side.

Sunday, 18 November 2012

Dream On


This tag has been crackled and ripped off half way.  The PaperArtsy image was stamped in black stazon onto a piece of manilla coated card and stapled onto the tag with T!m's tiny attacher. 

The bottom piece has been put through a script embossing folder and coloured with treasure gold.  Crunchy wax paper added along with tissue tape.  

Ribbon cut into 5 pieces and a letter stamped onto each piece and attached with a brad which has been hammered!! Embellished and fibres added to finish.


Blog Archive