Showing posts with label Sand. Show all posts

Tuesday, 1 June 2021

Up-cycled Tags


Our hoover gave up the ghost at the weekend so Martin went to Currys for another one.  I cut the packaging up and kept the three pieces above.


Coated them in black powertex.


Next I mixed some powertex sand into some soft gel medium and spread it onto the tags.


Once dry, I painted over them with powertex and then used metallic waxes to colour the edges and bring out the texture.


I cut up some squares from an old scarf.


Took them out in the garden and sprayed them with bisters.


Next I cut some squares from this ice-cream box.


I machine sewed the pieces of scarf to the cardboard for stability.


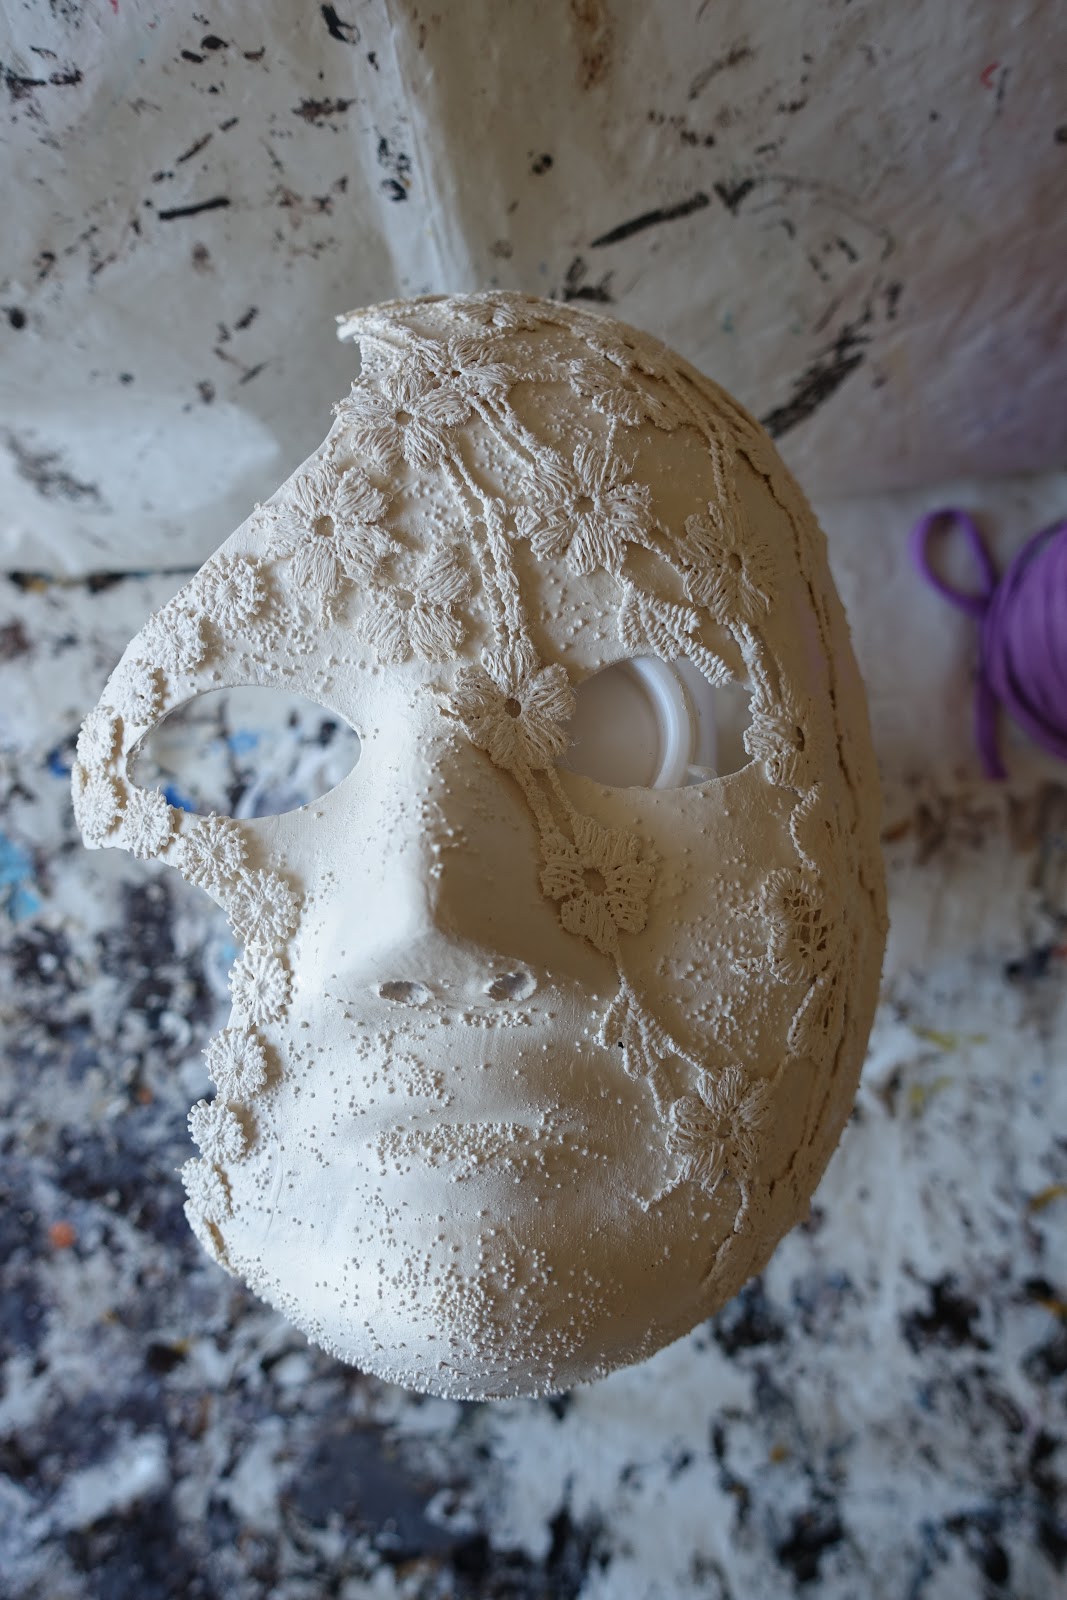
I powertexed some resin pieces.


Steampunk balloon tag.


Gothic style tag.


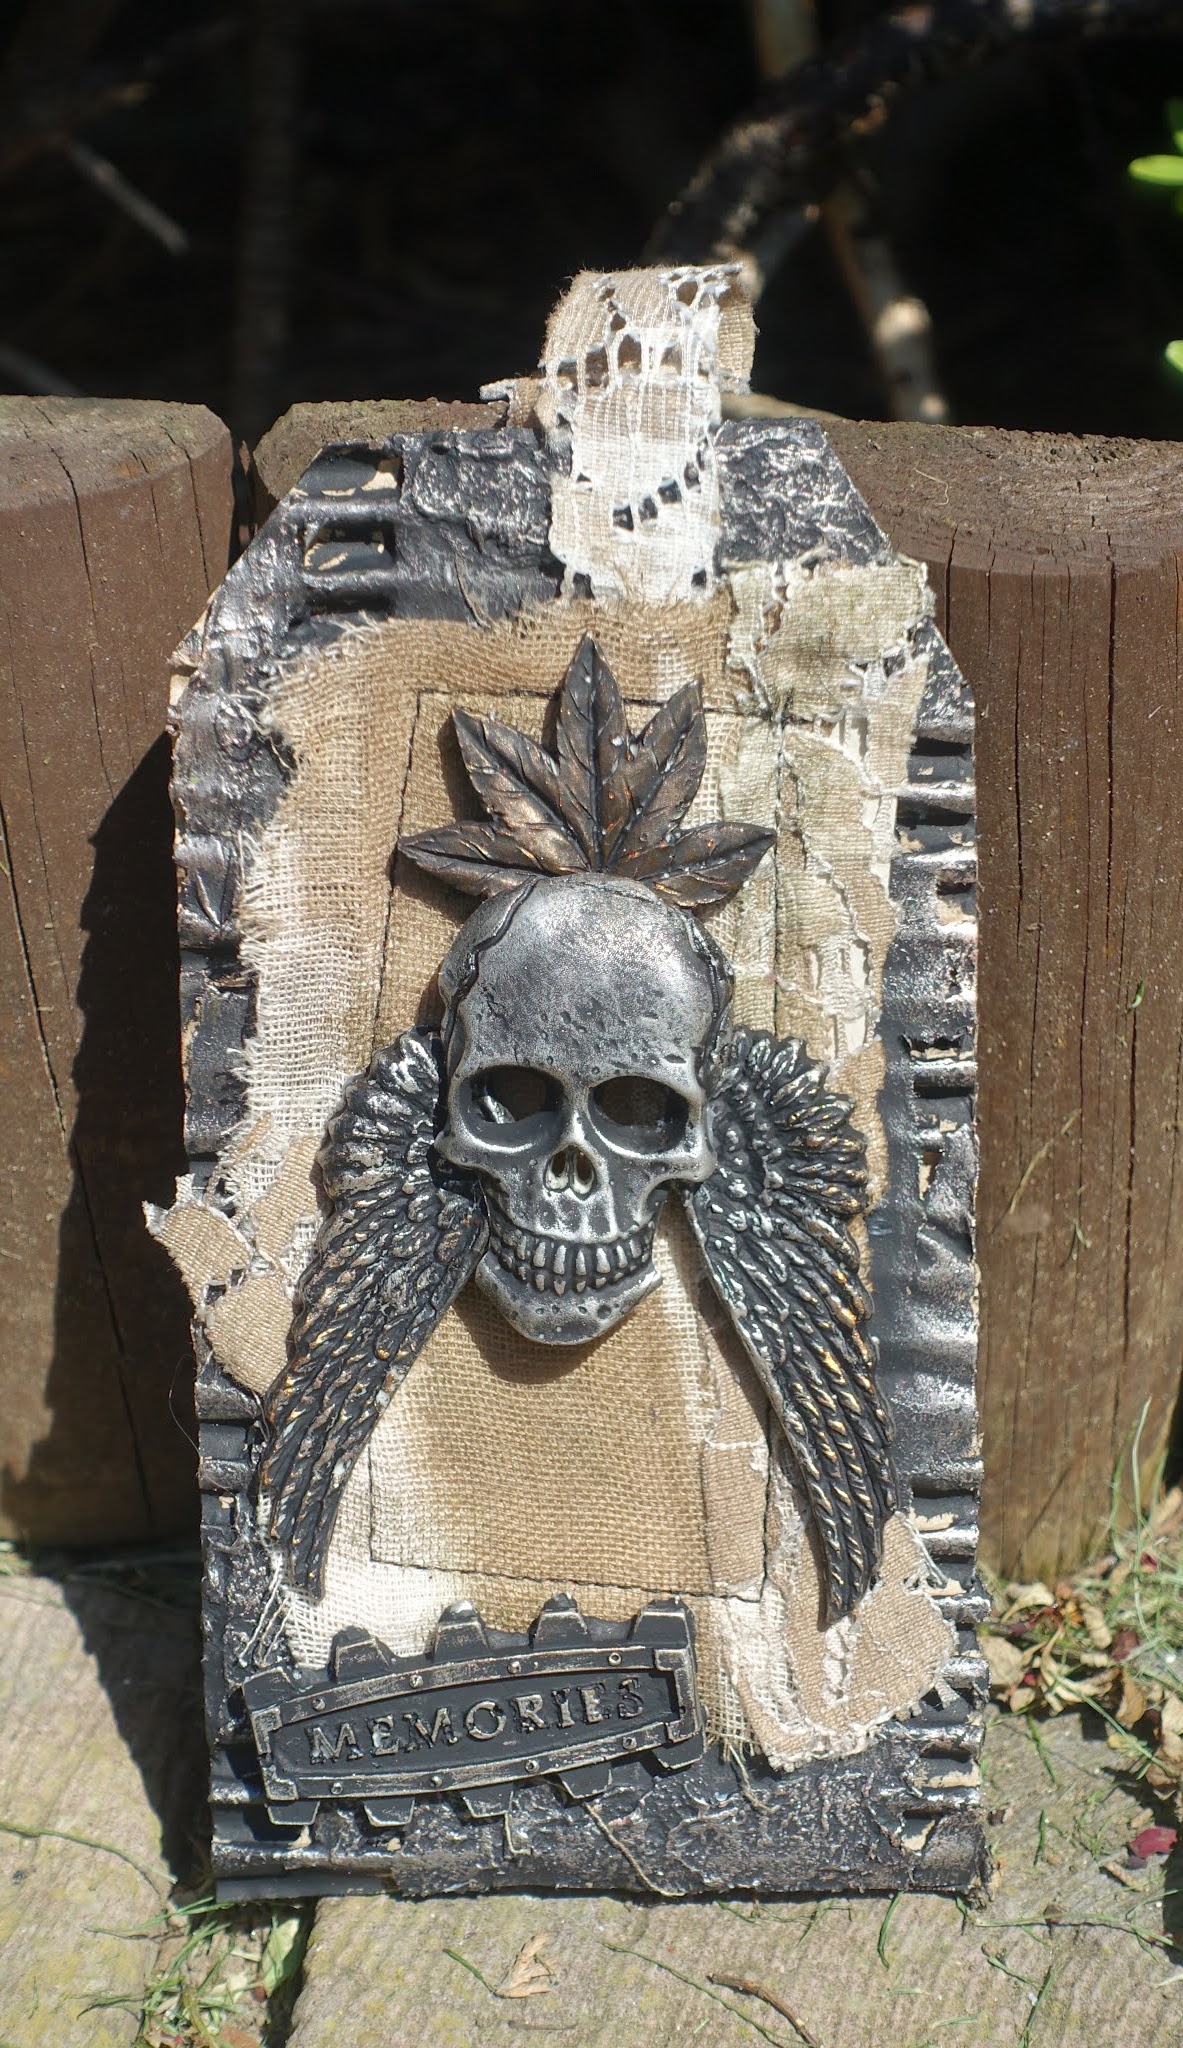
Skull and wings tag.

Tags created from up-cycled materials for the challenge.

#rusteffects #powertex #upcyclingchallenge

Saturday, 6 March 2021

Combi Camping - On the Road - Brighton Beach Huts


All aboard, off we go on the start of our virtual trip around WA.  We are heading to Brighton Beach to check out those beach huts.


So I cut the shapes with the TH tiny houses die.  I cut them out of corrugated to get the ridges.  Then gave them a coat of white powertex.


Used acrylic paints in various bright colours to decorate them.


Whilst they were drying off I created some texture with kitchen roll on a plank of wood.  This time I used the yellow powertex.


Once dry I added some small and then medium sand balls.


And once everything was dry I used pigments and varnish to colour it and bring out the textures.


I mounted the houses on the sand strip.


And added a house number.

Tuesday, 23 February 2021

Spooky House inspired by Finnibair

I came across a youtube video by Finnibair which I really liked, so I thought I'd give it a go with my own variations of course!


I used a Finnibair stencil with texture paste and sand and also some crackle paste in areas.


Once dry, I painted it with black powertex.


Next I pulled out some die cuts, metal pieces and some clay pieces to decorate with.


Next I laid out a bit of a plan.


This is a T!m die of the spooky house which I added crackle paste to.


Painted the spooky house in black powertex and re-arranged the elements.


I used the powertex to 'glue' down the pieces and then covered everything again.


Then I used metallic paints, pigments and interference paints / pigments to colour everything.


And here it is in the sun.

Friday, 23 October 2020

The Thinking Man


I made an armature, bulked it out with tinfoil and then covered the foil with masking tape.


I mixed up some 3d flex, white powertex and some power sand.  I obviously didn't put enough sand in though as it cracked and I didn't really want it to, but never mind.


I painted a block of wood in white powertex too.


I stuck the hands together and his right elbow is also stuck to his knee.

Saturday, 27 October 2018

Mask-erade


I picked up a mask from The Works reduced to £1 from £2.99.


To make it a bit more interesting, I cut some of the left side away.


Next I played around placing pieces of lace.


I also wanted to create some texture on the mask.


I added some sand to ivory Powertex and painted the mask. I then sprinkled on some of the tiny balls. I did it over a tray to catch the ones that rolled off and put them back in the tub.


Next I covered the pieces of lace in ivory Powertex and stuck them on the mask.


Close up of the sand and balls once it had dried.


And the lace.


It's now totally hardened and ready for the next step.


Next step wasn't the next step, as I decided I now wanted it green and not ivory, so I used my green Powertex and painted over it.


As the green really seemed to soak in, I gave it another coat or two.


Once totally dry, I dry brushed with gold pigment.

Not a bad transformation for a pound.

***Edited - it stopped raining!!***


Sunday, 12 August 2018

Sandball Skull


After being introduced to the 'mucky mess' technique at the Garden Party and forgetting to pick some ingredients up at Pramoda Gifts, I ordered some!


I did this in stages as I didn't want to mix too much up in one go, especially in this heat.


I literally just used a pallet knife to 'spread' it over the polystyrene skull. I did 'paint' the area with black Powertex to help it to stick easier.


I cut a recess out the back and added in a skull.


Once the whole of the skull was covered, I left it outside to dry.


Then again, with no particular plan, I just started to gently add some colour. This took quite a while as I didn't want to put too much on too soon, or to get my brush too loaded and end up with an area that had a clump of colour.


From the side, I still wanted quite a bit of the black to show through.


I added some clear beads for eyes to the skull in the back of the head and mixed up some white pigment to hi-light the features.


Close up of the eyes, the left one as you look at it is a huge brad and the right one is a metal cog. I stuck them both in with transparent Powertex.


I hi-lighted some of the teeth with bronze gold pigment.

Blog Archive