Showing posts with label Images. Show all posts

Monday, 1 June 2020

Oriental Embellishments


I've been trying to find some oriental embellishments but not had much luck, so I decided to make some myself using my stamps and embossing powders.


Used punches to shape them.


Found some images and printed them off on cream card, vellum and white paper.


And the same again but this time using script images, red card and red text on the vellum.

Wednesday, 27 May 2020

Embellishments & Clusters


I decided to triple emboss some of the embellishments I made a couple of days ago.

Tuesday, 19 May 2020

Pocket Text Pages Oriental Book


My WIP is finished for now, but can easily be added to at a later date if needed.


No real changes to the inside pages.


Apart from the addition of another charm.


And holes punched in the pages.


And red ribbon added through the holes.


To act as a binding.


Another image added to this page.


And the back page where you can just see the ribbons are tied.


Each of the pages has a top pocket with a tag in.


A view from the top.


And to show it stands up and reveal the tied ribbon at the front which can be expanded if I decide to add more pages at a later date.

I haven't shown the tags as you've already seen them all before.

Monday, 18 May 2020

A WIP - oriental text book pages


Machine stitched two sheets of text book paper together.


Machine stitched two of the sets of paper together to form a pouch.


Painted the pages in various shades of blue.


Edged each set of pages in gold.


Added random stamping to each page using black stazon.


Decorated the pages with anything Oriental, Asian, Japanese and Indian related.


Added charms and german scrap.


Back page (I think anyway).

Will be back when I've done a bit more.

Sunday, 2 July 2017

Atc's with Bling!!!


I covered a piece of card with sticky silver foil, cut it into ATC sized pieces and embossed each one with a different folder.


Swiped them with versa mark and added embossing powders. Heated them again and added some schizel otherwise known as foil!


Then I made a huge mistake!!! Instead of swiping a permanent ink over the top, ie archival or stazon, for reasons unknown to me, I used versa fine ink, which just would not dry!!


I couldn't use the heat tool to dry the ink as it would remelt the powders! So I sprayed them with matte varish and then swished over them again with black stazon ink! I finally chose some images and words, but didn't want to cover up too much of the backgrounds.

Monday, 24 April 2017

Indian Tag Book Part 2


The next thing to do was to put a backing on the tags using another piece of farbric.


And the same on the small tags.


Next was to sandwich the tag between the fabrics with the sewing machine - easier said than done, as you can see I went wonky and too wide down the right, but hey ho!


Having sewn around all the little ones first, I did get a bit better by the time I got to the big ones!


The next step was to add the couching to the edges. I have done this before, but looking back it was about 7 years ago!! 


Once they were done I cut them out. I'm sure I could have got closer to the couching but I left a bit of a gap as I didn't want to cut into it by mistake and have it fall off!! 


As you can see, I left some of the fabric pieces hanging over.


And here they are with their images on all blinged up (well not too much!).


And here are the little tags to go with them.


And finally all of them together.

I haven't quite decided how I am going to display them yet.

Sunday, 23 April 2017

Indian Tag Book


Today I was lucky enough to go to a workshop not far from me near Lincoln at a place called Needle and Thread.


It's an absolutely fabulous venue with perfect views.


And fortunately for us, it was a gorgeous day.


More green fields, trees and a lovely blue sky.


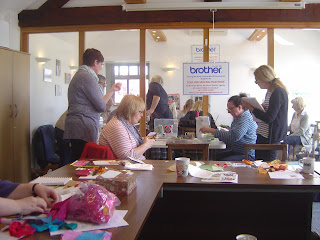
This is where the workshops are held, there are two rooms.


The workshop was taken by Angie Hughes, a textiles artist who is absolutely lovely and so down to earth as well as being a fantastic teacher.


So this is sort of what we were aiming for by the end of the session.


This is Angie giving us some instruction before we start.


And getting enthusiastic about it all!!


So off we went to choose some fabric for the front of our tags.


Next some instruction on how to use the sewing maching and a quick demo.


And Emma having a close up look!


Collecting bits of fabric, some stamping, images, sari ribbon and foil to start to build up the tags.


Layering the bits and bobs to build up the tags.


As you can see, there was plenty of stuff to choose from and play with.

11am was coffee / tea and cake time. Top one is strawberry and the bottom one is tahini and dark chocolate.


The lovely lady on the right stood up is Jan. She kept us supplied with teas and coffees all day.


And this is Angie sat in my chair next to Emma, sewing some metalic thread around a circle for me on one of my tags!


And this is Sally, the lady who organises it all. Behind her there is an embroidery class going on.

I will be back at some point to show you my finished tags, once I've finished them!!!

Blog Archive