Showing posts with label Feathers. Show all posts

Wednesday, 24 October 2018

All Dressed Up


I picked up these candlesticks from the car boot, £1.50 for them all.


I gave them a coat of silver paint and then dry brushed with black.


I picked up the smaller skull and pumpkin from Hobby Craft and the middle skull is from a pack of four from Morrisons. The jaw moves on that one! Using Powertex and Stoneart I made them look like stone.


Next I made a couple of hats using cardboard and t-shirt fabric.


Adding scrim, fibres, charms and wooden embellishments.


And finally I added a feather. He is sat on both of the smaller candlesticks.


For the pumpkin I simply added a hat that I already had. 


For this hat I covered the piece of lace with transparent Powertex and added it to the rim once the black had dried.


And here they are all lined up together. 

It's such good fun and the possibilities are endless.

Thursday, 5 May 2016

Another Couple of Cards


It's my mums birthday on the same day as my BIL's, so I went with the same card template. I know it's not my normal thing, but she loves flowers! 


The background on this panel is a ghost print from a gelli plate print using a Prima stencil.


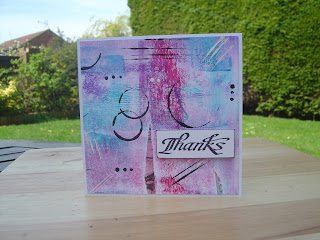
And I needed a quick and easy thank you card for my sister. Again I used part of a gelli print and used paint to add the marks.

Entering them into the PaperArtsy challenge again for this week.

Friday, 12 October 2012

Artful Times - Challenge 15


This weeks theme over at Artful Times is Fur or Feathers.  I decided to give Moth Fab a feathered outfit.  The skirt is a blue feather and the top is a green and black spotted feather.

Hop across to the challenge blog to see what Neet and Von made.  Don't forget if you want to join in, as long as you follow the guidelines you are in with a chance of winning a £10 voucher from our lovely sponsors, Oyster Stamps.

Thursday, 24 February 2011

JFF - Week 4 - Angel Wings


Well as you know I'm still away on holiday so this weeks Just for Fun piece was scheduled before I left.  Again the backing is corrugated, painted in snowcap white and pearl acrylic dabbers.  Stamped over with black stazon and the Crafty Individuals angels word stamp - CI140.  The image is stamped onto a white piece of card and 3 feathers were stamped onto white paper and cut out.  A small piece of corrugate was painted in pearl acrylic and if I had wings from Paperartsy Wings Plate 2 was stamped onto it.  The wings were made by gluing lots of feathers to a sheet of card, printing the wings out on acetate, sticking them on top of the feathers and cutting them out.  Everything was attached to the corrugated background with silicone glue.

Friday, 10 September 2010

Alphabet Page 'S'


I've ended up with 2 pages for the letter 's'!!!  The snowflakes are stamped and heat embossed with white opaque embossing powder.  The background is a mixture of faded jeans and broken china distress inks and denim adirondack ink.  The 3d snowflakes were cut on the cricut and covered with silver and turquoise stickles.  The letters were cut from the hippy chick alphabet plate.


The background is spiced marmalade distress ink with water spritzed on whilst still wet and blotted off with kitchen paper.  The outside edge stamp is from a green pepper plate, as are the skull and hat.  They were stamped onto white card and cut out.  The hat was stamped again, the ribbon, feather and safety pin added to it and it was layered onto of the first using silicone to give it some depth.  Large clear gems were used for the eyes.  A web and a few spiders were stamped from the Lavinia range in black soot distress ink, as was the letter 's'.  I distressed the outside edges with a paper distresser and inked with black soot. So I guess this 's' can be for spooky, skull and spiders.

Susan, thanks for your comment, I've now linked the 2nd page up to the Haunted Design House Challenge which this week is Elegantly Evil.  No sure it's elegant, but there you go!!!!

Saturday, 24 July 2010

Postcards with Stitches


I stitched this piece of hand dyed vilene which I'd previously burnt into with my textile tool and a brass stencil.  I used straight stitch first and went over it with a tight zig zag.  I left the threads long in the bottom right hand corner so that I could add some beads and sequins.  Thanks once again to Jo for this fab tip, hope I've done it ok Jo!!!!!


Again this piece of canvas is another that I'd already prepared.  I stitched it on with straight stitch going round it twice.  I added the piece of fibre down the side using a large zig zag stitch.  I was quite pleased with how this bit turned out as I've not done it before and didn't know if it would work or not. I usually stick them on first.  Again I left the bottom piece quite long to attach some wooden beads.

*****Edited***** I've entered this piece into this weeks Tuesday Taggers Challenge which is Canvas.  It is being sponsored by Art from the Heart.  Good luck everyone.


This piece is made from Angelina fibres with feathers, a skeleton leaf and wool fibres trapped between two layers.  I secured it around the edges using straight then tight zig zag stitch and randomly used a straight stitch to secure it further.  I used metaillic thread for the first time too.

All the backgrounds were brayered with ink from the big n juicy waterfall pad by Ranger.

Monday, 19 July 2010

Caught In Crystal


Whilst I was playing on Saturday I prepared a sheet of caught in crystal.  I used spiced marmalade, dusty concord and mustard seed distresses inks for the colours and red and green glitter as I couldn't find any silver!!!

Friday, 11 June 2010

From Scratch - WIP


Using a piece of fabric stabiliser I created this background with fibres, ribbons and strips of fabric.  I then added skeleton leaves and feathers.


I fused some white Angelina fibres, laid them on top and fused them to the background.

And that's as far as I've got!!!!

Saturday, 10 October 2009

Board Book Swap

Hilda over on Lotstodo is hosting a board book swap and as I didn't have one, she kindly sent me one. The theme was open although a few topics were suggested. This is what I've done with it.

Front Cover

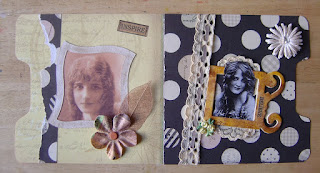
Inside pages

More inside pages

On this page I used one of the pre-cut shapes in the book

Last double set

Back cover

This is the book made up

Front and back made up
Can you guess what theme I chose? I tried really, really hard not to make it grungy!!!!

Blog Archive