Showing posts with label Golden Soft Gel. Show all posts

Tuesday, 1 June 2021

Up-cycled Tags


Our hoover gave up the ghost at the weekend so Martin went to Currys for another one.  I cut the packaging up and kept the three pieces above.


Coated them in black powertex.


Next I mixed some powertex sand into some soft gel medium and spread it onto the tags.


Once dry, I painted over them with powertex and then used metallic waxes to colour the edges and bring out the texture.


I cut up some squares from an old scarf.


Took them out in the garden and sprayed them with bisters.


Next I cut some squares from this ice-cream box.


I machine sewed the pieces of scarf to the cardboard for stability.


I powertexed some resin pieces.


Steampunk balloon tag.


Gothic style tag.


Skull and wings tag.

Tags created from up-cycled materials for the challenge.

#rusteffects #powertex #upcyclingchallenge

Thursday, 22 September 2016

Rainbow Goblin House Experiment


I made another house, this time from a jam jar.


I used up the remainder of my black Powertex so had to add some green to it.


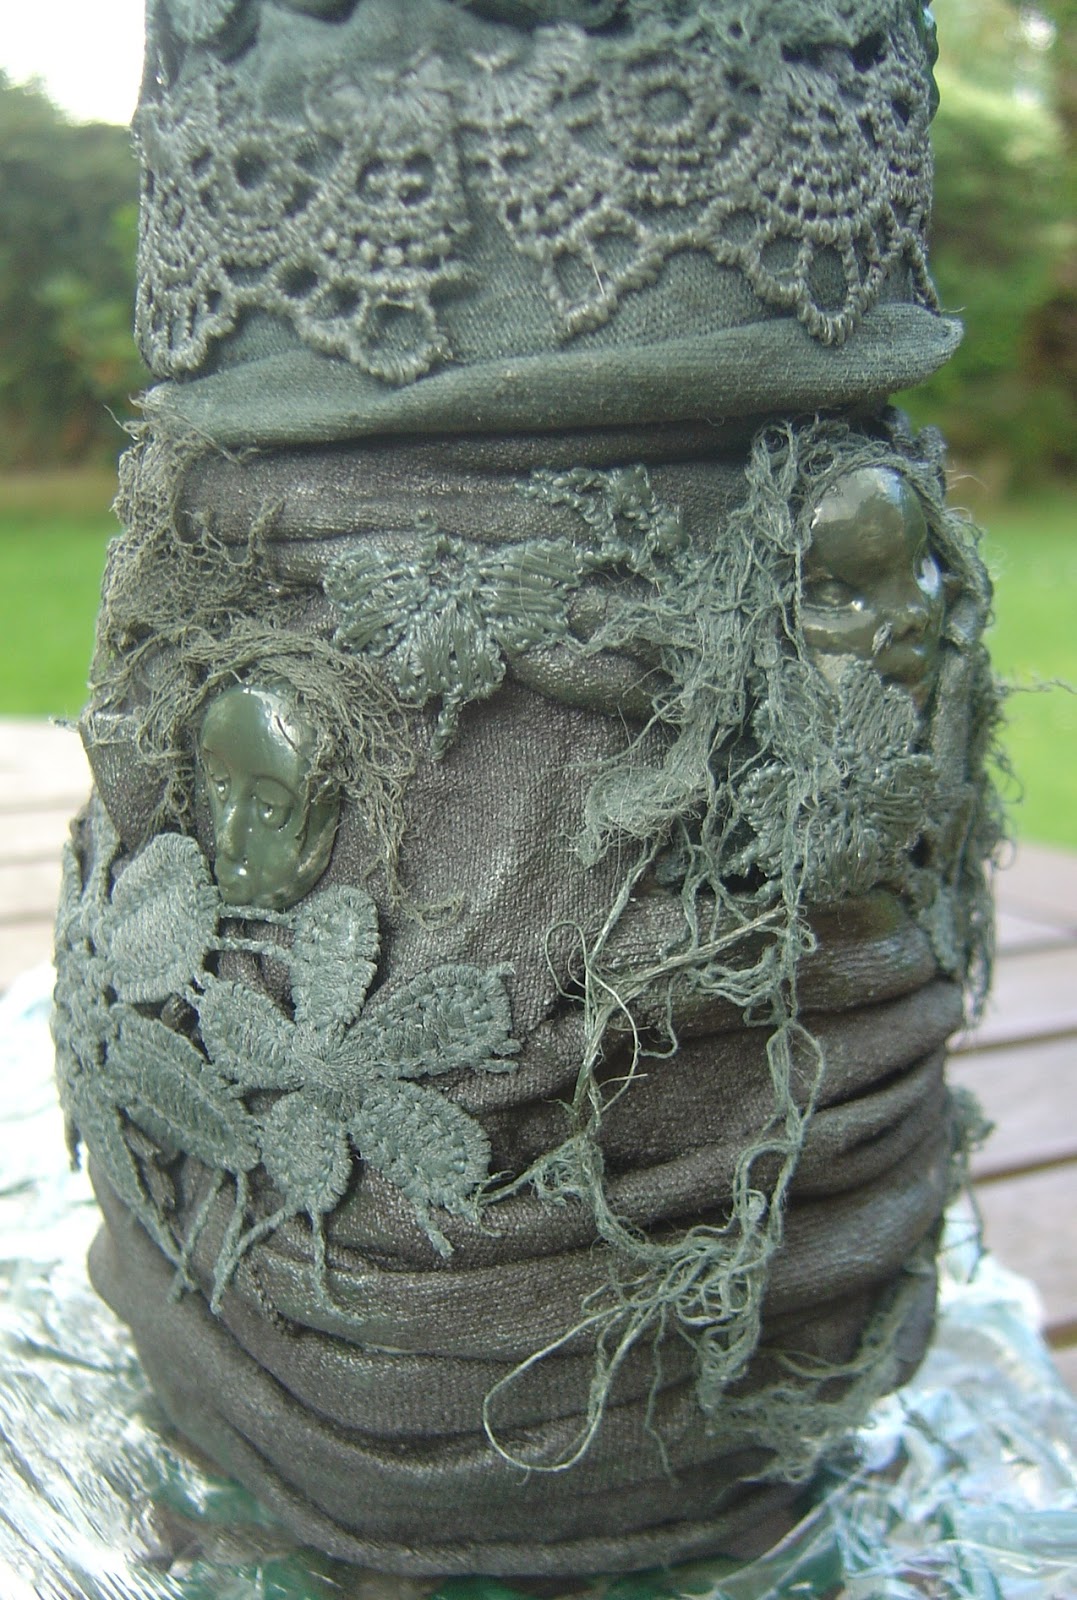
I added some air dry clay and fimo clay faces.


Some lace and cotton scrim.


Flowers and powertex cotton threads.


T-shirt fabric used to cover the base of the jar.


Close up of the base of the jar.


And the same for the lid.


Now for the experiment. I want to put this piece outside for a few months to see what varnishes are totally weather proof. The soft and reg gel are by Golden and the soft touch, satin, gloss, ultra matte and matte med are by DecoArt, the rest you can see. I paired them up with either a primary element or a perfect pearl pigment.


So here we go, I've placed the lid on with the head towards where I started the cycle. I started with Golden soft gel with wild plum primary elements, the second was Golden matte medium with autumn skies primary elements.


Then I moved onto the Golden regular gel and deep coral primary elements. followed by Americana Decoupage matte with ginger peach primary elements.


Followed by Americana Decoupage matte with ginger peach primary elements.


The next one didn't work too well and when mixed became watery and frothy - Mod Podge Dimensional Magic mixed with kiwi perfect pearls. It didn't cover over the face either.


The next combination is DecoArt media soft touch varnish and royal orchid primary elements, followed by DecoArt media matte medium and yellow ochre Powertex pigment.


DecoArt media ultra matte varnish and true blue primary elements.


And the final strip, DecoArt media gloss varnish with spiced pumpkin primary elements.


And I completed the set by using the remaining two varnishes for the roof. On the left side we have Americana Triple Thick Gloss Glaze with green patina perfect pearls and on the right DecoArt Media Satin varnish with moss agate primary elements.


A close up of the base of the pigments over the fabric.


And another close up of the pigments over the flower embellishments.

I now have to wait 3 weeks before it can be placed outside and start the experiment. This is because the Powertex only becomes waterproof after 3 weeks of drying time.

Watch this space!!!

***Edited***


Three weeks have now passed since I blinged up my goblin house and so today I put it outside the garden in the boarder and my intention is to leave it out there for at least 3 months to get really weathered, then bring it back in, inspect it and report on which pigments and varnishes survived and which, if any, didn't!!

Thursday, 28 April 2016

Know in your Heart


Used soft gel medium to adhere bits and bobs to a square canvas. Black and white gesso used to cover the background including splats. Metal embellishments added to finish.


Wooden heart painted in white crackle paste, coloured with red chalky paint and wiped back the black antiquing cream.


Close up of some of the textures.

All products are from the DecoArt range.

Tuesday, 26 April 2016

Inspired by Jean


I usually try and drop in on Jeans streams if I'm not out at netball on a Monday, but for whatever reason, last night it wouldn't load up and let me in. But when I saw her journal pages on FB today I just had to go and watch the recordings which you can find here and here to find out what she did.


So basically I painted the journal page in rainbow stripes using Decoart chalky paints, added the image from a magazine, whilst waiting for it to dry, painted the page with chalky black, then used a baby wipe through a couple of stencils to wipe back and reveal the colours underneath. Once dry I outlined some of the images with a white sharpie to define them and make them pop.

All paints are from the DecoArt range.

By using a gel medium, this kind of makes the image transparent and you can see the colours of paint through it.

Wednesday, 22 October 2014

Brusho and Gel Medium


After watching Tracey demo the Brushos at the show and explain to us what the thickener was for I decided to see if it would work with Golden gels. Top one is soft gel mixed with orange and it was a bit thin and sloppy, but it still gave good results when dry.


This one is Golden regular gel medium mixed with turquoise brusho and scraped through a stencil. This was much firmer that the above and has dried with more depth, ie the surface is much more raised than the top one.

Friday, 14 March 2014

Abstract Collage


I loved what Ellen Vargo did on a recent blog post with dimensional paint which you can see here, so I decided to give it a go after picking up some Tulip paint from Hobby Lobby. So I started off creating a background by brayering some paints.


And adding some stamped images in black stazon ink and white acrylic paint using Ellens PA stamps.


Scribbled with the tulip paints in both black and white. I only had the matte soft gel so had to use that and it doesn't dry as transparent as the gloss alternative.


I added some more details with a black sharpie, black and white posca pens, but forgot to take a photo before I cut them all up and added the pieces of scribbled dimensional paint.


Close up of the scribbled piece adhered to the background.


And I did exactly the same for this one but used the white dimensional paint scribbles.


Close up of the white scribbles on the background.

Thanks Ellen, this was great fun to do.


Saturday, 25 August 2012

Art Journey & a Photo


Art Journey's theme this month is 'use a photo'.  I've had loads of fun with this one.  I printed out a photo from our ski holiday (2011, as I missed this year!!), just onto normal photocopier paper.  I covered a large piece of chipboard in the shape of a jigsaw piece with white gesso.  I then gave it a coat of acrylic dabber paint in sandal.  I outlined it with cloudy blue acrylic paint. I gave it a blast with the heat gun to make sure it was totally dry.  I then painted on a very generous coat of Golden soft (matte) gel.  You have to be quick as it dries really fast.  I put the printed copy face down into the gel and used an old credit card to really smooth it over.  After a few seconds I peeled the paper off and voila, the image had transferred.  It's not perfect, but I was very happy with the result.  I then gave it another coat of the gel.  Once dried, which wasn't long, I added a bit more acrylic paint with my fingers to the sky.  I stamped on the AJ words, Precious Moments and swiped them over with a bit more paint.  I stamped the AJ characters onto a separate piece of card which I'd painted with juniper acrylic paint, cut them out and mounted them onto the jigsaw piece.  Finally I added some fibres.

**Apologies for the quality of the photo but it's been raining, thundering and hailing for most of the day, so not good light at all for taking photos!! 


Today the sun was out and this photo is a much truer representation of the colours.

Blog Archive