Showing posts with label bag. Show all posts

Friday, 27 July 2018

Canvas Play Day


Today I took a trip over to Pramoda Gifts to take a workshop with Marina. When I say a workshop, I mean a play day. Kath also joined us too.


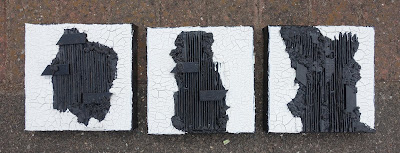
As I arrived late due to traffic, roadworks and accidents Marina had already started to prep my cardboard for me. We painted the canvas's in black powertex, placed the cardboard and added some of the wooden pegs from the back of the canvas.


Marina showing us how to mix up the balls and sand in the remaining Powertex. We did it in very small batches because it was between 33.5 and 35 degrees with the fan on and back door open!


So here are mine with the 'mucky mix' added. Told to us by Tracey at the garden party.


I put mine outside in the sun to dry whilst Kath and Marina wafted theirs with the hairdryer, but I was too hot so had a look around the fab studio at the lovely works of art.


A fabulously decorated skull and luckily they had some blanks to buy.


And this beautiful canvas. The colours are so subtle but it looks fab. It's like in a shadow box with a glass front, hence the reflection. 


Then I popped back outside to see how my cracks were doing.


Close up of the cracks on one of the canvases.


The left canvas was coloured with pigments and wax. The middle one was coloured with acrylic paints and inks. Some of the inks are metallic, a gold and an aqua. The right canvas has been base coloured with the orange paint, and the egg yolk and tangerine ink. I then added orange and burgundy pigments mixed with the Powerwax. I basically just kept going until I was happy with what I had. I still need to work on them as it was sooooo warm that the Powerwax had melted and it kept moving around. Marina put it in the fridge in the end!!


And after driving back in a storm with thunder, lightning, torrential rain, nearly dark at 6pm, hurricane type winds which left parts of trees and branches and loads and loads of leaves all over the roads, no to mention huge puddle, I finally arrived home about 7.40pm. It didn't let up from when I set off until well after midnight. So here are my purchases. I was running out of bronze Powertex after playing with it in the week, having seen the skull in the studio and also seeing a couple last weekend at the garden party, I picked up the last three that Marina had left. She had planned a workshop for them, but instead, very kindly let me have them. Then I spied the paper mache one too. I also picked up the gold metallic ink as it leaves a great shimmer over lots of the other colours. I picked up a piece of oasis too as I've been making figures and though it would be suitable to sit them on, so watch this space for that one!! And I've been after a little bag for ages, just big enough to fit my purse, camera and car keys in. This one was perfect and I got to try it out first! I picked up a tub of Powerwax last weekend at the garden party.


And because my mum and dad come over for the day and look after Fraz for me, I usually try and pick mum something up as they always have something unusual. I really wanted something duck related, but all the ducks had been sold and they weren't getting any more, so I had to make another choice and decided on the bee. I hope she likes it. I was hoping she might put it in one of the huge outdoor planters that I Powertexed for her birthday last year.


I took a photo of them when I got home and also the practise piece in the top corner, but I actually like them as a foursome, so might just keep them like this. I still need to wait for the wax to dry properly so I can buff it up or take some off or whatever I decide to do over the next few days, but need to look at them in daylight.

Saturday, 28 April 2018

Wet Felted Bag Workshop


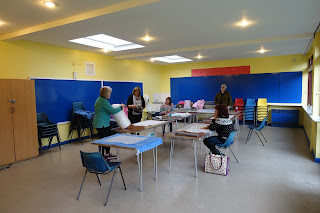
So today found us in a different location for our wet felted bag workshop with Dawn of Dawn Allen Fibre Artist. Lin and Chris had just arrived and were getting settled in with a cuppa.


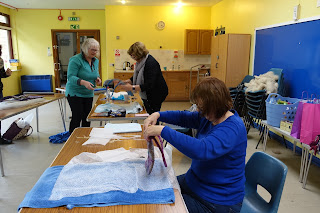
Dawn explaining to the group what a resist is, how to use it and the types of material you can use for one.


In the morning we made a smaller tester piece to get a feel for the wool and the shrinkage values. First thing to do was decide what we were going to make and what size of a resist we would need.


Once we'd decided, we started to add the wool. For the first layer we used a Bergschaf batt, which I thought was gorgeous. You can see it in the photo above. 


This has two layers on each side and I added a random design on the front side using some locks and nepps.


Here you can see the locks on the bottom. I covered them to do the rolling as I did't want them to felt.


Lin decided to add colour to hers. The colours are made up using Merino wool, nepps and masham wool locks.


And Chris laying her design out again using Merino wool, locks and nepps.


Chris's landscape design.


Everyone adding the finishing touches to their designs before the wetting and rolling process begins.


Lin taking a photo of Chris finishing her design as Chris forgot her phone.


And then the rolling begins. This is where you get your exercise!
  

Testing and looking - is it done yet??? Dawn giving Sue a bit of advice.


Lin is happy with with how her piece has come out after, rolling, hot and cold shocking and wringing out.


Chris is still rolling to try and shrink hers down to mobile phone size. We then stopped for some lunch.
 

After our practice this morning we went for it and made a bag in the afternoon using exactly the same process and taking into account what we learnt from this mornings make.


The first thing we did was to make a handle for our bags. Then we covered each side of the resist using the Bergschat and for the second layer we used the Merino, locks and nepps again to create the design of the outside of the bag. 


Then more wetting and rolling to get the wool felted and to the required size.


Chris cutting the resist out of the felted wool.


Dawn showing Linda how to felt the raw edges once the resist has been removed.


Front of Dawn's bag, she added a bright pink flap to hers. I really love how she felted along with us.


This is the back of Dawn's bag.


This is the front of Sue's bag. She's just removed the resist and is felting the raw edges after making a cut.


Moving along the cut edges of the bag to seal them.


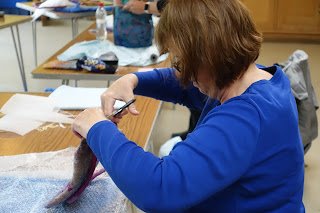
This is mine, I've just cut the resist out and seeing how the flap looks.


These are what Carol made. In the morning she made a phone case and in the afternoon a matching bag. 


Carol decided to add a bit of needle felting to her pieces.

For some reason I don't appear to have a photo of either Lin or Chris's finished bags.


When I got home I found something to stand in my bag whilst it dried so I could mould it to the bag shape that I wanted. Here it is standing on the draining board with an empty biscuit tin inside standing on a cooling tray to help it dry out.


Once they are properly dried tomorrow I will add the clasp and I may add some needle felting to them.

Thanks to all, had a fabulous day and learnt loads.

Tuesday, 24 October 2017

Wet Felted 3d Objects


Chris very kindly bought me this lovely wet felting kit for my birthday. So along with the huge bag of wool tops that Jan also sent and the ones Joyce sent, I thought I'd best put it to use.


I prepped the dining room table in anticipation after watching a couple of inspiring youtube videos on a vessel and a bag. 


First layer completed.


Side one of second layer.


Prepping the second layer of the second side.


With the soap and water solution on it.


I think this was the third layer.


After it had been felted with soap and warm water, rolled and quarter turned it was time to take the middle out, so I cut a hole in what is going to be the top.


Getting the resist out the middle was easier said than done!!


I felted the hole and the inside by turning it inside out and more rolling and turning.


The template started off at 8", so as you can see, it has shrunk quite a bit.


Next I had to shape it. I really wanted to try and create a neck but I think it's probably a little bit small, or I needed to work it a little more, I'm not sure, but I had to settle for what I had! I stuffed t-shirt fabric inside whilst it dried to keep the shape.


And this is it this morning after I'd take then t-shirt fabric out and low and behold, it's not only all stayed together, but it's held its shape too!!! WoooHooo!!
  

Then the sun came out so I took a few more photos.


I think it's come out pretty well for a first try as it's not fluffy or anything and it feels quite sturdy. I'm well pleased.


One thing I do need to remember to take into consideration, is that it shrinks. The blue template is what I used originally to make the shape, but look what size it ended up.


Next I started on the bag, this is my template or resist.


Layer one layered up to completely cover the resist.


This is layer two, a different shade of green.


Third layer has been added and the resist is still inside.


This is the other side of the third layer.


I did the same process as above and this is it this morning after it had completely dried.


And this is my favourite side. I want to make it into a bag, even though it is rather small, but I want to cut it down, put a flap on it and add a huge button.


Again the blue is the size of the resist I used and it's shrunk quite a bit. But you live and learn.


I am really pleased with how my first two 3d wet felted objects turned out. I'm not sure if I'm going to decorate the vessel or leave it as it is, but I am definitely going to make a bag from the other piece.

Blog Archive