Showing posts with label Masks. Show all posts

Tuesday, 11 September 2012

Happy Daze - Steampunkery


This months theme over at the Happy Daze monthly challenge is right up my street - steampunkery!!

I decided to make a small canvas (5" x 7").  Covered the background with Stewart Gill translucent chocolate brown.  Used matte medium to glue down the clock face and the tape measure papers.  I used a Tando cog mask with texture paste to create the depth of the cogs bottom right.  Painted them with a mixture of acrylic metallic dabbers, luminere and Stewart Gill paints.


I added a couple of T!m cogs, a charm which started out gold, so got some distressed treatment and a key!!


Close up of the texture paste cogs using the Tando Creative mask.

Everything was assembled using glossy accents.

Don't forget to be eligible for the £15 voucher to spend in the shop, you have to use at least one product that Moira sells, which isn't difficult!!! 

Wednesday, 13 June 2012

Industrial Chic Tag


Over at Dragons Dream TIO this week, Gabrielle has chosen the theme of Industrial Chic.  There is a recipe of 3 elements, clockwork/cogs, vintage brown and industrial imagery.  I started with a white tag, overlaid the winged dress form mask and coloured the background with raw umber pan pastel.  I then used the Tando Mask cog group at the top and bottom of the tag.  I randomly stamped the cogs and gears in timber brown stazon.  I stamped the diagram image from the TH steampunk plate down the left hand side of the tag in vintage photo distress ink.  I stamped the 3 men in timber brown stazon onto a piece of chipboard, cut them out and attached with 3d foam.  The cogs, watch parts, prestuds, pen nib etc were attached with silicone.  Fibres were added to finish.

Saturday, 13 August 2011

Atc Swaps


This months UKStampers ATC theme swap is 'charm and chain'.  These are mine above.

Wednesday, 15 June 2011

Watch the Birdie


The background was created using my new tando cogs mask.  I coloured the background with antique distress stain and used walnut stain distress ink to ink through the mask.  I coloured the bird with denim acrylic paint and touched it up with sail boat blue.  The words are stamped from a paperartsy hot picks plate.  I added gems to the crown and mounted onto a piece of black card with the navy ribbon sandwiched inbetween.

Saturday, 14 March 2009

Lotstodo Week 11 Challenge - Mask It


This weeks theme on the lotstodo challenge blog was 'Masks'. I created this 8 x 8 canvas by firstly applying a thick coat of gesso and writing, stamping, pressing shapes and making squiggles with an old credit card whilst the gesso was still wet. When dry, I applied spiced marmalade distressed inks over the top and used a piece of damp cut n dry to move the ink around. I also blended in a bit of mustard seed. I then placed my TH flourish mask over the right hand corner and covered with fired brick distressed ink.

I then used acrylic dabbers to paint my wooden letters to spell out the word 'Hope'. I stamped the CI Hope caligraphy stamp over each of them with timber brown stazon. I used blaze red stazon to enhance the imprints made with the gesso and added a small amount of gold rub n buff. I then added a few rub ons, a few flourishes made with my cuttlebug, a button, an arrow and last of all a MASK charm.

Thursday, 25 December 2008

Christmas Gifts

These are some of the christmas gifts I made for my forum friends. Some more wooden atc's and thrinchies

Front

Back

Front

Back

These are some of the christmas gifts I made for my forum friends. Some tags using my TH alphabet masks to personalise them with each persons initial
Front
Back

Wednesday, 17 December 2008

A Few Tags


I created the background for this tag by inking a craft mat using my Nick Bantock inks, spraying water onto the ink and then putting my roller through the mess I'd created on the craft sheet, this was the result!!! I used the colours van dyke, damson plum and vermillion laquer. I used the Tim Holtz Carte Postale stamp with versamark, then added peeled paint distressed embossing powder. I used saddle and timber brown stazon to add the post mark images. I used the vermillion laquer ink pad with the journey stamp. I used diamond glaze on the word journey and added a mini grungeboard arrow which I coloured with timber brown stazon and attached with a brad. I added fibres to finish.


I created this background with the remains of what was left from the top one. I stamped some splodges on the background with Nick Bantock's van dyke ink pad. I used saddle brown stazon to stamp the main image. I added a flower image at the top of the tag and decorated one of the middles with a clear gem stone. I used my PaperArtsy frame stamps to stamp up the coffee stirrer with timber brown squares, attached it to the tag and added 3 further clear gem stones. Added fibres to finish.


I created this background by putting my flourish mask over the tag, sprayed it with walnut crystals and a metal mix to give it a bit of a shine. Removed the mask and swiped the whole of the tag with aged mahogany distressed ink. I then threw drops of water over the tag to create a watermark effect and gave it a blast with the heat tool. Then stamped 4 sets of flowers with walnut stain distressed ink down the right hand side. I then attached my main image which I had created ages ago on a 3 x 3 piece of card. Using stazon saddle brown, I stamped the veritas image and using vermillion laquer I stamped the quote 'nurture your dreams' bottom left. Added fibres to finish.

Sunday, 7 December 2008


Front

Back
This is a tag I was messing around with earlier. I tret myself to a new stamp and a new ink pad from PaperParadise earlier in the week. I fancied trying out one of those new ones by
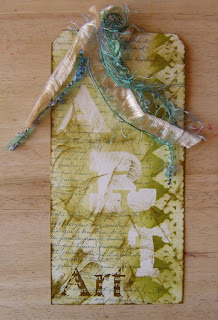
Nick Bantock and I like very much!!! I also used my new TH masks on the front.

Friday, 14 November 2008

A Couple of Tags


Spiced Marigold distressed ink as a base layer, then I put my new TH masks on and added a bit of Shabby Shutters and Frayed Burlap. I stamped the image with versamark ink and used Peeled Paint distressed embossing powder. Once heated I rubbed away the crystals for the distressed effect

Did more or less the same with this tag except I stamped the top and bottom images with Peeled Paint distressed ink and the middle one is embossed as above

Blog Archive