Showing posts with label Jump Rings and Findings. Show all posts

Thursday, 30 April 2020

Accordion Wallet


Watched a couple of youtube videos and decided to have a go myself. 


The back cover.


The inside flap strengthened with the duct tape and to cover the back of the brad.


The accordion part using the recycled envelopes.


The bottoms of the envelopes again lined with duct tape for added strength.

Monday, 15 July 2013

Shrink Plastic Bracelet


Over on the PA blog this week Carol is back again charming us with her fab idea of a shrink plastic bracelet which you can see here.

I die cut, sanded and painted as per Carols brief.  I used the largest and middle sizes of the Sizzix Primitive Hearts Die, together with the whole heart from T!m's Heart Wings die with guacamole fresco paint as it's a light but opaque colour.


Stamped various LP images onto each shape using black archival ink.


The next stage is very important, remember to put a hole somewhere on them so you can put the jump rings on when they've been shrunk.  It's much harder to do this the other way round!!


This is the un-shrunk largest heart on the left and on the right is what it shrinks down to.


And same again but this is using the TH heart shape.


Now my luck with triple embossing UTEE is about the same as Helen's with shrink plastic, not a marriage made in heaven.  So I decided to forgo this stage but instead gave each piece 2 coats of satin glaze.


And finally I edged them with gold liquid leaf and added a jump ring to each one.


And attached them to a piece of chain with a further jump ring and added a clasp.


And this is it opened out.

Thursday, 24 May 2012

A 50th Birthday


A friend of mine has a 50th birthday today, can't tell you who as I promised I wouldn't tell anyone how old she was!!!!  The head and body were made from modelling clay, the hook screws and pins were added and were left to dry for over 24 hours.  Once dry I sanded them down, painted the body in faded jeans acrylic dabber and the head in sand CH studio paint.  I created the face with Artbars.  The head is wrapped in a piece of window lead.  I used beads to create the arms and legs, added washers to make the hands and added a bead and a bead cap for the hat.  To attach the head to the body I used a washer, a metal flower and a bead cap.  I made the metal frill for the neck from the smallest of the flowers on the TH tattered floral alterations die and added the key chain.  I added the
'5' '0' gold peel offs to finish.


This is the card I made.  The 50 and the happy birthday are clay pieces which have been coloured with cool peri alcohol ink as was the card background.  Various Art Journey and T!m images were stamped in shaded lilac and seedless grape distress inks.  The main indigo blu image was stamped on a separate piece of card in black stazon.  The edges were coloured with frayed burlap distress ink.  Frayed burlap was also added to the main background to balance it out.

Tuesday, 17 January 2012

Another beaded bracelet


I finally managed to get round to making myself a bracelet too, but of course, it had to be green.  


Friday, 13 January 2012

Beaded Bracelets


As most of you know, I've not been able to do much in the way of anything, let alone crafting.  I have managed to get Martin to put a few beads on a tray and get me some tools out but it wasn't really a success as I dropped the bead strands on lots of occasions and kept dropping beads everywhere!!


So I've just finished these few bracelets off over the last week or so.


Mum is coming over again today, so I'm going to get her to choose one for herself.


I've made a couple for my colleagues at work.


May change this one as I'm not sure about the middle bead.  Can't decide if it's too big or not.


And finally, yes Kate, a pink one!!!


Won't be doing much more for another few weeks!!

Saturday, 10 December 2011

Bead and Fabric Bracelets


I've been having a play with making bracelets from fabric and using wire and beads to decorate them.  Here are my first attempts, a bit messy, but then I love the randomness of it.

Saturday, 3 December 2011

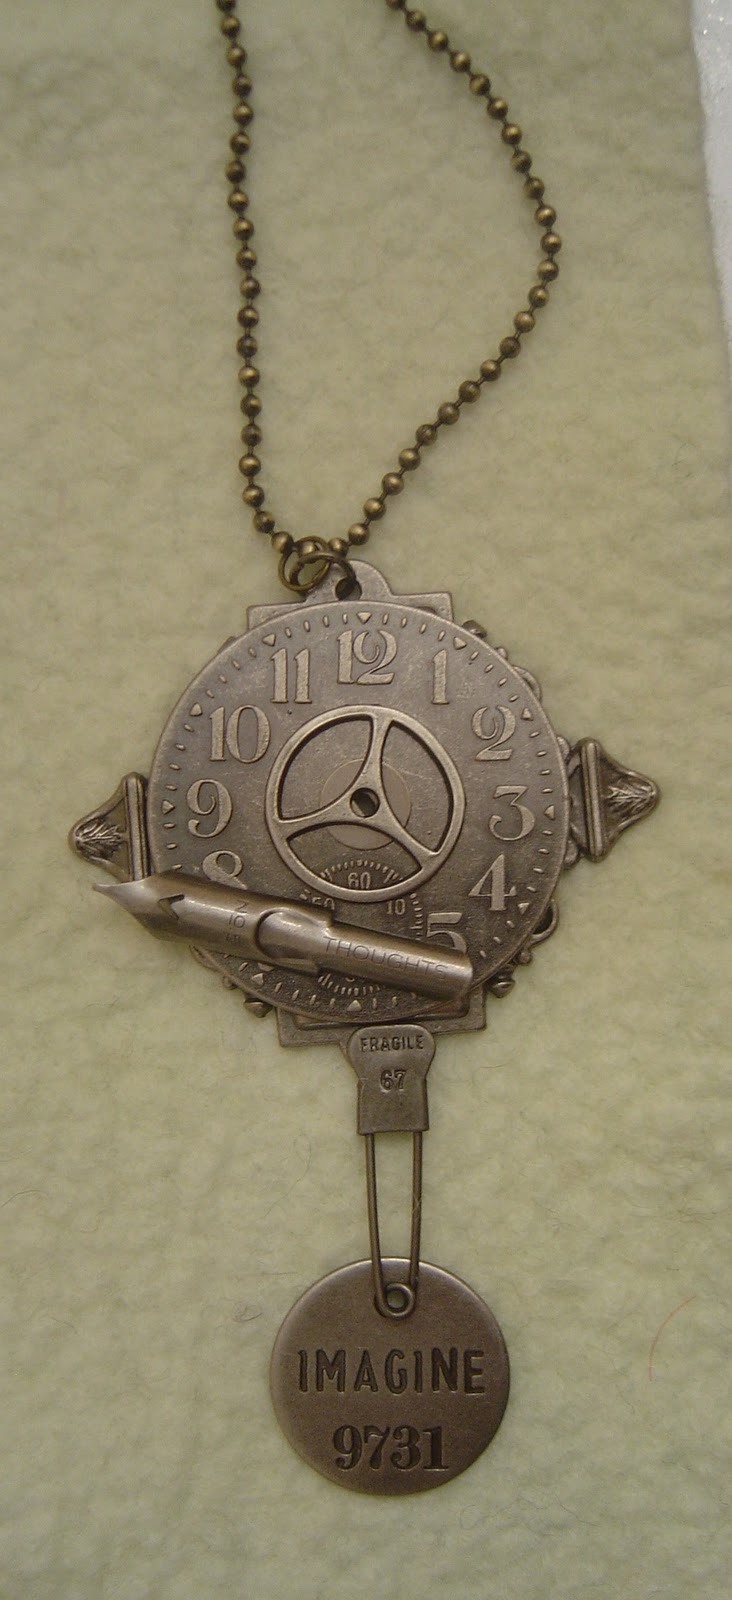
Steampunk Jewellery


I have just taken delivery of this lush magazine which landed on my doormat this morning.  It's fab and full of techniques and inspirational jewellery ideas.  It's from the massive and fantastic Stampington & Co range, so you have to order it in from the USA.

Anyway, back to the steampunk pieces.  These were inspired by my mate, Nicky, who sells the ones she makes as they are absolutely stunning.  She incorporates lots of different materials in her pendants. If you are interested, visit her blog and click on the email me logo down the right to ask her what she has as each pendant is unique.

I also came across someone else who had played around with the same idea, as she had  entered her make into a Simon Says challenge.  See it here.

So here is what I was playing around with using the TH ornate plates as the base for the pieces.

This one uses all TH pieces


This one is TH, except the cog which is 7Gypsys.


This one is a mix of all sorts.


TH and 7Gypsys pieces.


A mix of all sorts.


This one doesn't use the ornate plate for the base.  The clock pieces are TH and the cog 7Gypsys.  The face is made from clay and coloured with silver acrylic paint.

Sunday, 13 February 2011

Steampunk Heart


I mixed 3 colours of clay to create this piece.  I shaped it into a heart and twisted the bottom.  I added several pieces of metal coloured findings, washers, nuts, watch pieces, safety pins, wire and gems to create a steampunk effect.

Wednesday, 29 December 2010

Friendly Plastic Bracelet


This bracelet is made from two colours of friendly plastic melted together and sliced into five pieces and joined together with brass jump rings.  Inspiration for this piece was from one of my new christmas books - Friendly Plastic 101


I couldn't actually believe how comfy it is to wear!!!

Blog Archive