Showing posts with label Hanger. Show all posts

Sunday, 4 August 2013

Creative Journey


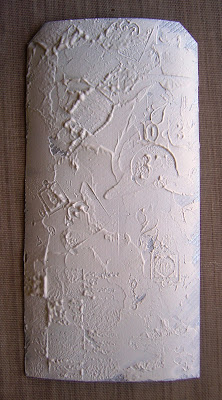
I picked these stamps up at a craft sale recently and I love wooden and PA stamps so I put a couple of them to good use!!


Painted the hanger with chocolate pudding fresco paint and randomly added Irish cream.  Using the confetti stencil I added nougat paint.  I stamped the Hampton Arts face image and the Stampers Anonymous quote onto kraft card in brown timber stazon. Added an embellishment and fibres which I also picked up at the sale.


Think Monday, think ATC and more are asking to see faces this week, so I'm hoping this counts even though it's only half a face!!

Also Country View Crafts are asking for quotes or saying, but read the rules of this before you submit. My quote is from a T!m Holtz, stampers anonymous wooden stamp as shown above in the first photo.

And finally, Our Creative Corner want to see words, words, words!!

Monday, 1 July 2013

Guilded Hanger


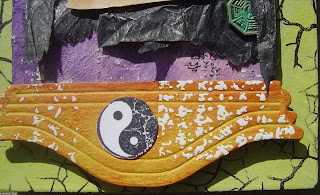
I was interested to see how the guilding flakes worked with the fine detailed LP stamps.  I was amazed that there was some black showing through round the shoulders and body of the image.  The photo's not that great, but it does look quite good in real life.

I used a piece of my home made washi tape across the bottom, tore the black card, added some treasure gold and tied a piece of white and red twill around the bottom.

I took the string off the hanger and replaced it with some thicker red cord.  The hanger is painted in blood orange fresco paint.

Tuesday, 21 May 2013

Beaded Hanging Board


Over on the PaperArtsy blog it's Carols turn to wow us this week.  To find out what she made and follow along, click here.

I painted the board in pansy and my lovely mate Emma kindly sent me some of the Golden coarse fibre medium that she picked up from Cass Art when we were down at Ally Pally.  So I used this through the harlequin stencil as Carol did.


Now to my beaded trim, well it actually started off white as above, and after I'd had the alcohol inks to the beads and the French roast fresco to the ribbon, it turned out like the top photo.


And here is the finished piece. I pretty much followed what Carol did except I added some script in black stazon and over stamped in versamagic cloud white to fill in the gaps and used ribbon on the hanger as I couldn't face stringing fiddly beads!!

Friday, 10 May 2013

Ruff Diamond


Over on the PaperArtsy blog this week Sue has been using lots of greens, so I just had to play along.  Now this wasn't as easy as it sounds as my index and middle fingers are swollen and bruised from playing netball on Tuesday night, to the point where I had to cut the corrugated diamonds left handed with a craft knife, hence the reason they are a bit ruff!!

Now I followed Sue most of the way until it came to the images, as you 'll know by now, I don't do flowers!!  The images are coloured with portfolio pastels and smudged (with left finger!!).

Friday, 26 April 2013

Out the Blue


The background was coloured with baltic blue fresco paint, a layer of crackle glaze added and covered with vanilla.  A layer of limelight added and some more baltic blue splodged around the edges.


The main LP image was stamped onto crackly tissue paper and painted from the back and adhered to the background with golden matte medium.


The Tando Creative chipboard cog with wings was given a layer of grunge paste and #44 PA mini was stamped into it. Once dried it was coloured with brown shed and tinted with aquamarine treasure gold. The smaller cog was painted with haystack, pumpkin and brown shed and a smidge of the TG.


Pewter treasure gold was added to the edges.  The background was stamped in white ink with the #44 mini script stamp.  The TH pediments were coloured with haystack, pumpkin soup and brown shed.  Again using the #44 mini stamped in versamark, sticky embossing powder added and heated and bluey/green (schizzle) foil applied.


You can just about make out the crackle effect on the left, as I covered most of it up!!

Hope you like it Carol xxx

Challenges I would like to enter - 


Saturday, 20 April 2013

Serenity


Still playing catch up with Linda's last week of DT over at the PaperArtsy blog.  To find out what's going on check out here technique here.  I used grunge paste and images from ink and the dog plates for the background of the tag.


I used eggplant and claret to colour the tag.  I then sanded it back to reveal some of the white and give me a smooth surface to work on.


For the top and bottom I used a blend of haystack, smoked paprika, pumpkin soup and brown shed fresco paints on the T!m Holtz pediment dies.


I used schizzle foil (now that could be completely wrong, but it's from PA), by stamping the ink and the dog image in versamark, covering with Ranger sticky embossing powder, heating, and whilst still hot and sticky, pressing the foil into the images. I used white foil.


I then had to choose an image, so from my new LP #22 plate I chose the one above and the one below.  I stamped one in black stazon and one in versamark and covered them both with black embossing powder.


I did the same with this image too.


I coloured the chosen image with distress ink markers and a water brush.  It sort of blended into the background, so I mounted it on a scrunched piece of black tissue paper tinted with pewter treasure gold.  The charms have been coloured with vintaj patina (the green set), buffed up and again rubbed with pewter TG.


I then had a change of tact and decided to use a hanging chunky board to mount the tag on instead of going the way Linda went with hers.  I gave it a base coat of guacamole and then blended in limelight and zesty zing.  I stamped the crackle image in black stazon.


I twisted some green sari ribbon around the string hanger.


And this is the completed piece.


Close up of the embossed image coloured with distress ink markers.


Close up of the top with the schizzle foil.


And the treasure gold on the the black tissue paper.

It's so much better when the sun is shining because the colours actually look how they do in real life!!

Monday, 19 November 2012

Dare to Dream


Left side embossed background is fresco paint and right side background is Dylusion sprays, both have been swiped with treasure gold.  The main image is from PaperArtsy, the eye has been coloured with a green distress ink marker, more treasure gold added and the crunchy wax paper has been stapled to the right hand side.

Friday, 16 November 2012

Use it Up


Over at Out of a Hat Creations this week they asking for us to use up our stash.  Everything I've used here is well over a year old apart from the hanger which I got from the Manchester ICHF show around September time.

Monday, 4 June 2012

AJC #22


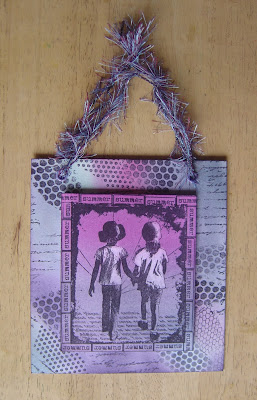
This months Art Journey Challenge is Summer as chosen by Anneke.*  I did buy a few AJ stamp plates a few weeks ago but none of them are relevant to summer so I had to revert back to my old faithfuls!!!  The background was created with pan pastels and various background stamps.  The main image is an AJ stamp from the Precious Moments plate.  I edged it with the summer word stamp from the Words plate.  I added eyelets and a piece of wool/fibre to hang.


This is a snippet of the main image as I used an eraser to remove the colour on their t-shirts.

*Edited - sorry it's not Anneke who chose the theme this month, it was Willy. It's Anneke's turn next month!!

Sunday, 12 June 2011

Framed in Pasta


I cut a circle of card by drawing round a bowl. I cut the middle out and glued a layer of raw pasta pieces all the way around the ring.  Once dry I added another layer over the top.  When that was dry I painted it with green patina eco-friendly paint.  I selected an image for the middle, a piece of ribbon to hang and attached everything to a cd for stability.

Thursday, 19 November 2009

Nesties and Frames Fun


This card was created using nesties

This card was created using nesties, a cuttlebug die and a crafty individuals sentiments stamp. The stamp was given to me by Alison, thanks.

This card was created using some of the negatives from the card above

Using the oval scroll nesties an aperture, an acetate piece and larger frame were created. An image was stamped onto the acetate and then images and a sentiment were stamped onto the card. The paper at the top is the same as the paper inside and has been decorated using a Martha Stewart punch

And finally a wall hanger

Blog Archive