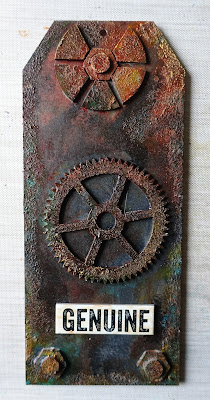
Day 26 of the #fabtag30day.
Showing posts with label Texture Sand Paste. Show all posts
Showing posts with label Texture Sand Paste. Show all posts
Thursday, 30 July 2020
Friday, 16 March 2018
Rusty Elements
After the launch of the new Andy Skinner and Tando greyboard kits, they inspired me to make a couple of tags. I already have the industrial set and some mdf hearts and tags and this is what I came up with.
All products used were from the DecoArt range, including textured sand paste, media paints in paynes grey, dairylide yellow, cobalt teal and quinacridone gold.
I also used some metallic lustre in orange flicker over some of the sand paste to bring out the detail.
Love how the quin gold changes the colour of the colours underneath.
And for the second one I used white modelling paste with the fossil stencil.
I painted the whole tag with white tinting base, added a layer of patina antiquing cream and wiped back. Then added metallic lustre in orange flicker and copper kettle.
The heart was made in the same way as the tag above and I've added some rusty wire.
Close up of the sand paste with orange flicker metallic lustre.
Both tags, side by side.
Friday, 23 June 2017
Quick Tag Play
Black gesso and then lots of different DecoArt media paints until I was happy with the colour. Texture sand paste around the edges.
Stamped my new steampunk man and hi-lighted in white posca pen.
White tinting base, followed by a couple of coats of chalky paint and some hair clay to act as a resist, then a layer of purple media paint and wiped back.
Stamped the skull, whited it out and over stamped. Stamped the words and used a white posca pen to hi-light and I also whitened the teeth too!!!
All products are from the DecoArt range.
Friday, 2 June 2017
Shrine using T!m's house die
I decided to try and make some moulds from the wooden wings I'd order recently and then I put some clay in them and they turned out okay. As they are only very thin they didn't take very long to dry and I also put them out in the sun. The shrine shape is actually the bigger of T!m's houses with a panel cut out the front. I used DecoArt products to decorate it and all the embellishments.
Saturday, 13 May 2017
'A' Layers and Layers
I took a cardboard substraight in the form of a letter A and gave it a coat of media tinting base.
I added modelling paste, crackle paint, crackle paste and texture sand paste mixed with ultra matte varnish very randomly all over the A.
Next I started to apply different colours of media paint starting with paynes grey.
And yellow transparent oxide.
And after lots and lots more layers.
And same for the other side with lots of quin gold.
Next I added metallic lustre.
I used champagne, orange flicker, turquoise and black shimmer.
I was very sparing with the embellishments as I didn't want to cover too much up!
Saturday, 8 April 2017
Mini Shrine
Way back when, before my holiday, Lesley kindly ordered me some bits and bobs from Calico Crafts and I have finally got round to making something with one of the pieces.
I know you can't really see the insides or outsides of the box but I created texture on them using the Decoart textured sand paste and then building the colours up with the media paint until I reached a colour that I liked. I lightly rubbed titan buff over them to bring out the texture, it worked really well actually. Decoarted the inside and top with skulls and a set of wings from Calico, used wire to wrap around the sides and a piece of metal smugded in carbon black media paint at the front.
Monday, 6 February 2017
RAK
As it's RAK (Random Act of Kindness) week from 12th - 18th February and RAK day 17th February, I suggested to a FB group I'm in that it would be a great idea if we did this amongst ourselves. There are only 7 of us in our closed group, so not too difficult to arrange. One person in the group pm'd everyone the name of the person we are to make for. The person we make for isn't necessarily the person we receive from, so it's a bit like a secret Santa I guess.
Anyway this is what I made from pieces of mdf and chipboard. All products are from DecoArt.
I hope she likes it xx
Friday, 30 December 2016
Jigsaw Piece
Had another little play, this time with a chipboard jigsaw piece which measures approx 4".
Added salt to a paint wash to get the pitted effect.
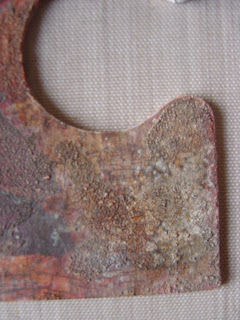
Added texture sand paste to get a rust effect, except I wanted it more of a white rust than an orange rust.
And here I did want a rusty orangey rust effect.
Just a bit of a play and an experiment with different colours.
Wednesday, 28 December 2016
Layers and Layers & Layers and Layers!!!
I can't even begin to tell you how many layers there are on this canvas as I just kept adding more and more layers of paint amongst some stamping and stenciling. Once I'd decided the background was finished, I added brighter coloured paints to the Seth Apter die cut shapes.
That's Crafty have any anything goes theme this week.
Wednesday, 21 December 2016
Rusty Skull
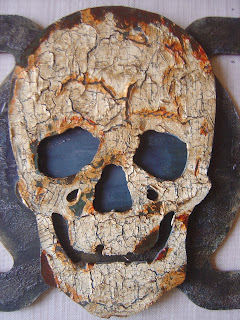
This piece kind of happened by mistake. We bought a box of oranges and the lid was a sturdy wooden figure of 8, so once in my hands idea started flowing! Above is an mdf skull which was bought for me from MDF man at one of the shows. I needed a large focal point, so decided to use it by giving it the mega crackle treatment, followed by the rust treatment.
I added all sorts to the back panel until I got what I wanted, then went on to add stenciling in white gesso and then an Andy Skinner dirty wash to tone it down. I also added rusty wire and some charms which I'd also rusted.
The metal numbers started off as a bright silver, but again I aged and rusted them.
Rusted more charms, a skull, flower and couple of leaves.
Rusty corrugated metal for behind the eyes!
And there, finished, or was I?
No, I wasn't! I decided to add a couple of chipboard nuts to opposite corners.
And the rusty heart was looking a bit plain, so I added some stamping in black stazon.
And then I was finished!!!
I've just seen over on the That's Crafty challenge blog they have a theme of flower power and your project has to feature a flower, so I'm hoping this will count as I have a flower on the heart.
Saturday, 17 December 2016
Heart & Rusty Cogs
I stuck a load of cogs very randomly onto an mdf heart and covered everything in a layer of a mix of ultra matte varnish and textured sand paste. I built up the layers using various colours of DecoArt media paints until I was happy with it.
Close up of the layers of colours.
And hopefully you can see the pitted effect from the textured sand paste to help create the rust effect.
Sunday, 11 December 2016
A Play Inspired by Andy Skinner on Hochanda
After watching the rewind shows of Andy Skinner and DecoArt on Hochanda I was inspired to have a play yesterday. I didn't really have anything in mind, just got a few pieces of mdf out and tried out some techniques, most of which I've done before. Was slightly gutted when I emptied my whole mdf box to find I'd got no large tags left :o(
As I say, I had no real idea of what was going to go with what, so this morning once everything was completely dry, I started to assemble pieces and these are what I came up with.
The mini dream tag was originally meant for this background, but I love how the colours in the heart just co-ordinated perfectly.
I used prussian blue hue to enhance the cracks in the heart.
Lots of rust techniques going on in this one.
Close up of the rusty heart and cog.
I wanted to put this on a tag with a white background with a large crackle but instead I used a piece of embossed rust effect card and a piece of corrugated that I'd made at some other time.
Close up of the heart which was stamped and crackled on the 3 corners and then black antiquing cream used to enhance the cracks.
Close up of the rusted embossed card. You can see how I made this here.
This was one of Andy's new techniques, well the technique isn't new, it's the product you use that is different, luckily I had some triple thick glaze and the colours dispersed perfectly.
I stenciled the word onto a mini mdf tag and covered with clear media crackle and I got some wonderful cracks. I used white antiquing cream to enhance them.
And finally my large heart simply painted with relic and stamped with one of Andy's background stamps in everlasting chalky paint.
Subscribe to:
Posts (Atom)


