Sunday, 11 November 2012

A Stitch in Time - ATC


The challenge over at ABAC is a stitch in time and you can use any element that represents time, watch, clock, clock parts etc and/or stitching - real or faux!

The background of the ATC is alcohol inks over sticky silver foil which has been passed through the TH riveted metal texture fade.

Saturday, 10 November 2012

Under Lock & Key


Over at Out of a Hat Creations this week they have a fabulous theme of locks and keys.  ABAC also have the theme of mainly black.


I used the Sizzix box candy drawer die to make the box and covered it in clock face / time paper which I picked up cheap last time I was at AftH.


I encased the box in silver chain and added the lock and key.

There is nothing inside as you are not meant to be able to get it open!!!

*** Out of the Hat are having another mousetrap challenge in the next couple of weeks.  If you would like to take part, but don't have a mousetrap, please feel free to email me (click button on sidebar) with your information and I will gladly post one out to you so you can join in ***

Emboss It


Over at the Stamp Man this month they are asking for anything embossed, be it heat embossed, embossed using a folder, stencil or mask, or indeed any other type of embossing!!

So here is my embossed tag mainly using fresco paints and treasure gold along with a couple of embossing folders.

Friday, 9 November 2012

A Decorative Hanging for Stampotique


Sam has chosen this weeks theme of hanging decorations over at the Stampotique Designers Challenge Blog.  I picked up this wooden sign from PaperArtsy when in Doncaster, obviously it was just plain wood.  Using the fresco paints, I gave it a couple of coats of snowflake, then a thin coat of satin glaze, I mixed a lot of white with south pacific as I wanted a very light blue for the top coat.  Now imagine my surprise when I sat there for ages waiting for it to crackle and nothing happened.  I couldn't understand it, it has always worked perfectly and then duh!!!! The penny dropped, I'd used satin glaze and not crackle glaze so it wasn't going to crack was it!!!

So, moving on, all stamps used are Stampotique.  The letters are the  alphabitties. I stamped the word in versa mark ink and added white embossing powder.  I stamped the Daniel's hearts and hanging hearts in versamagic cloud white ink. I then coloured some of the hearts with the south pacific fresco paint, hi-lighted parts of the letters and edged the sign with the white ink.

***Edited***
Top 3 winner


Birthday Card


It's my dads birthday on Sunday and he is bike mad!!  I decided to try out a photo transfer onto fabric using PaperArtsy Fresco Satin Glaze and to my surprise it came out great. I wasn't surprised about the technique as I've tried it before but I was surprised about the quality of the transfer, it looks fab IRL.

I then discovered that I had some washi tape with a map on it.  I didn't even realised I owned any!!!

Thursday, 8 November 2012

Viva La France


Over at Simon Says Stamp and Show this week they have a theme of Inspiration Francaise. I cut a piece of white card into a postcard sized piece (6" x 4").  Stamped the main CI image in black stazon, masked it off and used PA and TH stamps for the background.  I then stamped the Eiffel Tower image again in black stazon.  I edged the postcard with black stazon too!!  I took the milled lavender and dusty concord distress ink markers and slightly tinted the flowers.

Wednesday, 7 November 2012

AJ - Round


This month over at Art Journey they have chosen the theme of 'round'.  I used a cog stencil with turquoise tint (580.8) pan pastel over black card.  I cut some spellbinder circles from patterned paper and gave them a coat of watered down honey dew fresco paint.  I stamped various images onto each circle and mounted them over the cogs.  I mounted the whole piece onto white and then black at opposite corners.

Unfortunately this isn't the best photo but the weather is really dull - sorry!!!

Tuesday, 6 November 2012

Bonfire Night


Over at PanPastelUk this week they have a theme of Bonfire Night.  I cut T!m's on the edge townscape die from patterned paper.  Stamped the three Art Journey stamps in white ink and went over them with a gelli glaze pen in white and orange.  I used embossing enamel around the outside edges.

Monday, 5 November 2012

Brights


Over at Happy Daze this month they have a great theme for November of Brighten it Up.  So I used salty ocean, picked raspberry, peacock feathers and ripe persimmon distress inks and did the water flick technique.  I stamped the rays from the T!m grunge plate. The Stampotique image is one of my samples from the distress ink markers play.  It is actually brighter than the photo suggests but unfortunately the light here isn't good today.

To be eligible to enter the challenge you have to use at least one product from the on-line shop, which is dead easy as Moira sells a fab variety of products including distress ink pads and stazon ink pads, which I used in my tag.

Sunday, 4 November 2012

More Play Day Makes


Whilst Emma was making her Paperarsty piece I was playing around with tags and backgrounds with distress stains.  The main image is Lynne Perrella and I coloured it with distress markers.


I used the picket fence and the marbling technique for this background and it worked out quite well as her face just falls into the right spot!!!  The lace is painted with fresco paints and the crunch paper is coloured with treasure gold.

Saturday, 3 November 2012

Play Day


My friend Emma, came to play today and unfortunately I forgot to take any photos of us arting or her cuddling Fraz, but nevertheless she made this fab take on a project we recently saw at the Paperartsy stand at Doncaster Dome craft show.


And she teased me with this fabulous tag that she'd made for me but was unsure whether or not to give me it so told me about it then left it in her bag!!!  She knows I LOVE green but she couldn't resist adding a bit of pink sparkly!!!!  It's fabulous isn't it.  I actually think the dare I say it 'pink' and green go together quite well.  No don't panic I'm not transformed!!!!  Just sayin', a bit is okay!!


Skull 'n' Gate


I've been crackling again and over at ABAC they are asking for us to use black in a project.  I painted a piece of chipboard in copper, gave it a thin coat of crackle glaze and then painted black over the top and as you can see, it crackled lovely.  I cut it up into gate sized pieces, and used the brads to hold it all together!!  I gave the brads a bash with a T!m hammer.

I actually wanted to do the bottom coat pewter but my order hadn't arrived from Artful Splodger, hence it ended up copper.  But the postie was running late today so it did eventually arrive, so I was able to cut the skull and bat from the movers and shapers die I'd also ordered.

Friday, 2 November 2012

Nature


Out of a Hat Creations have moved swiftly on from Christmas to nature!!  So here is my butterfly tag.   

Thursday, 1 November 2012

Funny Halloween


Over at Stampotique this week they have a theme of 'funny halloween'.  I did want to write the slogan, 'does my bum look big in this' but decided against it!!

More Experimenting - Satin Glaze


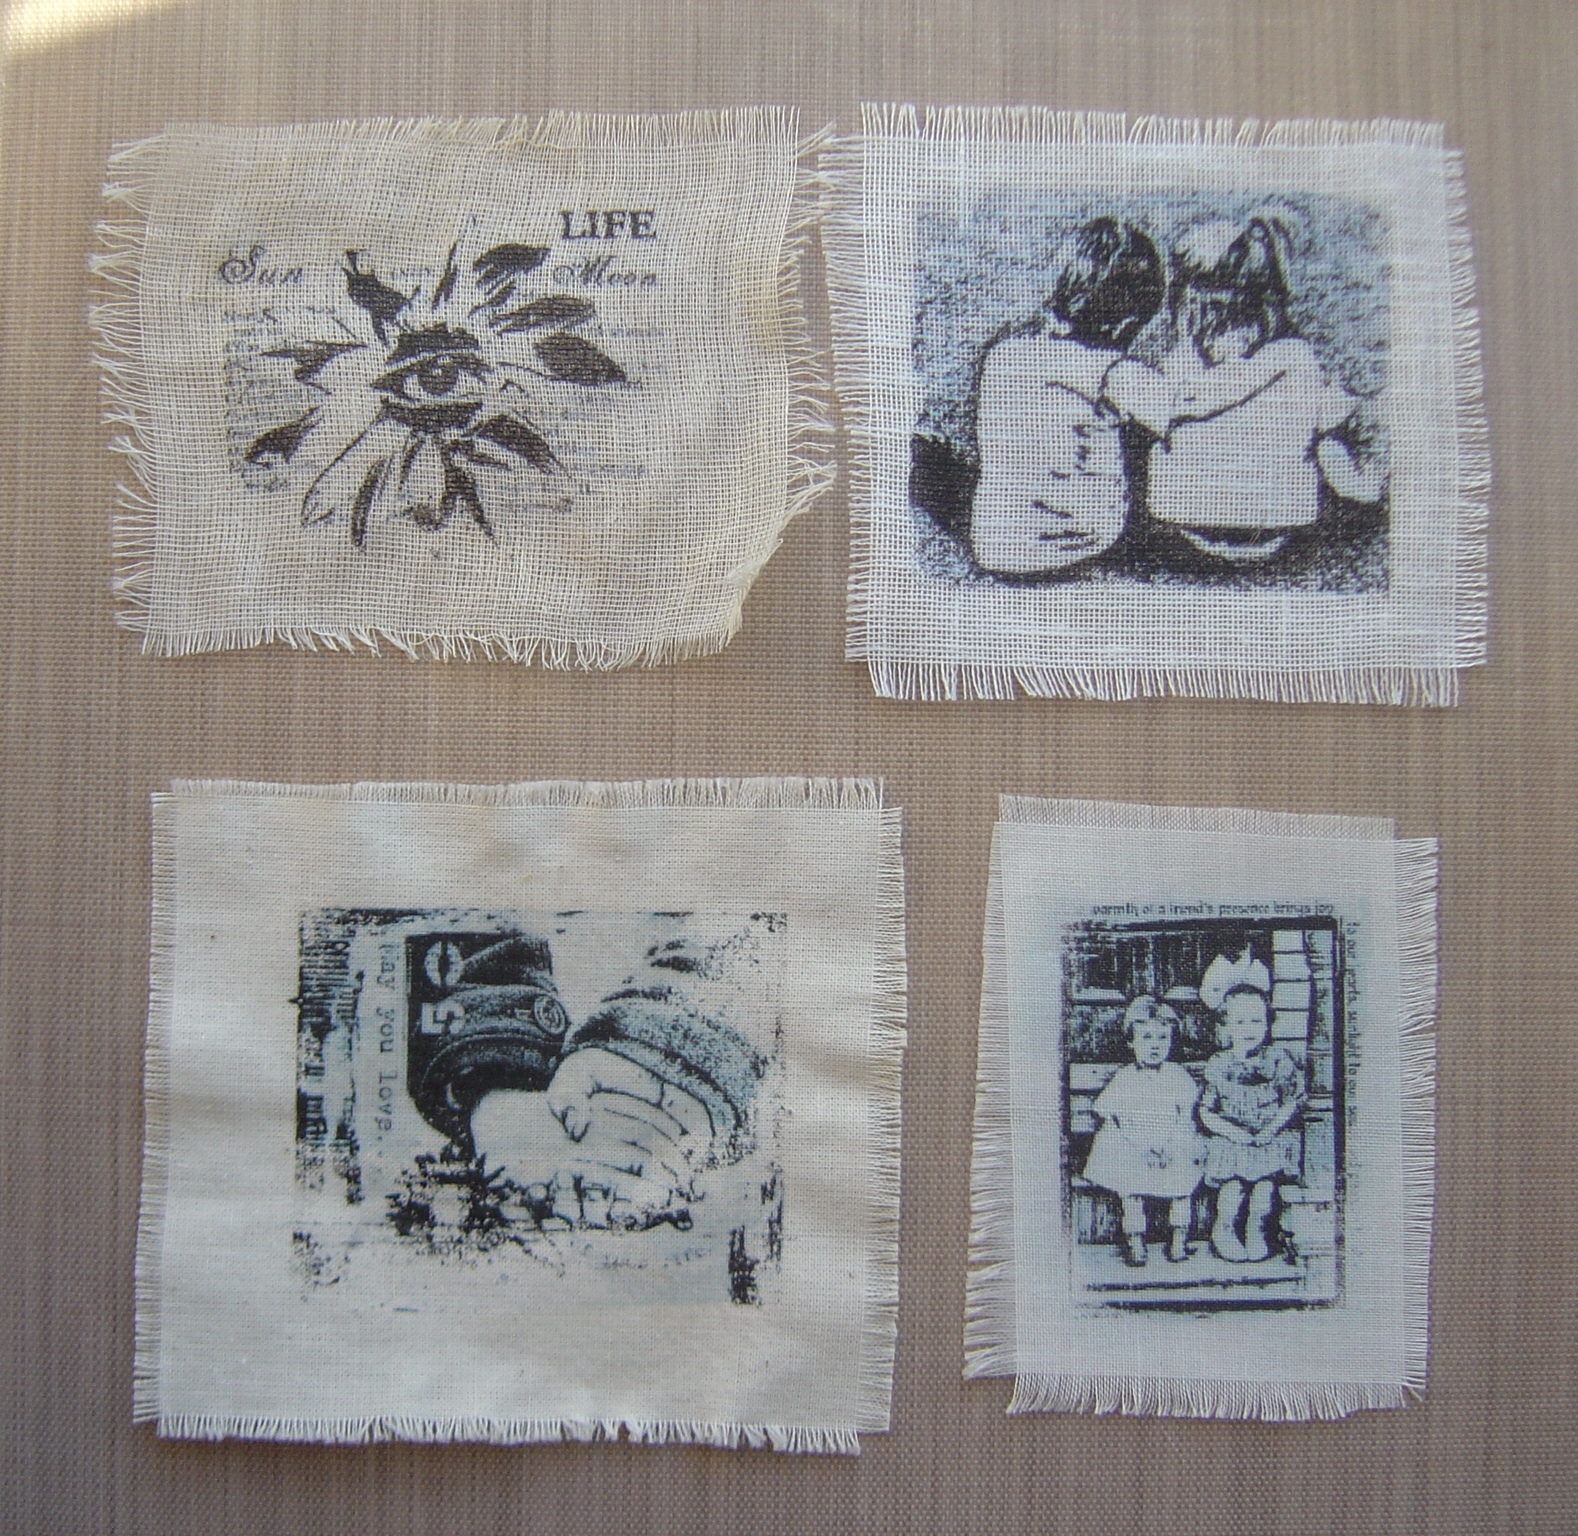
Whilst at Harrogate and the Dome watching Leandra of Paperartsy demoing an image/photo transfer technique using satin glaze, I was amazed how well they transferred and how quick the process was.  So I bought a bottle and have been having a play.

You need to print from an inkjet printer onto acetate.  I was slightly concerned with this as I have a deskjet printer, but decided to give it a go anyway.  I have since found out that any printer which takes ink cartridges is an inkjet printer, the manufacturers just call them different names.


This is immediately after I've taken the acetate off and they are still very wet.  I was going to wait for them to dry, but me being impatient, I zapped them with the heat tool, which you can do without any harm coming to them.


I tried them on all different weaves of fabric, this one is quite an open weave.


This weave is the loosest and it's the lightest of the fabrics.


This one was quite a heavy weight fabric with a tight weave.


And this was the tightest weave.


These are all 4 pieces together so you can see the different fabrics and weaves now they have been dried.  But as you can see the images have transferred perfectly.


Then I decided to apply some colour using the Paperartsy Fresco Chalk Paints.


I used pumpkin soup as a wash on this one, dried it and went back in with nougat.


For this one I turned it over and coloured it from the back as I wanted a more subtle colour.


And this is the view from the front.


I used Baltic blue on this one, I really watered it down, and I also coloured the images with it.


And finally, for this one I sprayed the fabric with water first and then applied the paint around the outside edges.  I used my favourite colour, Guacamole.


Blog Archive