Sunday, 18 October 2015

Donny Dome Show


Look who I caught up with today after a do or die situation to get there!! It's a long story but I went by train which was actually a bus, Linda & Chris very kindly called in at the train station to pick me up and Lesley very kindly brought me home again. So from L-R we have Jo, Hazel, Lesley, Linda, Chris and Jules.


And Leandra demo-ing on the PA stand and Hugo getting some tips.

Had a lovely day guys and was great to catch up. Thanks to Hazel and Lesley for my cards and to Lin and Chris for the lovely goodie bag. 

Oh and just in case you were wondering, I didn't buy anything as I am going up to Glasgow at the weekend for the SECC show.

Monday, 12 October 2015

Mini Wooden Makes


So following on from yesterday's post on how I textured the backgrounds, here's what I did with the wooden pieces.


Added two sets of wings, a crackled heart, a rustic skull and rusty nails and a couple of metal embellishments.


Close up of the heart, skull and rusty nails.


Mini tag with another crackled heart and antiquing cream. Skull and spider and then a rustic handle holding the clock hands.


Close up of the spider and handle.


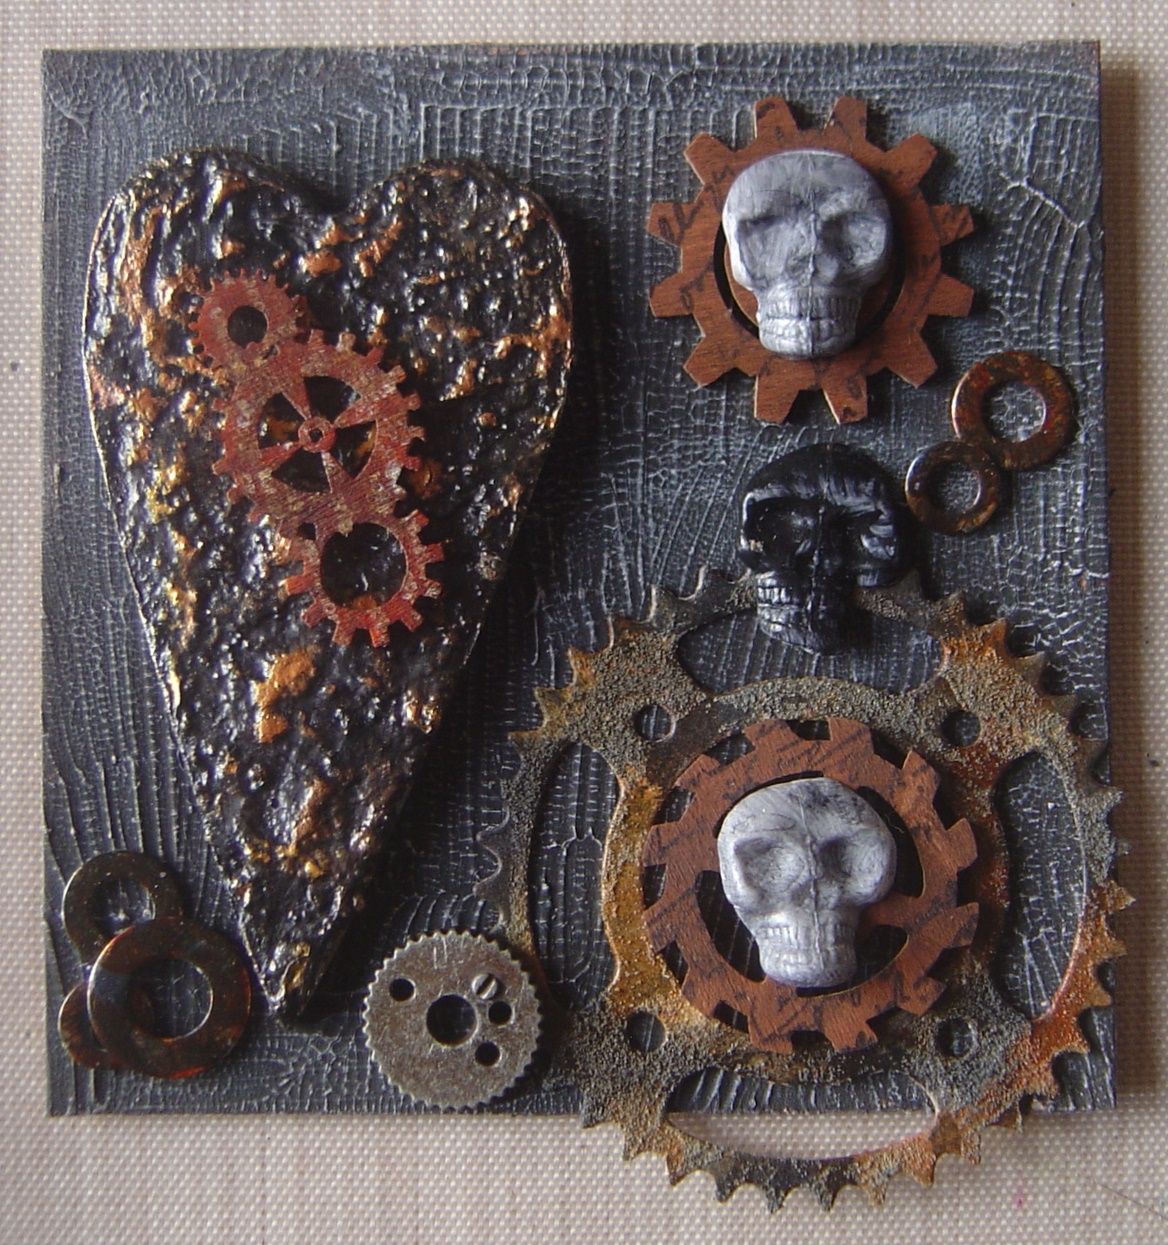
And finally the heart which I mounted onto a piece of card along with cogs, skulls and washers.


And again another close up of various pieces.

All products used are from the decoart range which you can find here.

I'm also entering into this months challenge over at Country View Crafts as they have a theme of texture.

Sunday, 11 October 2015

Mini Wooden Background Textures


I put a bit of each of the above in a mixing pot and spread it on some wooden mdf shapes.


I put a thin layer on the tag, two layers on the atc and a thick layer on the heart. Dried them with a heat gun and they bubbled, hissed and went sticky. I left them to dry off and then painted them in DA carbon black acrylic from the media range. I'd forgotten how good this stuff is. Great coverage, only one coat needed.


Next I added some of the DA metallic lustres and as you can see the texture has really popped.


I used champagne ice and emerald on the atc, turquoise, black shimmer and silver on the tag and copper kettle, orange flicker and iced espresso on the heart. I buffed them up with a dry cloth.

I'll be back again when I make them into something x.

Friday, 9 October 2015

Halloween ATB


I was recently invited to join a FB group called mini marvels and there is a halloween challenge going on at present, so I decided to join in with my little 2.75" ATB.


The box is coloured with black pearl DA dazzling metallics and the panels with eggplant and pumpkin patch DA multi surface paints. The images are heat embossed with black embossing powder.


And the top I just coloured in pumpkin patch and edged with eggplant.

All paint mediums are from the DecoArt Range.

Thursday, 8 October 2015

Let's Dance


I wanted to experiment with my set of Lindy's today as I wanted to try them direct onto the page, ie without gesso, and was quite pleased with how they turned out. I added a bit of background stamping in purple and olive green stazon and the main Dina images are stamped in black stazon and masked off to create the line.

Sunday, 4 October 2015

Tag & Atc Swap - Pink


I made a masterboard using DecoArt Multi Surface satin paints in flamingo and pink tropics and innocence chalky finish paints. Added issue tape, stamping with bubble wrap  and bottle tops in carbon and everlasting chalky paint.


I stamped random butterfly images from a Finn set using black stazon. I randomly drizzled black and white 3d paint by Tulip across the whole page. Once dry I gave the whole page a coat of media satin varnish and then cut it up into atc and tag sizes.

All products apart from the Tulip 3d paint are from DecoArts.

These are based on a technique used by Patti Tolley Parrish.

Saturday, 3 October 2015

Journal Page Play


Been playing again with magazine and collage pages making up images, but wanted to do something different this time and do the writing in a colour. I still ended up adding a black and white just to help define it more.


And using my new Zig pens I did a lot more doodling on these pages with them. There is only one problem with them so far, when using a white sharpie over the top of them, the white turns a paler shade of the colour you are writing over. So I used silver on the left hand side page.

Friday, 2 October 2015

Bistres


Had a little play with Bistres today, used yellow, blue, red and natural which is a brown. They appear to work exactly the same as Brushos. To be honest, in my opinion, there's no difference in them, they just come in different packaging and the Bistres are in much larger pots than the Brushos, but for me that's not a problem as I'm probably never going to get through all my Brushos anyway.

Thursday, 1 October 2015

Playing with new stuff


I've been so engrossed with cutting up images and making new ones that I've neglected some new things I recently purchased, so today I decided to play with them all!!  I scraped fibre paste through an Andy Skinner stencil, once dry added some Lindy's sprays, I recently got the French heritage set. I added some gold DA media fluid acrylic to some golden tar gel. This wasn't actually as drippy as I thought it was going to be, so unfortunately I ended up with bigger blobs than I really wanted, but hey ho.


I added some stamping to the background in iced spruce distress ink. Stamped in timber brown stazon the Dina image and Clarity word on separate card, cut it out, glued it on and outlined it with dark brown pencil along with some of the stencilled area. Used bronze pan pastel over the textured fibre paste. This photo was taken outside in the garden.

Sunday, 27 September 2015

Flip Flap Journal


This is the front cover of a journal I put together using six, 6 x 12 pieces of card, creating extra flaps. So the pages are 6 x 6 or 6 x 3 but the 6 x 3's create shutters over some of the 6 x 6 pages. I used brads and a piece of hemp cord as a closure.


This is the very first page you see when you open the cover. The inside of the flaps have been covered with a mask patterned card to hide the backs of the brads.


This is one of the 6 x 6 pages with it's two 6 x 3 shutters with borders and images.


The pages on the left are two 6 x 3 pages closed, so you are seeing the outsides and then another 6 x 6 page.


This one shows two 6 x 3 pages closed, a 6 x 6 page and another 6 x 3 page.


So the 6 x 6 page in the middle will be covered up with the 6 x 3 flaps either side.


Once all the pages and shutters had some sort of imagery on them I went back in and coloured all the backgrounds.


Added some stamping, doodling and low and behold, some writing!


Also added some pre-printed text to some of the pages too. 


I just love how the page on the left came out. The two pages on the right form the shutters to the 6 x 6 page underneath it.


And another 6 x 6 with a 6 x 3 flap each side. There are more pages as there 21 in total, but I didn't want to bore you too much!!


And finally an aerial view so you can see how the shutters fold in.

Friday, 25 September 2015

Journal Pages


I used a mix of magazine and printed images for these two pages.


Coloured the backgrounds with pan pastels.


Added doodling with coloured pens and pencils and went in search for some words.


Couldn't find any words but added a bit more doodling to the right page.


You never know, I might find some words one day.


And actually finish these pages - lol.

Monday, 21 September 2015

Tag Swap - Resist


I decided to use Andy Skinners technique using hair wax to create a resist. You can see it here. I cut a tag shape from a piece of white foam board and painted with media transparent yellow iron oxide and made the circles by dipping surgical spirits into the paint.


When dry I gave it a coat of media quinacridone burnt orange and whilst still wet, threw on some easy float solution. Placed plain paper over the top and lifted off the paint when the easy float had been.


Next I stamped images in black stazon. I love how it looks at this stage, but I had to continue as I'd not used any resist techniques yet!


Next I used the wax and a coat of purrisan blue hue. Looking back, I should have used a lighter blue, but hey ho!


Wiped back using the hair wax as the resist and I ended up with this.


More hair wax and then a layer of the multi surface satin paint in leprechaun.


And again, after it'd been wiped back but wax added ready for the next coat.


A coat of lace chalky paint and left to let completely dry.


I inked up my Hampton Art script stamp with stazon and stamped over the whole tag.


This is the final result after all the layers and waxing.


As I felt I'd 'lost' the main dragonfly image, I over stamped it and added a couple of bits of script over the green to break up the solid colour.


And for my second resist technique I used bondaweb. Sprayed the tag with orange media mister, ironed on the bondaweb, covered it with clear embossing powder and heated. Then sprayed it with violet shimmer.


You can see the shimmer here, especially on the left hand side.


As you can see because the bondaweb isn't solid, the violet has gone into the pitted areas but resisted where the embossing powder has melted.


Close up of the melted embossing powder and the media sprays.


And another one.


As I didn't want to cover too much of the background up, I cut out an image that had been stamped onto fabric and using the sewing machine sewed it onto the tag and doodled around the outside of the tag with a white posca pen.


Close up of the stitched image on the tag.

All products are from the DecoArt range.

Blog Archive