Saturday, 19 January 2013

Frazzle Chillin' Out


Fraz chillin' on the settee


Then he heard the camera click, looked up and opened an eye!!!
 

Then he sat up to find out what he was missing!!!

Wax Scrapings


This PaperArtsy technique is part of the same one in the previous post which you can find here.  I blended the Artbar colours (A11) blue, (A13) cyan, (A02) yellow and (A18) kiwi for the background.


This is a close up of the main image with the wax scraped away in certain areas.

***Edited***
This tag won me a prize over at the PaperArtsy blog.


I chose the LP Collection #10 stamp plate.


Friday, 18 January 2013

Washed Out Script Tag


Played along with another of the PaperArtsy techniques Helen is showcasing which you can find here.  I used orange (A04), red (A05) and yellow (A02) Artbars.  I also did the scraping thing on the  image at the top, bottom and the hat.


This is a close up of the script stamping over the image.  I was going to go back in with a black pen and touch up the main image, but I quite like how it came out, so have decided to leave it be.

As you are quickly finding out, my LP stamp sets are limited!!

Let it Snow


I received this gorgeous card from a Twitter friend over in the USA.  I won't share what she has said inside but she has written some very kind words - thank you Susan.

Unfortunately the photo doesn't do it justice, but it's nearly dark and snowing a blizzard outside, so not much natural light.

Thursday, 17 January 2013

Sand Paper meets Artbars


Over at the PaperArtsy blog the guest designer has been sharing more techniques, this time using sand paper and pastels.  You can find the full instructions here.  I used Artbars as I don't have the portfolio pastels. I used green(A18), turquoise (A15) and cyan (A13).


This is a close up after having used the sand paper, but I only had 1 grade which was fine, probably could of done with a bit more ruffage!!!  Don't even know if you can see it very well.


I used the stencil bump technique on the background, stamped some script from the PA Ink and the dog background #2 plate and used the main images off the LP collection 005 plate.  The crunchy waxed kraft paper has been coated in treasure gold, aquamarine, sapphire, olive bronze and a bit of onyxite thrown in too and attached with T!m's tiny attacher.  Fibres added to finish.

Wednesday, 16 January 2013

Artbar Blended Backgrounds


Over at the PaperArtsy blog they are having weekly guest designers, so this week I decided to have a play along with Helen's warped windows. For full instruction of the technique check here.

I used Artbars instead of the Portfolio pastels as I don't have any.  They blended lovely but they didn't work the same over the painted stencilled diamonds, so thanks to Clare's suggestion, I painted them instead.  I used pumpkin soup fresco paint.


And this was the second one using the reverse as in the original post.  I used the Artbar colours red (A05), orange (A04) and blue (A11) and pumpkin soup fresco paint for the yellow!!


Tuesday, 15 January 2013

Whatever...


Stampotique have set the challenge this week for us to use die cuts and punches.  Well the die cut was no problem, but the punches, can't remember the last time I had one out!!!  So after a rummage through a box I found a mini cat!!  The fence is my new on the edge T!m die.

Monday, 14 January 2013

A Splash of Colour


Over at Simon Says Stamp Challenge this week they are asking for black and white and a splash of colour.  This is an atc which I stamped with a Dina Wakley image in black stazon.  Sprayed a concentrated area with squeezed orange Dylusions ink spray and let it drip.  I then mounted the white card onto a piece of black.


I tried more or less the same thing on a tag using hammered card.  I used a Dina Wakley and Kaisercraft stamp with black stazon and the fresh lime Dylusions ink spray.

Sunday, 13 January 2013

January Challenge - In Gratitude


The main challenge set by Sandra for all the members of the Creativity Venture group for this month is called 'In Gratitude'.  Sandra has set up all these challenges to make us think outside the box.  The main brief, once I had had it explained to me, was to basically think back over last year and choose a word which covered around 6 events.  Take that word and create a project.

There are 3 levels to choose from to work with.  The visual output areas (number of surfaces) determine which level to do.  So there were 4, 5 or 6 surfaces and each one carried a number of techniques you have to include and you also have to incorporate the mandatory ones on the list too, again level dependant.  

So as you can see, I chose the middle one with 5 visual outputs, which Sandra calls, 'enjoying the moment level'.  The project had to include 7 techniques including 5 from the list.  I chose journalling, die cuts, something new, layering and inking.  Now for those of you that know me you'll know journalling doesn't feature very high on my list, so I wrote on a piece of tissue paper first and used mod podge to glue it onto the canvas.  It says 'not under the control or in the power of another; able to act or be done as one wishes, know no boundaries, take flight, release, relinquish'.  The die cuts are the arrows decorated with rub ons.  The something new is the background technique as I have just bought Kate Cranes new box set of dvds.  The layering is the paint and the inking is the stamped images.  Other techniques include stencilling, bumping, doodling, using gesso, using artbars and blending and I'm sure there are a few more in there too!!!


And this is a snippet of the other 4 sides.  The canvas is a deep edged one and the overall size is 9" x 12".

So can you guess what my chosen word was?

Over at ABAC this week they have the theme of 'things with wings' and this just happens to fit in perfectly.

This weeks PanPastelUK challenge is 'new technique' so again, a perfect fit.

***Edited***

I made top 3 over at ABAC with this canvas


Saturday, 12 January 2013

A Personal Challenge


I have just joined a wonderful on-line craft group called 'Creativity Venture' set up and run by the lovely Sandra.  Now Sandra has put lots of work into the challenges to make us think 'outside the box'.  She collected personal information from each of us at the start.

So my personal challenge for this month was to take inspiration from the above tin which she sourced from ellenskaartjes.blogspot.com, do my own rendition and add as much of my own style into the piece as I wanted.

So off tin hunting I went and found this;


a mini whisky tin


and the inside.  It's quite a nice size and quite deep.


So I set to work collecting a few pieces, stamping some images.  The background is a piece of kraft resist from T!m's stack covered with picket fence distress stain.  The stamped images are from TH plates, the cogs are from the movers and shapers mini gears die and the arrows are from a cuttlebug die.


Once I'd placed them where I wanted them I put them all at different levels as you can see in the above photo to give some dimension.


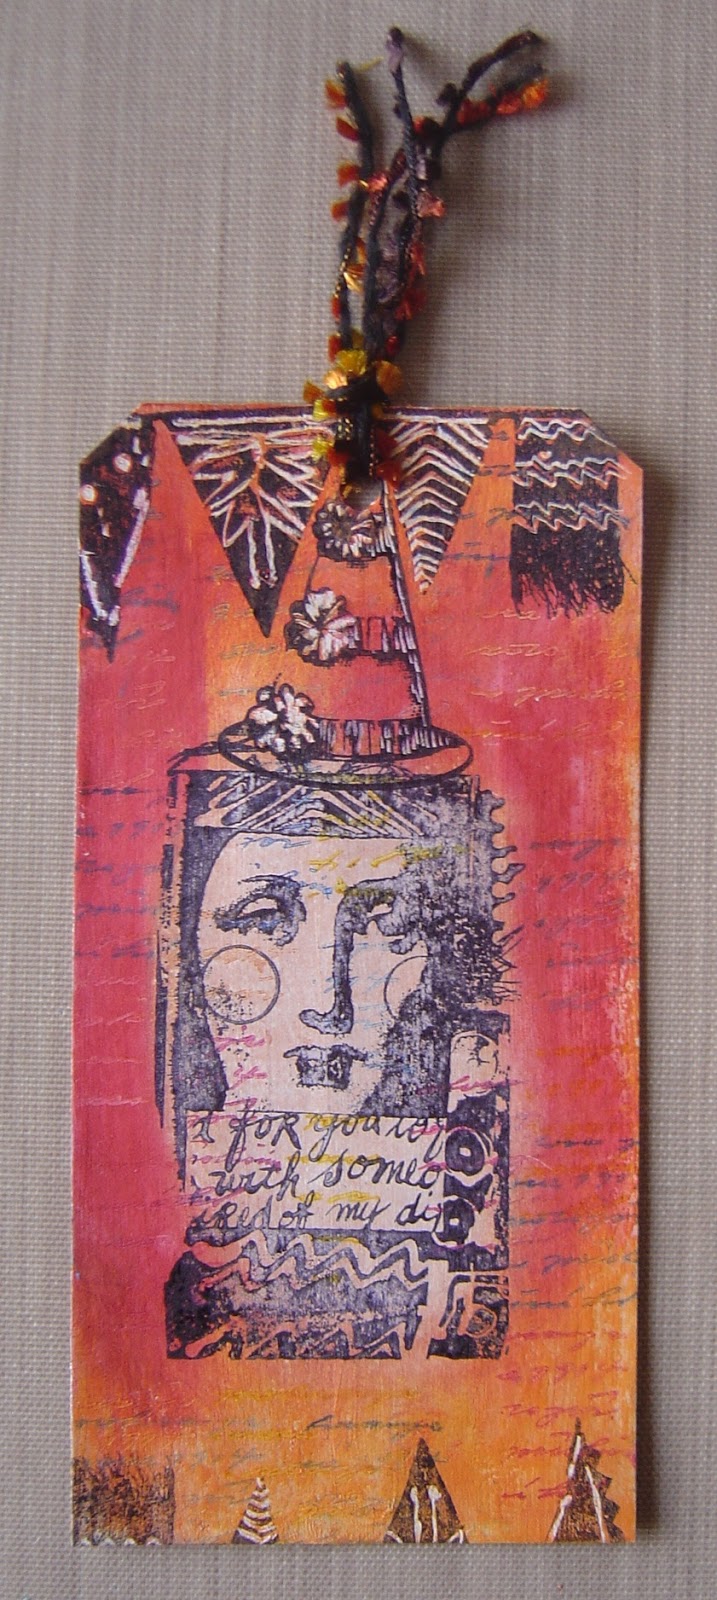
This piece is going to make the inside of the lid, using some T!m papers, his cogs and stamp!!  I used the metallic distress stains on the cog and around the words.


Then I started working on the front (ie the lid) and this is where I took inspiration from the photo I'd been sent using the lacing and the torn and curled edges.  Again everything on the lid is from the T!m collection including the tissue tape around the edges.


So these are the pieces from earlier, now housed inside the tin and the bottom of the tin around the sides has been edged with card.  I haven't done anything with the inside edges of the lid, else it won't close properly!!!


And finally the outside edge looked a bit plain and boring as the paper I'd used only had very faint text script on and not all the way around, so I stuck on a strip of burplap.

Thanks once again to the Creativity Venture group and Sandra for challenging me - hope I've come up to scratch!!!

I also want to enter this piece into the Out of a Hat Creations challenge.  This week they have a bingo card and you have to pick a line.  Each of the lines includes a hat, still in keeping with the hatters tea party theme.  Can you guess which line I've used?


Notebook For Burn


It was Burns birthday yesterday, so I sent her a little something.  I made this a while ago with her in mind as it's PINK, yes I did say PINK, but like I said it was a while ago.  

Remember way back when, when I attended the gelli plate class at AftH with the lovely Kate Crane.  Well this was one of the backgrounds I made, so I turned it into a notebook for Burn.


Saturday, 5 January 2013

2013 Calendar


Stampotique are kicking off the new year with a calendar / journal / diary page or cover.  I went for the calendar option, I did one page with a years calendar.

The background is an offcut from a piece made on the gelli plate workshop at AftH, mounted onto a piece of chipboard which was die cut with an on the edge die and painted blue.

The monsters and mushroom were stamped, coloured with distress ink makers, cut out and mounted onto the background.  The mushroom was a little dark and got lost in the blue background, so I lightened the blue with a white Artbar and outlined the image with a white Posca pen.

I printed off a calendar from a free Google download, cut the months into the same size, stapled them all together and attached them with twine.

I added a piece of ribbon to enable me to hang it from my computer desk.

Friday, 4 January 2013

I Accept


Well I have to admit, I was more than a little stumped with this weeks challenge over at Out of a Hat Creations as they have invited everyone to their 'hatters' tea party and would like a reply in keeping with the theme.

The reason I was stumped, I have no stamps, papers, in fact nothing, to reflect anything to do with Alice or a tea party, or even a tea cup!!

I downloaded a teapot template from Google and roughly sketched something like it onto a piece of chipboard.  Run a couple of pieces of kraft card through a clock texture fade and coloured with mustard seed, rusty hinge, iced spruce and walnut stain distress inks and covered the teapot with it.  

Now for the image, well I scoured the tv mag as I knew there had been a bit of a write up about the movie with Mr D, stuck him in the biggest circle nestie I had and cut him out.  I used the smallest circle to create the knob on the lid. 

Then I stamped my acceptance to the party.

I now need to apologise to Sandra as I didn't scroll all the way down the post and I didn't see her creation until I'd finished mine.  I didn't copy honestly, great minds just think alike!!!!

Thursday, 3 January 2013

Fun with Atc's


Over at Fun with Atcs this week they have the theme of 'something new'.  So I chose the technique as the new bit.  I did try this new to me Dina Wakley technique just after Christmas on a tag here, but I thought I'd see how it faired on an atc.  I used white card for the above atc.


And as I've been experimenting lately with different colours of card, I tried it again with exactly the same colours on kraft coloured card.

Simon Says Stamps Challenge also have the theme of 'new something', so I am also submitting my atc's.

Tuesday, 1 January 2013

First Post of 2013

Happy New Year to you all, hope you had a good one.

Well my first post of the new year could only really be a tag couldn't it!!!

T!m's on the ball with his first tag of 2013, so whilst I'm still off I thought I'd give it a go been as I have most of the supplies and I'm going to be busy from January to June with finishing a college course I started in 2010.

I actually made 2 tags, I used exactly the same colour inks / stains etc for both but thought it would be quite nice to see what they would look like on both manilla and kraft tags.


This is the manilla (the yellowy coloured tag).


And this is the kraft tag which is more of a browny colour.

For some reason my 3rd walnut stain distress stain has gone green, hence the colour of the ribbon!!  Tried weathered wood but it didn't show up that well.

Blog Archive