Thursday, 28 February 2013

Skiing in Utah


For those of you who don't know, I am currently away on a skiing trip in Salt Lake City, Utah.  It snowed for our second day of skiing which made every where look really pretty.


And it carried on for the next two days, but as you can see, the sun was also out!!


Then it stopped and the sun did come out.


And it's been out ever since!! This is Sundance Resort which Robert Redford owns.


Then it snowed some more at Powder Mountain.


Then something weird happened with the sun, it had a huge circle around it.


And finally just to prove we are both here!!


Wednesday, 20 February 2013

For A While


No more craftiness for me for a while.  No, I haven't disappeared off the face of the earth, shall just be AWOL for approximately 3 weeks as we're going on holiday.  Those of you who know me will remember I missed out last year due to my accident, so I've really been looking forward to going this year.

Not sure how I'll get on until I get there, but I'm going to give it a good go, and oh yeah of course, I shall be shopping too!!!

So if I get chance, the only thing you'll see from me for a while are sunny, snowy photos or any new stash I've managed to find in the big craft superstores!!!

So I will apologise in advance as I know I will not get around to commenting on your blogs.  I will have a sneaky peak as and when I can, so just because I've not left a comment, don't think I've not been.

So for my last piece for a while, I am entering my AWOL postcard into this weeks Stampotique challenge which has the theme of 'use text'.

Have fun you all and happy crafting xxxx

Tuesday, 19 February 2013

Another Bright Day


This time I used the distress PAINTS, but I couldn't get the same type of watermarks as I did with the inks.  You can just see some bottom left corner.  I'm wondering if by the time I'd got down there the paints had dried!!  I took a different approach with the white ink spray this time too, I flicked it on before I stamped!!


I used the same PaperArtsy flower image as I did the previous post as it's the only one I have!!  This time I squiggled over the stems with white pen too.  I used the text from the Urban Snapshots Arched Apertures #2 plate.

To find out how to create these wonderful tags check out the PaperArtsy blog and their fab guest designer, Linda Cain.

Notebook for Chris


Yesterday was Chris's birthday and a while ago I made her this cute little notebook baring the Stampotique character Gibi.


This is the back.  I also managed to get the o wires on the right way round too!!!

Monday, 18 February 2013

Brighten Up Your Day


YAY - Linda Cain is back again this week guesting over at the PaperArtsy blog.  To see the technique Linda used click here.  I used images from the PaperArtsy Hot Picks 1004 stamp plate and to create my white dots I took the end off my new white Dylusions spray and dotted them onto the tag.

Saturday, 16 February 2013

Something Messy


I've allowed myself one last play as I am knee deep in a college assignment which I have to submit before I go on my holidays on Thursday, but I needed a break and Simon Says Stamp and Show are asking for something messy.

I was inspired by both Paula and Helen to create this wooden plaque as I loved the colours they'd both used on recent makes.  I also wanted to play some more with my distress paints, white Dylusion ink spray and of course I my new T!m stamp set.

I'm also playing along with Out of a Hat Creations again with my row of birds.

Friday, 15 February 2013

Locked Up


Over at Out of a Hat Creations this week they are asking for birds and/or butterflies.  I don't normally like birds but for some reason I love the row on the TH plate I recently bought.  I also wanted to use the remaining stamp off the blue print industrial stamp plate.

Using the techniques shown by Helen over on this weeks PaperArtsy blog, this time I chose a different technique and scrunched a piece of crunchy waxed kraft paper, unfolded it and painted it with a blend of haystack, Christmas pudding and Irish cream.  I scrunched it up again and rubbed over it with black stazon to hi-lite the creases.  I stamped the image 3 times and painted the acetate layer with nougat.  The corrugated cardboard strip across the bottom is stamped with black stazon and lightly coloured with Irish cream and added 3 metal buttons.  

Thursday, 14 February 2013

White on White


Both Stampotique and Simon Says Stamp have the theme of white this week.  Simon Says have a photo inspiration picture and I chose to use the bottom right image.

I painted the mdf cog shape with picket fence distress paint (and it covered beautifully in one coat).  I used wow vanilla white embossing powder with the Stampotique journey collage stamp.  I loved the way this looked and really didn't want to cover it up!!

I stamped the Stampotique key keeper and the T!m blueprint key onto acetate, coloured it with snowflake fresco paint and cut them out.  The lock was stamped onto a really thick white vellum and again cut out.

As you can see from the shadows the sun came out, so I am pleased to say the colour is a true reflection.

Something Red


Over at Fun with Atc's they have a theme of something red.  Only something has to be red or it can all be red.

I coloured 2 chipboard sized atc's, one with fired brick distress paint and the other with barn door.  I was pleasantly surprised at how well they covered and only needed one coat.

I stamped the PaperArtsy mini script #44 directly onto the background with red stazon.  I stamped the mini images on the top in black stazon and again onto white card.  I cut them out and coloured them with pan pastels and 3d'd them over the original image.  Stamped the Stampotique splatter in black stazon, used a T!m chit chat sticker and outlined it with a Posca pen.

Wednesday, 13 February 2013

Play Time


Been playing with all sorts of different things whilst sitting in the warm watching the snow come down!!  Used my new TH blueprint stamp set which I stamped twice and cut out the cogs to build it up.  The distress paints are lush, they just blend so well.  They were used to colour the mini cogs and the mini clipboard which holds the stamped cogs in place.  Alcohol inks on the bottom heart which has been covered in silver sticky foil and run through an embossing folder. Bits and bobs to finish it off.

Tuesday, 12 February 2013

New Goodies / Distress Paints


Look what came today, my set of T!m distress paints, the colours are lush.  Haven't had time to play yet, that will have to wait until tomorrow evening.  I also picked up the new white Dylusions ink spray, the T!m mini clipboard set, a set of diffusers and a new and an older stamp plate.

Monday, 11 February 2013

In a Flash


Over at the PaperArtsy blog Helen is back again and she's been playing with the Crunchy Waxed Kraft Paper.  She's showcased loads of techniques which you can find here.

I decided to use the very first one by painting it with nougat and irish cream fresco paints and I scrunched it up.  I then used another of the techniques by rubbing the surface with walnut distress ink and inking it off on another piece of card.

I'd also received my new (to me) T!m stamp plates so I had a play with those too. I stamped the light bulb 3 times, the last time onto acetate and painted the back with nougat fresco paint.  The heart is die cut from the metal card and stamped in black stazon with PA mini #44 script, as is the crown.  The bottom piece of crunchy waxed kraft paper is scrunched up and coloured with onyxite treasure gold.

Friday, 8 February 2013

Texture, Texture, Texture


Over at Out of a Hat Creations this week they are asking to see 3 types of textures in our creations.  I ran the tag through an M-bossibilities circles folder and coloured with purple pan pastels.  I die cut the umbrella man from chipboard and painted him black. For the final texture I cut a piece of honeycomb paper to create the canopy of the umbrella.  I stamped the words, cut them out and coloured them with a blue pan pastel.

So, just to clarify, my three textures are:
  • embossed background
  • chipboard
  • honeycomb paper


Thursday, 7 February 2013

Red, Pink & White


Yes, that does say PINK in the title!!!  Over at Stampotique this week, they have a colour challenge, red, pink and white.  As you can imagine, I don't have much pink but I decided to experiment with what I did have.  This postcard is a blend of magenta and permanent red pan pastels. I used a stencil and an eraser to rub out random circles to reveal the white.  I stamped Daniels hearts in white and then went over them again with a white posca pen.  I stamped Heart Throb onto a separate piece of card, coloured him in with a range of pinks and reds from the distress marker set.  Gave him a crown and some sparkly gems.


I sprayed a blob of dylusions fuschia ink onto the tag and let it drip.  Stamped the string of hearts in blaze red stazon down the left and a swirl bottom right.  The main image, newt with lunch box, was stamped separately and coloured with distress marker pens.


I used raspberry pickle distress stain on these two tags as I swiped it across one, spritzed it with water and placed the second one on top of it and squished them together.  I stamped Daniels hearts in blaze red stazon.  Heart boy was stamped separately and again coloured with distress markers.


And finally I stamped the bla, bla, bla and the splatters with red stazon.  Daniel's tree topper (scary Mary) was stamped on a separate piece of card and coloured with distress ink markers.  She didn't get a crown!!

Over at Simon Says Stamp they have a theme of 'have a heart' so been as though every one of these pieces has a heart, I'm entering over there too!!!

Happy Daze have a theme of 'love is all around' for this months challenge, so I'm entering over there as well!!

Wednesday, 6 February 2013

Fly With Me


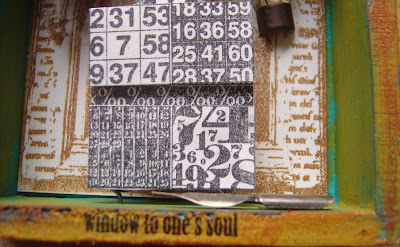
Over at the PaperArtsy blog this week Michelle is back with a wooden house.  I didn't have a house so I used the back part off the shadow box I'd recently done the frame with here.  It was rather spooky actually as I'd used beach hut and south pacific on it just to clean the brush from the frame.  For details of the full technique see here.


Unfortunately I don't have the butternut, so instead I used pumpkin soup, which was my first mistake, I would of been better using haystack.  You see I went for a colour match, when I should of gone for a like for like paint.  Butternut is opaque and has high coverage as does the haystack, but the pumpkin soup is translucent and has low coverage.  Never mind, I'm learning as I go along and I'd already put it on top of the crackle glaze and once it's on, there's nothing you can do, except remember for next time!!  I don't have burnt umber and I couldn't find it in the range either so I used brown shed instead.  It looks nothing like it should, but I'm actually quite pleased with the way it's come out.

Part 2 of the technique shown the following evening, was to actually fill the box and embellish.


The background is from the Urban Snapshot Arched Apertures plate #3 stamped in saddle brown stazon.  I added a light bulb and a cog stuck over a mini spool to give depth.  The letters 'fly' are cut from the T!m Holtz word play die and coloured with baltic blue and brown shed fresco paint.


The main image was stamped twice in black stazon from the ink and the dog, dolls #1 plate.  I mounted the first image onto a couple of idea-ology pins and mounted other parts of the same image over the top to hide them.  I also added a pen nib to the base.


The wings are cut from a Sizzix die and painted in haystack with a light coat of brown shed. Learnt my lesson from above!!


And this is the same piece stood up, but we have had so many weathers today, the lack of light has altered the colours!!!


Monday, 4 February 2013

Traci Bautista


Emma paid a birthday visit to AftH on Thursday to take a journal class with the lovely Kate Crane.  Little did I know that she was scheming and she bought this wonderful Traci Bautista stamp for me. I'd been pondering over ever since I saw it at Stampington.


Using white as the background colour I spray the Dylusions squeezed orange and let it drip.  I stamped the TB image in purple stazon down the left hand side and top right, and just using the scribble for bottom right, I inked up in black stazon.  I edged the tag in seedless preserve distress ink.


I used a kraft coloured tag for this one and coloured it with various shades of pinks, purples and blues in pan pastels.  I used a circle stencil and used white pan pastel, then bumped it with a light blue shade. I stamped in black stazon using parts of the stamp.


And finally I made an atc and used the top script from the same stamp and the background is lightly stamped in purple stazon.  The main image and the bottom text is from the PaperArtsy Wings #2 plate.  The reason for this is because over at the PanPastelUK blog, they have a theme of animals, so I thought the funky chicken fitted in well!!

Have to say that these are lovely stamps but are a bit Dina Wakley-ish, even down to the packaging!!!

Sunday, 3 February 2013

Queen of Hearts


I'm trying to play along with T!m's 12 tags for 2013 and so far this year, I'm keeping up, yes I know it's only the second one!!  Did have a bit of improvising to do as you can see!!  I used a couple of mini playing cards and doodled around the outsides!!

Also over at Anything But A Card they have a theme of 'share the love', and I think this tag fits in perfectly.

And Happy Daze have a theme of 'love is all around' so I'm entering over there as well.

Saturday, 2 February 2013

PaperArtsy Inspired Frame


Gillian has completed this months techniques over at the PaperArtsy Blog.  Check out here for the full technique.  I used a 15 cm square shadow box but took the back off.  I more or less prepared the frame the same was as shown. 

 I used the Crafters Workshop, Antiquities stencil with texture paste.  A mixture of limelight, hey pesto, honey dew and guacamole greens and baltic blue, south pacific and beach hut blues and snowflake and nougat to mix them.

As I didn't have the wood to put in the hole, I used the thick plastic what came with the shadow box.  I stamped the image from the LP #10 plate and painted it from the reverse using the same colours as above.  I stamped the mini script #44 on the frame in baltic blue and used olive bronze, sapphire and renaissance treasure gold to hi-light the texture pasted areas.  I went around the edges both inside and out with a very fine layer of baltic blue. 


I decided that the two pieces didn't combine very well and the face was way too stark white.  So I used black stazon and the mini script stamp again to stamp around the edges of the plastic and the face.  To extend this, I carried it through in a few areas onto the frame.


Still not being a 100% happy with it, I went back to it this morning and added some gems and some white pen!!!


Cracks and Flourishes


I used pewter on the bottom as per Leandra's last comment on my blog, as I agree with her that the metallic paint isn't thick enough to cover the crackle glaze and make it crack.  So I switched them around and did the pewter on the bottom but I didn't want the blue as dark as the baltic blue but Suzz had said that she had used the inky pool and it didn't crack too well either.  So again going with what Leandra suggested, I mixed a drip of baltic blue with lots of snowflake to make a lighter baltic blue!! It worked out prefect.  I sanded it back and honestly you can't believe how smooth a surface it leaves.  Then I took my PaperBag Studios stamp and my PA flourish from the Squiggly Ink, swirls and curls #6 plate, as over at this weeks Fun with Atc's they have a theme of flourishes.  I stamped them in black stazon.  I placed mini black gems on the end of each swirl.

For full explanation of the technique check out the PaperArtsy blog here.

Friday, 1 February 2013

I Have Wings


This is Suzz's last technique to share over at the PaperArtsy blog.  I opted for the technique of the first atc as it was my favourite, so hop along and check it out here.

My pewter didn't crackle properly, I don't think I shook the bottle enough as it was a bit watery, but once you've put it on there's nothing you can do!!!  So I went over it with a bit of white.  But the baltic blue with the pewter underneath cracked beautifully as you can see from the panels on the left and the butterfly on his head.  I used the Ink and the Dog Wings #2 stamp plate.

Red, Green, Black & White


Over at Out of a Hat Creations this week they are asking for a set of 3 Atc's with any theme but each must incorporate the colours red, green, black and white.  

Now mine look like orange and yellow but they really are shades of red and green.  I used the fresco paint colours, claret, London bus (which is obviously red!!),  guacamole, hey pesto and limelight (being the greens).  I stamped the LP images onto acetate and coloured the backs of certain areas in snowflake fresco paint.  I over heated them which caused the acetate to warp and curl, so they had to be stapled with T!m's mini attacher!!!  I added text from the script stamp using black and red stazon.  Finally I added circles in snowflake paint and doodled with the white Posca pen!!


Blog Archive