Showing posts with label Craft / Solder Tool. Show all posts

Tuesday, 15 December 2020

Egyptian Pharaoh Sculpture


Been making big circles again with my cutter.


I cut one of them into quarters.


Using my solder tool I made some marks in two of the pieces.


Used up the blue powertex I mixed for the bauble on two pieces and did the other two pieces in black powertex.


Then I toned them down a bit.


Next I secured the two lots of pieces together with wire and started to build up the bottom pieces and coloured it until I was happy with it.


And here it is finished and mounted.

Wednesday, 21 October 2020

Polystyrene Sculpture


Using up some more of the polystyrene, I cut the above piece in half.  Coated it in the remainder of the grey powertex from the skulls.  Once dry I added crackle paint and fibre paste to the left side piece and tar gel to the right piece.  I left it overnight to dry, then used my soldering tool to make the holes and finally I coloured it up until I was happy with the result.

Saturday, 9 July 2016

Open Doors


Over on Mini Marvel FB page we have a swap of fabrics, as the brief wasn't up before I made this I'm hoping I can use it. The image was stamped and transferred onto a piece of cotton scrim, next layer is a used baby wipe, next a piece of tulle and finally all onto the cerise felt.


I stitched the piece of wool all the way around the image to hi-light it and to hold everything together.


Once everything was secure I took the heat tool to it and singed the layers. And finally took my burnishing tool and melted some of the felt.

It measures approx 5.5" x 4.75".


Saturday, 30 April 2011

FP Pellets & Ooze


I've been having a play with the FP pellets today.  They look like frogspawn when they are all melted and they all stick together!!  They are clear when you pick them out the hot water and can be coloured with AI's.  I used meadow on the first layer of this piece and then stream on the outside layer.  The stream is usually a very vivid blue but it really does take a lot to colour them.


The inner piece is pellets and coloured with ginger AI, but it's way too thick.  I should have rolled it out more.  The outside piece is the burnt orange from the foiled strips. You can see the difference in colour!!!


Bottom right is pellets coloured with stream AI, again too thick.  The other five pieces are from the foiled strips and have had the ooze technique used on them.  I cut the bottom left with an 's' shaped cookie cutter, but decided to leave it in the square.  If you enlarge the picture you can see the ooze just coming through in the shape of an 's'.

Sunday, 24 April 2011

Friendly Plastic Peel Off Box


I've always wondered how this was done.  A box made with friendly plastic and my pet hate of the craft world 'peel offs'.

Well last weekend when I took Liz's class, she shared the technique with me.  It's so simple when you know how!!!


I was quite impressed how it all came together, no glue, just constructed by heating the plastic.


This is the lid.  I ran out of black FP so used silver around the edges and black peel off dots.  The handle is made using the smaller piece of tubing from the tubead kit on the previous post.


I have to say, I was totally amazed when the lid actually fitted snuggly onto the box.   This is the other side of the box.


This is the inside of the lid.  I lined the top with green organza/chiffon type fabric.  I didn't do all the sides though.


I did the same inside the box and lined all the sides and bottom with the same green fabric.

Tuesday, 19 April 2011

FP Bowl


This is my first attempt at a free form bowl using the FP.  I was quite pleased with how it came out although I should have made it bigger before I moulded it in the bowl shape - live and learn!!!  I then soldered the organza backing onto it and melted away the excess from around the edges.  I've had to put it on the black backing so you can see it!!!

This actually started off as the front of my book cover on Satuday...hmmm...how things change - lol.

Wednesday, 20 October 2010

Shades of Green


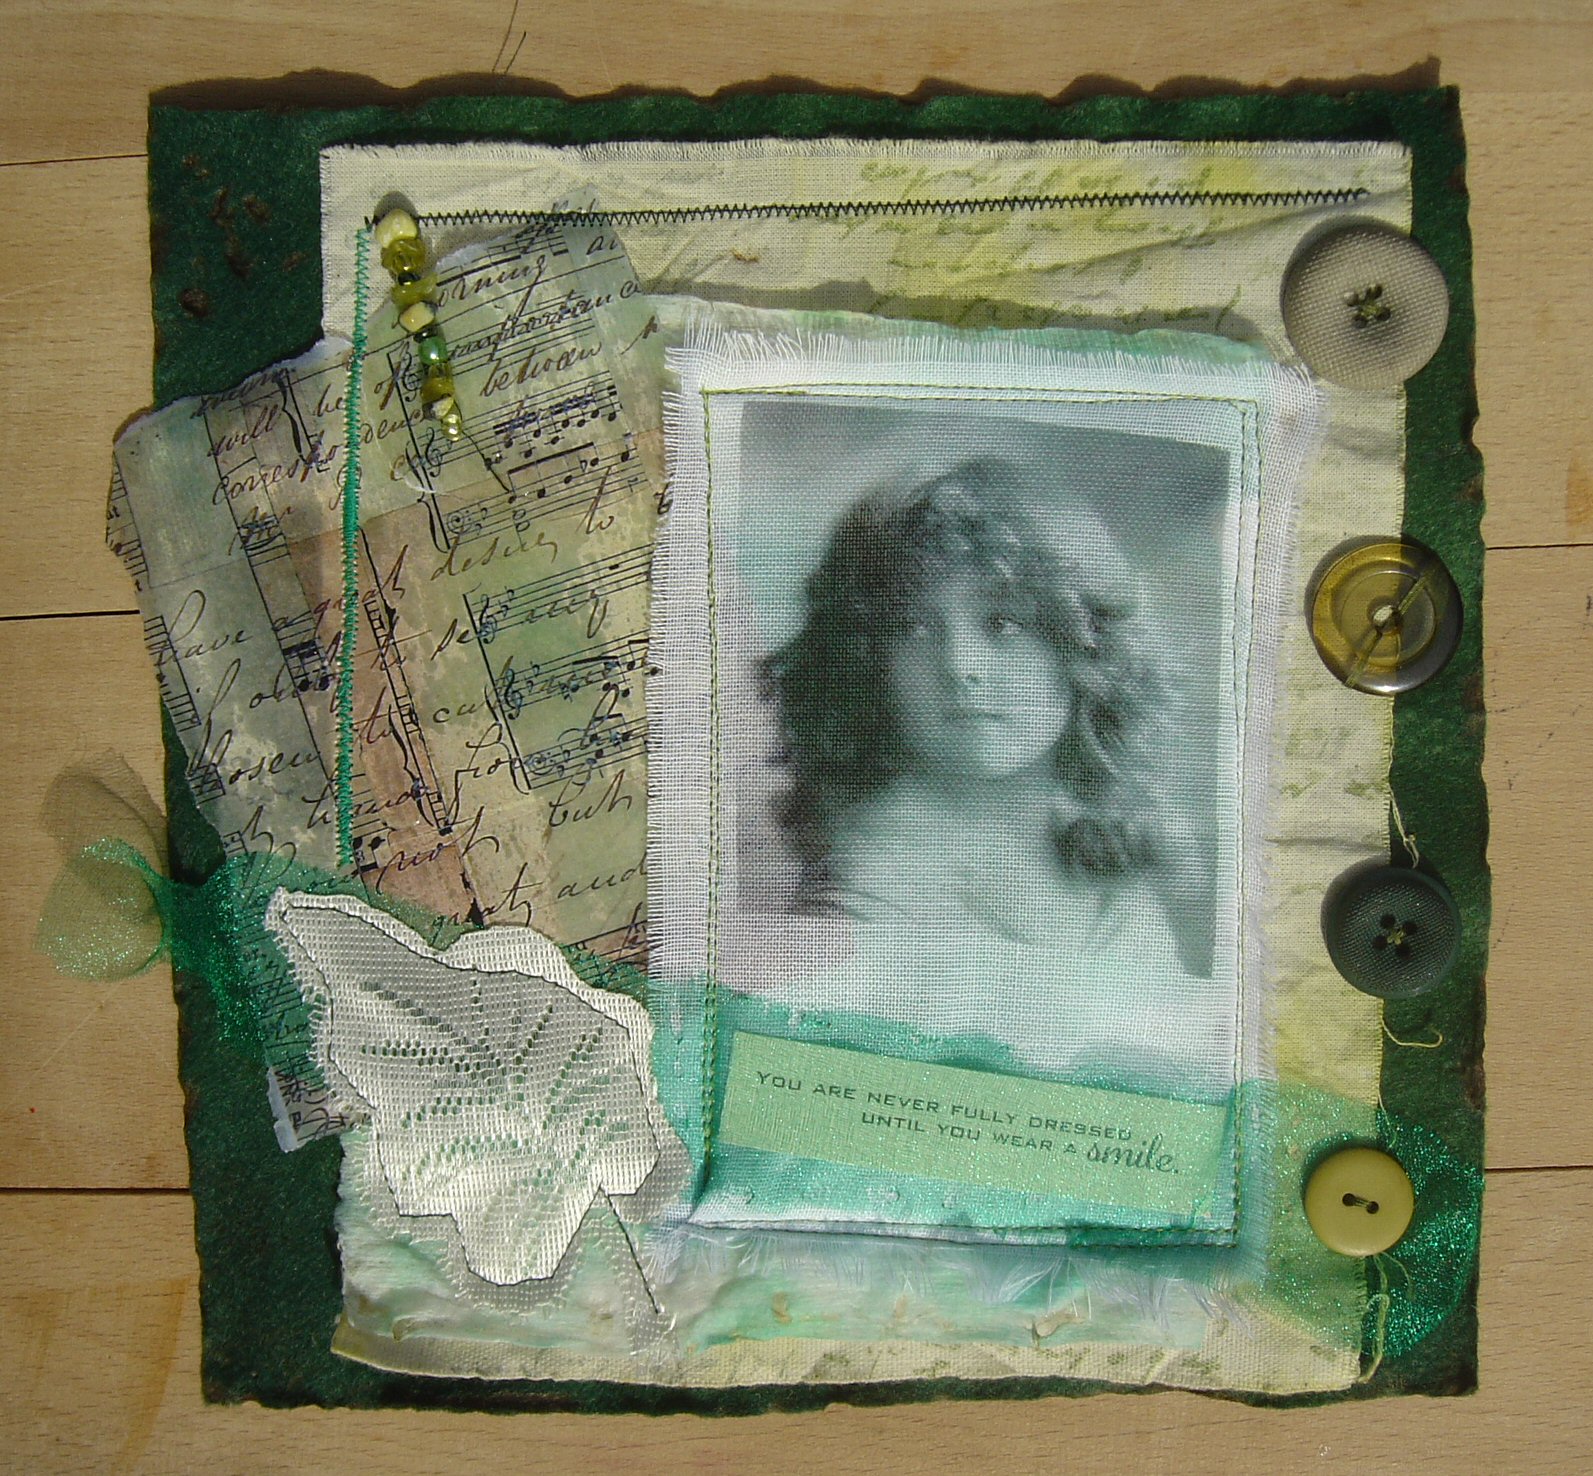
I made this for my friend Kath aka LazyKay as it's her birthday today.  Like me, she is a worshipper of green.  Unfortunately, the felt is of the type that doesn't burn properly, so it's just gone brown around the edges and I tried to burn holes in the top left hand corner, but without success, again another brown patch!!!  Hope you like it Kath - Happy Birthday xxxx

Saturday, 2 October 2010

Fabric Postcard Swap


I have signed up for a 1 x 1 fabric postcard swap on one of the yahoo groups I've recently joined.  You swap directly with your allocated partner.  As I'm quite new, I don't know my swapee so I hope they like it.  The image is coated in ice resin and mounted onto a piece of felt.  The left hand side has been filled with beads, buttons, threads, ribbons, fibres and sequins.  Tulle has been covered over the top and it has been machine stitched to capture the pieces and keep them in place.  The organza on the right has been subjected to the heat tool and some of the felt has been singed. A piece of ribbon was added to the left and a string of beads to the right.

Wednesday, 25 August 2010

Pockets of Secrets


The base is a piece of dark brown felt but it must be of a different fabric mix as it didn't burn very well, it was from Boyes and the pieces from The Range are certainly much thicker and singe much better. There is a piece of batting next to give it some spring and padding, then I laid on a piece of cream frayed scrim.  The image is another ice resin piece and was sewn on with the machine with a piece of chocolate organza over the top.  I left the top open to insert the wire hanger.  Once this was in place I put fibres, wool, threads, sequins, beads and buttons on the opposite side and sewed in 3 little pockets to house all the bits. I printed the word 'secrets' onto a piece of scrim, padded it out with a bit of stuffing, sewed around the edges, frayed the right hand side and then sewed some lines into it and sewed it onto the bottom of the felt. I finished by adding beads to the hanger. Pity that the felt won't burn any more as I wanted it to have a more distressed look, but never mind.

Monday, 23 August 2010

Under my Umbrella


Again the main image is an ice resin piece.  As you can see there is a bit of white still left on it, that's where I haven't quite covered it properly.  As it was my first attempt with it I think it's ok.  The image is suspended in the frame and attached with the buttons!!!  The buttons are attached to the image and the felt.  The felt is wrapped round the wire frame and sewn with embroidery thread.  The backing materials, duck egg scrim, chocolate tulle and burgandy felt were all attached with the buttons.  Using my craft tool I melted the edges and burnished a few holes!!!!

Sunday, 22 August 2010

Alter it Monthly


I discovered this challenge site, Alter it Monthly, via Zoe, so thanks Zoe.  This will be the first time that I've entered anything so I'm hoping this piece will qualify as the theme is 'music' and the background of this piece is from a sheet of music.  I covered it in ice resin, along with the main image.  Ice resin makes the paper transparent (ish), with like a greasy sticky look, although it isn't (once it's thoroughly dried out). I made a small frame from green wire, suspended the image inside it.  Sewed the frame onto a piece of red velvet and white frayed scrim. These were then mounted onto a piece of burgandy felt which has been subjected to the craft tool for a singed effect. I also burnt the holes the ribbon is threaded through with it too.  I then mounted everything onto a piece of ice resin music paper and added a couple of eyelets.

Heart felt


This piece is made up of all leftovers from previous projects.  I basically just stacked them all on a piece of felt and placed a piece of tulle over the top.  Randomly sewed all over the piece, used the heat gun, then went back in with the textile tool and burnished some random holes.  I added the felt heart and the beads to finish.

Wednesday, 18 August 2010

Finders, Keepers


I love this piece, not only for the colours but the range of materials used.  I transferred the images onto the white cottom scrim.  The next layer would you believe is a thick dishcloth which I painted with magenta and plum silk paints which I picked up at The Range at the weekend.  Next is a layer of lilac tulle and finally a layer of burgandy thick felt (again from The Range). I sewed all the layers together using a straight stitch and went over it with a zig-zag stitch.  I added the piece of fibre around the edge using the widest zig-zag stitch.  Using my craft tool I burnt away some of the felt and tulle.  If you try this, make sure you are in a well ventilated room, as it really does give off some fumes.

Wednesday, 11 August 2010

Follow your Heart


Using another piece of hand dyed fabric I stitched on a couple of panels which had also been dyed with the same colours of eco-line inks.  The heart shape is the centre out the previous piece and I hand stitched the blue embroidery thread around the outside but machine sewed the heart to the background fabrics.  I hand sewed the beads and sequins on the fabric mesh panel.  On the right hand side there is a pink piece of organza which I slightly singed.  The words on the twill were printed on the computer and attached just at one end.

Saturday, 24 July 2010

Postcards with Stitches


I stitched this piece of hand dyed vilene which I'd previously burnt into with my textile tool and a brass stencil.  I used straight stitch first and went over it with a tight zig zag.  I left the threads long in the bottom right hand corner so that I could add some beads and sequins.  Thanks once again to Jo for this fab tip, hope I've done it ok Jo!!!!!


Again this piece of canvas is another that I'd already prepared.  I stitched it on with straight stitch going round it twice.  I added the piece of fibre down the side using a large zig zag stitch.  I was quite pleased with how this bit turned out as I've not done it before and didn't know if it would work or not. I usually stick them on first.  Again I left the bottom piece quite long to attach some wooden beads.

*****Edited***** I've entered this piece into this weeks Tuesday Taggers Challenge which is Canvas.  It is being sponsored by Art from the Heart.  Good luck everyone.


This piece is made from Angelina fibres with feathers, a skeleton leaf and wool fibres trapped between two layers.  I secured it around the edges using straight then tight zig zag stitch and randomly used a straight stitch to secure it further.  I used metaillic thread for the first time too.

All the backgrounds were brayered with ink from the big n juicy waterfall pad by Ranger.

Sunday, 13 June 2010

Vilene Etching


I'd already dyed a piece of vilene interfacing with various colours of distressed re-inkers.  I low tack taped a brass stencil to the piece above and using my heat textile tool melted away the sections.


Here I've just put it behind a piece of coloured card so you can see the effect better.

Etching on canvas


I had a play with etching into painted canvas with my heat textile tool. I tried all of the interchangable ends to see how they performed!!  The best one was the fine pointed one.  The thicker the paint, the harder you have to press and the slower you have to drag the tool.


Using canvas sheets, I printed some images, tore them to give ragged edges, painted the edges and used the heat textile tool to create the patterns

Saturday, 6 June 2009

Lotstodo Week 23 - Charms


I made these 2 charms with my crafty tool which can also be used as a solder iron. They are only my first attempts, so I will keep trying. It's very fiddly and quite awkward as you have to use your left hand quite a bit, or right if you're a leftie!!!!

Thursday, 14 May 2009

Been Playing Again!!!

I've been playing courtesy of Lorraine at UkStampers. I wanted some 'Lutradur' but couldn't find any in small quantities, so she suggested that I try tumble dryer sheets instead, so I did. I bought the cheapest ones I could find, 94p from Asda.
I then used my new craft tool to burn shapes and patterns into it. Obviously this is just a practise piece to see what happened, how much pressure to apply etc. As you can see, some bits I managed to burn!!!
I then sprayed with sheet with watered down distressed re-inkers

I will get around to doing a proper one, one day!!!!

Saturday, 9 May 2009

Lotstodo Week 19 Challenge - Stripes / Lines


Sue, this one is especially for you, pink and flowery!!!!! The canvas was coated in bees wax. The napkin was soaked in the melt pot directly in the melted beeswax, pulled out and laid on the canvas. I used my new tool with the small iron shaped extension to re-heat the wax to adhere it to the canvas, smoothed it out with the flat surface and added a piece of ribbon. It doesn't show up very well on the picture but there are lots of different shades of pink stripes behind the flower and on the right there are stripes too - you just have to look closely!!!!

Blog Archive