Showing posts with label Powerwax. Show all posts

Friday, 29 January 2021

3d Flex & Powerwax


I created a mix of 3d flex and powertex and created a heavy paste, spread it across the mdf shape and let it dry.

Once dry I used pigments and powerwax to colour the paste. Once I was happy I covered the whole piece in a layer of powerwax, let it dry and then gave it a buff with a clean cloth.

I then used my gilding paste to create a pattern.  Once I'd left it to dry for about an hour I then used gold foil to cover the paste and finally I went around the edge in gold pen.

Wednesday, 23 September 2020

Sumo Geisha Figure


Martin made me a two pronged wooden base and I started to create my figure with a polystyrene ball for the body, tinfoil, bubble wrap and masking tape.


The head and hands are Powertex plaster pieces.  I then created the legs and roughly decided where I wanted the top and bottom colour to meet.


I mixed yellow powertex with 3d flex to make a clay and then covered the bottom part of the figure.  I didn't make enough to do the legs as well, so I left them for now.


I also stamped into the clay and left it outside in the sun to dry and crack.


I made up some more yellow and covered the legs, then made some red.  This time I made far too much red, so ended up giving her a red hat too.  But I cling filmed the neck to keep it clean.


Close up of the red crackle and the stamping.


Drying and cracking out in the sun again.  Martin came home and told me it looked like Ronald McDonald!!!


So using pigments and powerwax I changed the colours.


I also painted her nails.

And her face, and gave her some hair.


Close up of the back with the blue over the red.


And the bottom is more of a blend as I added orange to the yellow.

Saturday, 22 September 2018

A Rectangular Glass Bottle


I found this great shaped empty glass bottle in a recycling box. I covered it in masking / paper tape and painted it with black Powertex.


Once it was dry, I added some stencilling to all the sides using black modelling paste.


Front


Back
 

Once the stencilling was dry, I added a skull, gluing it on with the black Powertex.


Using iridescent pigments, I dry brushed the bottle.


The back, where you can now see the skull stencil.


The side with more skulls.


I used acrylic paint to paint the skull on the front.


Tilted so you can see the colour wave better.


And this side has numbers stencilled on it.


I just need to find a candle to stick in the top and it'll be ready for Halloween.

Sunday, 19 August 2018

Cracked Vase


Remember the pot vase that I picked up at the car boot?


I gave it a coat of prussian blue paint.


Then I mixed up some 3d flex, ivory powertex and a bit of water to create the mix to spread on the to make the cracks.


I mixed up batches at a time, so I wasn't left with way too much.


I used a pallet knife to spread the mix on this side and it created lovely large cracks.


And when I applied it to this side I used my hand to press it onto the vase. As you can see it's still created cracks, but in a different way.


I coloured it using lots of different mediums. Firstly I sprayed it with Dylusions inks in orange. Then used golden hi-flow inks in napole red and quinacridone red and finally once it was all dry I used the Powerwax mixed with ginger and peach pigments to cover all of the vase.


And this is the other side. I also painted the neck and bottom with black paint.


Close up of the side that was applied with a pallet knife.


Close up of the other side applied with my fingers.

***Edited***


When I went for a walk with Fraz this morning, I picked up these dried poppy pods that had broken off and were lying on the pavement.

Sunday, 5 August 2018

Powertex tags


I had some Powertex left in my tray, so I grabbed three little tags to use it up.


I coloured the left one with bisters, the middle one with hi flow inks and the right one with acrylic paint.


Then I played with pigments and the Powerwax until I was happy with what I had, adding and removing colours as I went along.


Once I'd decided I was there, I left them a couple of hours to dry in the sun and then did some dry brushing over the top with the ivory Powertex.


Close ups of the dry brushing with the ivory Powertex. I think they came out pretty good and I have no preference over the different mediums I used, it just depends what effect you are going for.

Friday, 3 August 2018

Canvas Colours


Having been to Pramoda Gifts last Friday and playing with the Powerwax, paints, inks and pigments, I decided I needed to change the colour of my original canvas that I made at the Powertex garden party as it was a bit on the pinky / purple side.


And this is what is looks like now. I went down the orange route with it. And after the rain of last weekend, the grass is now green again too!!


Think you can see the shimmer better on this one. 


A close up of the fabulous cracks. Loving the Powerwax.

Monday, 30 July 2018

Powertex Canvas's Update


So following on from my play day workshop at Pramoda Gifts with Marina (Powertex tutor) and Kath on Friday, I spent most of Saturday adding more colours to the sample canvas (middle left).


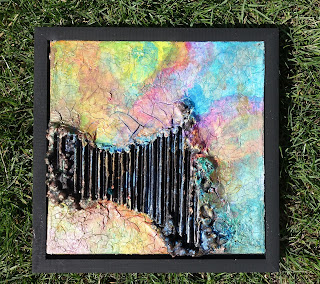
And even though it has every colour under the sun on it, I really, really like it.


So then I set to and added some more to my set of canvas's. We've had rain for the last four days and the grass has come back green again!


I painted the frame black for this canvas board and now it looks even better.


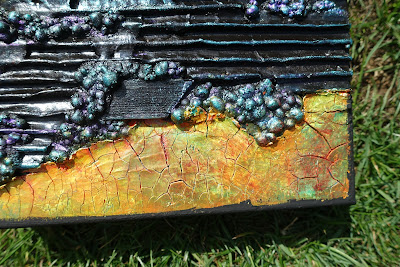
Close up of the crackle and additional layers of colours.


More red added to give depth in the cracks.


And the same here but with a deeper orange.


I also put some red over the green and orange on the middle canvas. 


This one is quite light, but it's meant to be as I was taking the colour off with the neat wax. 


I'm really pleased with how the colours have blended, now to find somewhere to put them all.


Blog Archive