Showing posts with label Water Soluble Crayons. Show all posts

Wednesday, 17 January 2018

Tags & Atcs


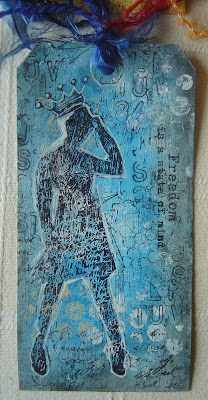
Had a play with some backgrounds today and made these tags. I coloured the images with my zig pens which I haven't used for a while.


A couple more with Lynn Perrella Paperartsy stamps and a compass stencil I bought ages ago but hadn't used until now.


And finally a couple of Atc's. I cut the Teesha Moore boy with the hair image in half and used one for each atc.

Tuesday, 16 January 2018

Button Eve


Using the fabulous ARTZONE stencils designed by Deb Wainwright I created this piece. The background has been coloured with red, orange and yellow Decoart premium acrylics, applied with a babywipe. I used blue twister crayola crayon through the essentials 1 and outlined the boxes with white crayon and smudged them. The main image, Eve, was stencilled with black Decoart modelling paste. I added two buttons for the other eye.

All the stencils (and more) can be found in Debs online shop here. If you get chance, please pay a visit. They retail at £5.75 and are excellent value. They are made from a very robust material and because of this they are very to use and also easy to clean. They are also very versatile as they can be used either way.


Saturday, 13 January 2018

Boho Jane


Using the fabulous ARTZONE stencils designed by Deb Wainwright I created this piece. The background has been coloured with magenta, orange and yellow Decoart premium acrylics which I applied with a babywipe. I used carbon black through the Boho Jane stencil, which is from the first release. I coloured in using twisted crayola crayons and added buttons and fibres to embellish.

All the stencils (and more) can be found in Debs online shop here. If you get chance, please pay a visit. They retail at £5.75 and are excellent value. They are made from a very robust material and because of this they are very to use and also easy to clean. They are also very versatile as they can be used either way.

Saturday, 24 December 2016

A Couple of Quick Pages


A couple of quick journal pages as I fancied a play been as though all the food shopping was done yesterday.  This page is just literally panels of pictures because the page was mostly black around the top half because of what was on the previous page, so I needed something to cover it up. Still enjoyed putting it all together though.


And this page is made up of magazine pieces and printed pages. As you can see I attempted some lettering as I've not done any for a while.

That's Crafty have an anything goes challenge for the last one of the year, so I'm entering these pages.

Tuesday, 12 April 2016

Tag Playtime


Well as it was chucking it down all morning, I decided to do something I've not done for a long time, play with some tags!


The backgrounds are mainly Crayola Twist Stiks but they don't blend very well and need 'help', so gesso was applied to the tags first which helps them move across the page better.


Close up - stamping with inks and chalky paints.


And pretty much the same thing for this one, just stamped until I got the look I wanted. I added some white pen work to this one.

Friday, 25 March 2016

Crayons


This piece of card has had everything thrown at it. I started off trying out my new to me Target water soluble crayons and Crayola Twist Stix and I was going to throw it away. Instead I gave the whole page a thin coat of neon orange acrylic paint. Next I watered down a purple and painted that on. Once dry I added black media mist, followed by magenta and finally white. This made it quite pale, so to bring it back to life I stuck a couple of fingers in the pot of turquoise Dylusions, smeared it around a bit and then did exactly the same with the lime. I also wanted to try some of the new wooden stamps I brought back, so I inked them up in black stazon and randomly stamped. Lastly I added stencilling with white chalky paint. I told you I'd thrown everything at it.


I cut the A4 card into 6, decided which way up I wanted them and mounted them onto a small card. Next I went in with black and white sharpie pens and added lines and doodles.


I added a happy birthday sentiment to half of them, the other half I've left blank to add to when I need to.

The finished cards measure 4" x 4".


Blog Archive