Showing posts with label Primary Elements. Show all posts

Sunday, 28 May 2017

Fiorella - Little Flower


Last weekend when I went to my mosiac workshop at Pramoda Gifts, Marina very kindly let me look through her Powertex books.


One of the books had a lovely figure in it and all I could really remember is that it was green. Phill very kindly described it to me so I thought I'd give it a go.


So first of all I made some air dry clay heads from moulds. On the bottom two heads I actually added clay to the back and rounded them off so they were 3d and not flat.


I set to making a couple of figures. The one on the left is made from a wire armature and then padded out with tin foil and covered in masking tape. The one on the left is primarily made from a piece of polystyrene and then some tinfoil at the bottom to create the lower body shape. I fixed the one on the left onto a wooden meat hammer, but I sawed the handle in half and stuck the other half onto a piece of wood to create the right hand base.


To create some texture, I mixed up some Powertex and Stone Art to make some clay. Then randomly spread it over the two figures and put it outside in the sunshine to dry.


Once dry I gave them both a coat of bronze Powertex, I applied it with a paintbrush as I didn't want to absolutely soak it. I set it aside for a few minutes and then sprinkled the Stone Art on the top and just kept turning it and sprinkling and let the excess drop off. Once I'd gone around the whole figure I lightly rubbed in the Stone Art, rubbed off the excess and left them to dry overnight.


This morning I took them outside and brushed off the excess with a paintbrush and you can see the lovely texture it has left.


They are now ready for the heads to be put on and the next stage.


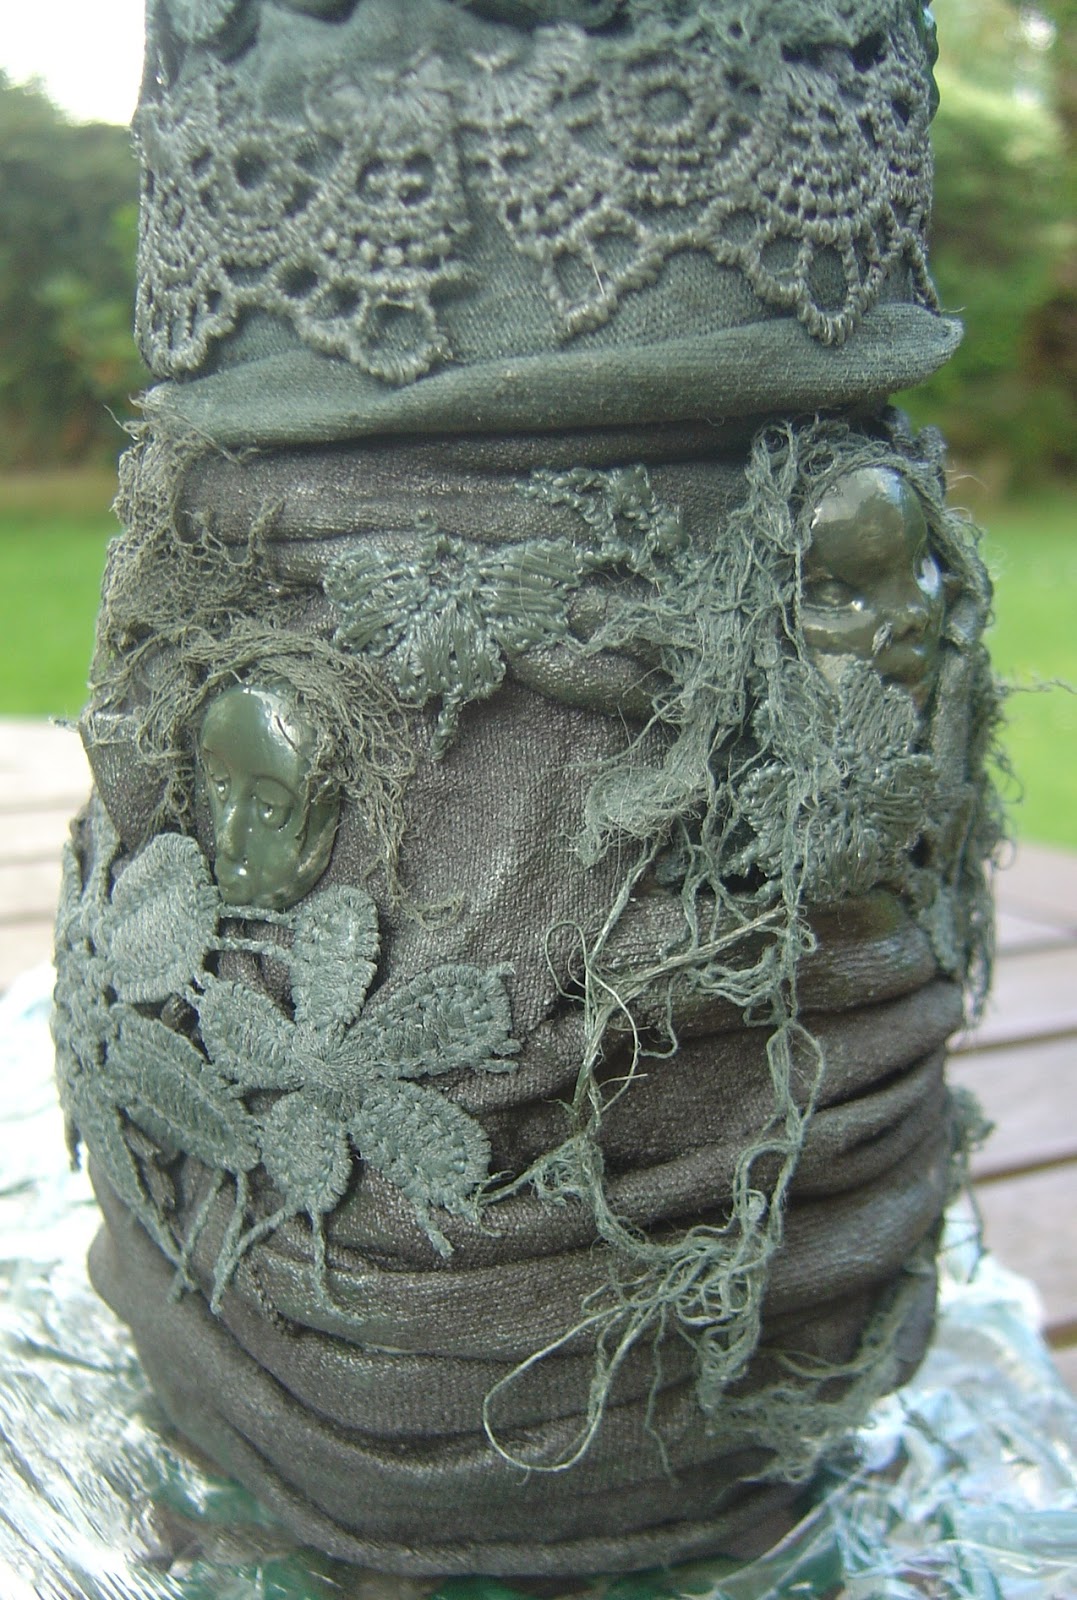
Heads attached and Powercotton added for yet more textures.


Another layer of bronze Powertex and back in the airing cupboard to dry as it was way too windy today to put them outside.


Totally dried this morning, but I feared I'd made a grave mistake giving them a coat of Powertex, I wasn't really that happy with them at all.


Anyhow I persevered, I coloured the left hand one with the red power colour pigment. I didn't dry brush as I wanted to cover most of the figure. And the right one has a mix of power pigment green and moss green and from the primary elements pigment range, moss agate.


Next I dry brushed them with the rich gold and the bronze gold pigments.


Rich gold against the greens, however unfortunately you can't really see it.


And I used the bronze gold with the red, but again, you can't really see it.


So I brought them back inside in the hope that you can see the colours better.


And now I really love how they have both turned out, just wish I could get a better photo to reflect the colours.


And finally the reason for the post title, this is what the figure is titled in the book. The book is written in another language and apparetly 'Fiorella' is Italian and it's a girls name. When translated it means 'little flower', so I wanted to share with you my two little flowers.

Thursday, 22 September 2016

Rainbow Goblin House Experiment


I made another house, this time from a jam jar.


I used up the remainder of my black Powertex so had to add some green to it.


I added some air dry clay and fimo clay faces.


Some lace and cotton scrim.


Flowers and powertex cotton threads.


T-shirt fabric used to cover the base of the jar.


Close up of the base of the jar.


And the same for the lid.


Now for the experiment. I want to put this piece outside for a few months to see what varnishes are totally weather proof. The soft and reg gel are by Golden and the soft touch, satin, gloss, ultra matte and matte med are by DecoArt, the rest you can see. I paired them up with either a primary element or a perfect pearl pigment.


So here we go, I've placed the lid on with the head towards where I started the cycle. I started with Golden soft gel with wild plum primary elements, the second was Golden matte medium with autumn skies primary elements.


Then I moved onto the Golden regular gel and deep coral primary elements. followed by Americana Decoupage matte with ginger peach primary elements.


Followed by Americana Decoupage matte with ginger peach primary elements.


The next one didn't work too well and when mixed became watery and frothy - Mod Podge Dimensional Magic mixed with kiwi perfect pearls. It didn't cover over the face either.


The next combination is DecoArt media soft touch varnish and royal orchid primary elements, followed by DecoArt media matte medium and yellow ochre Powertex pigment.


DecoArt media ultra matte varnish and true blue primary elements.


And the final strip, DecoArt media gloss varnish with spiced pumpkin primary elements.


And I completed the set by using the remaining two varnishes for the roof. On the left side we have Americana Triple Thick Gloss Glaze with green patina perfect pearls and on the right DecoArt Media Satin varnish with moss agate primary elements.


A close up of the base of the pigments over the fabric.


And another close up of the pigments over the flower embellishments.

I now have to wait 3 weeks before it can be placed outside and start the experiment. This is because the Powertex only becomes waterproof after 3 weeks of drying time.

Watch this space!!!

***Edited***


Three weeks have now passed since I blinged up my goblin house and so today I put it outside the garden in the boarder and my intention is to leave it out there for at least 3 months to get really weathered, then bring it back in, inspect it and report on which pigments and varnishes survived and which, if any, didn't!!

Friday, 26 August 2016

Hochanda Ghoul


Having watched Tracey Evans on Hochanda I made a ghoul using a Wilkos meat basher, a clay skull from a mold, tinfoil and masking tape to get to the above stage.


This was him having been given the black Powertex treatment using lots of different fabrics including t-shirt material, lace, ric-rac and power cotton. 


Here he is outside after being in the airing cupboard all night. Now at this point I was going to wait before I coloured him.


I'm visiting a shop in a couple of weeks that carries the whole Powertex range, so was going to get some more of the pigments, but............


I couldn't wait that long so out came the Ranger Perfect Pearls, the Primary Elements and the DecoArt satin varnish. 


I really can't believe how dull the colours look even though the sun is out, but IRL they are really vibrant, I love him.


Front view, I used about three different colours of blue to give him a bit of colour.


I did the hat in heirloom gold perfect pearls and also gave his face a light brushing with it too.

Thursday, 25 August 2016

Powertex, Pigment and Varnish Experiment


I conducted an experiment to see if the primary elements pigments when mixed with various varnishes would stand up to outside weather, mainly rain on a piece of Powertex conditioned fabric which was more than 3 weeks old.


I put the piece of fabric in the border and waited for it to get rained on. After about two hours it was wet and the water just sat on top. I tried rubbing the pigment whilst it was still outside in the rain on all 3 strips and nothing happened, it just stayed where it was.

So I brought it in and absolutely soaked it under the tap and scrunched it to screw out the water. Again I tried rubbing and nothing happened. I dried it with a heat tool.


This is the same piece recycled and dried. On this photo the colours don't look as vibrant as they did before I started the process, but that is because it's still raining and it's got darker, I can confirm that IRL it is exactly the same as it was when it first went outside.

Result, Americana Triple Thick Glaze, Folkart Textile Medium and DecoArt Media Satin Varnish are all waterproof when mixed with primary elements pigments and adhered to Powertexed fabric. 

*** Edited***


This was taken just now (next day) in the sun and as you can see it's as good as new.

Monday, 23 November 2015

Powertex Canvas 2


This is the second disaster piece from yesterday and like I said, I just couldn't get it to do what I wanted and this is how it dried eventually in the airing cupboard.


As I mixed up way too much red pigment for the previous piece, I used it again on this one just to see if I could bring any of the texture out even though it's not highly textured, in fact, it's very flat.


To give a bit of contrast, I also added some renaissance treasure gold, you can't see it very well on the photo, but it is there.

Blog Archive