Showing posts with label Image Transfer Technique. Show all posts

Sunday, 30 December 2012

Topaz Postcard


I decided to make a postcard using topaz colours which I've interpreted as orangey browns, as the Out of a Hat Creations challenge of birthstones is running for 2 weeks over the Christmas period.

The background is a piece of core card run through a texture fade embossing folder and then sanded to reveal more of the underneath colour.  The fabric piece was created a while ago and if you want to how check back here.  The flower from the tattered flowers decorative strip was also cut from the core card and assembled using a brad.  A piece of ric rac ribbon was added to finish.


Wednesday, 19 December 2012

Harlequin Canvas


This time I used neat texture paste through the crafters workshop harlequin stencil directly onto the canvas.  


I painted it with limelight fresco paint and hi-lighted areas with aquamarine and sapphire treasure gold.  The word 'dream' was die cut from a movers & shapers die and again hi-lighted with the same colours of treasure gold.  It was backed with a piece of tissue paper coloured with distress re-inkers and 4 green pearly gems added.  The image is a transfer as per yesterdays post.  The small words are from the dark room door set I recently picked up for a fiver, stamped with black stazon, cut out and mounted onto the canvas.

Thursday, 1 November 2012

More Experimenting - Satin Glaze


Whilst at Harrogate and the Dome watching Leandra of Paperartsy demoing an image/photo transfer technique using satin glaze, I was amazed how well they transferred and how quick the process was.  So I bought a bottle and have been having a play.

You need to print from an inkjet printer onto acetate.  I was slightly concerned with this as I have a deskjet printer, but decided to give it a go anyway.  I have since found out that any printer which takes ink cartridges is an inkjet printer, the manufacturers just call them different names.


This is immediately after I've taken the acetate off and they are still very wet.  I was going to wait for them to dry, but me being impatient, I zapped them with the heat tool, which you can do without any harm coming to them.


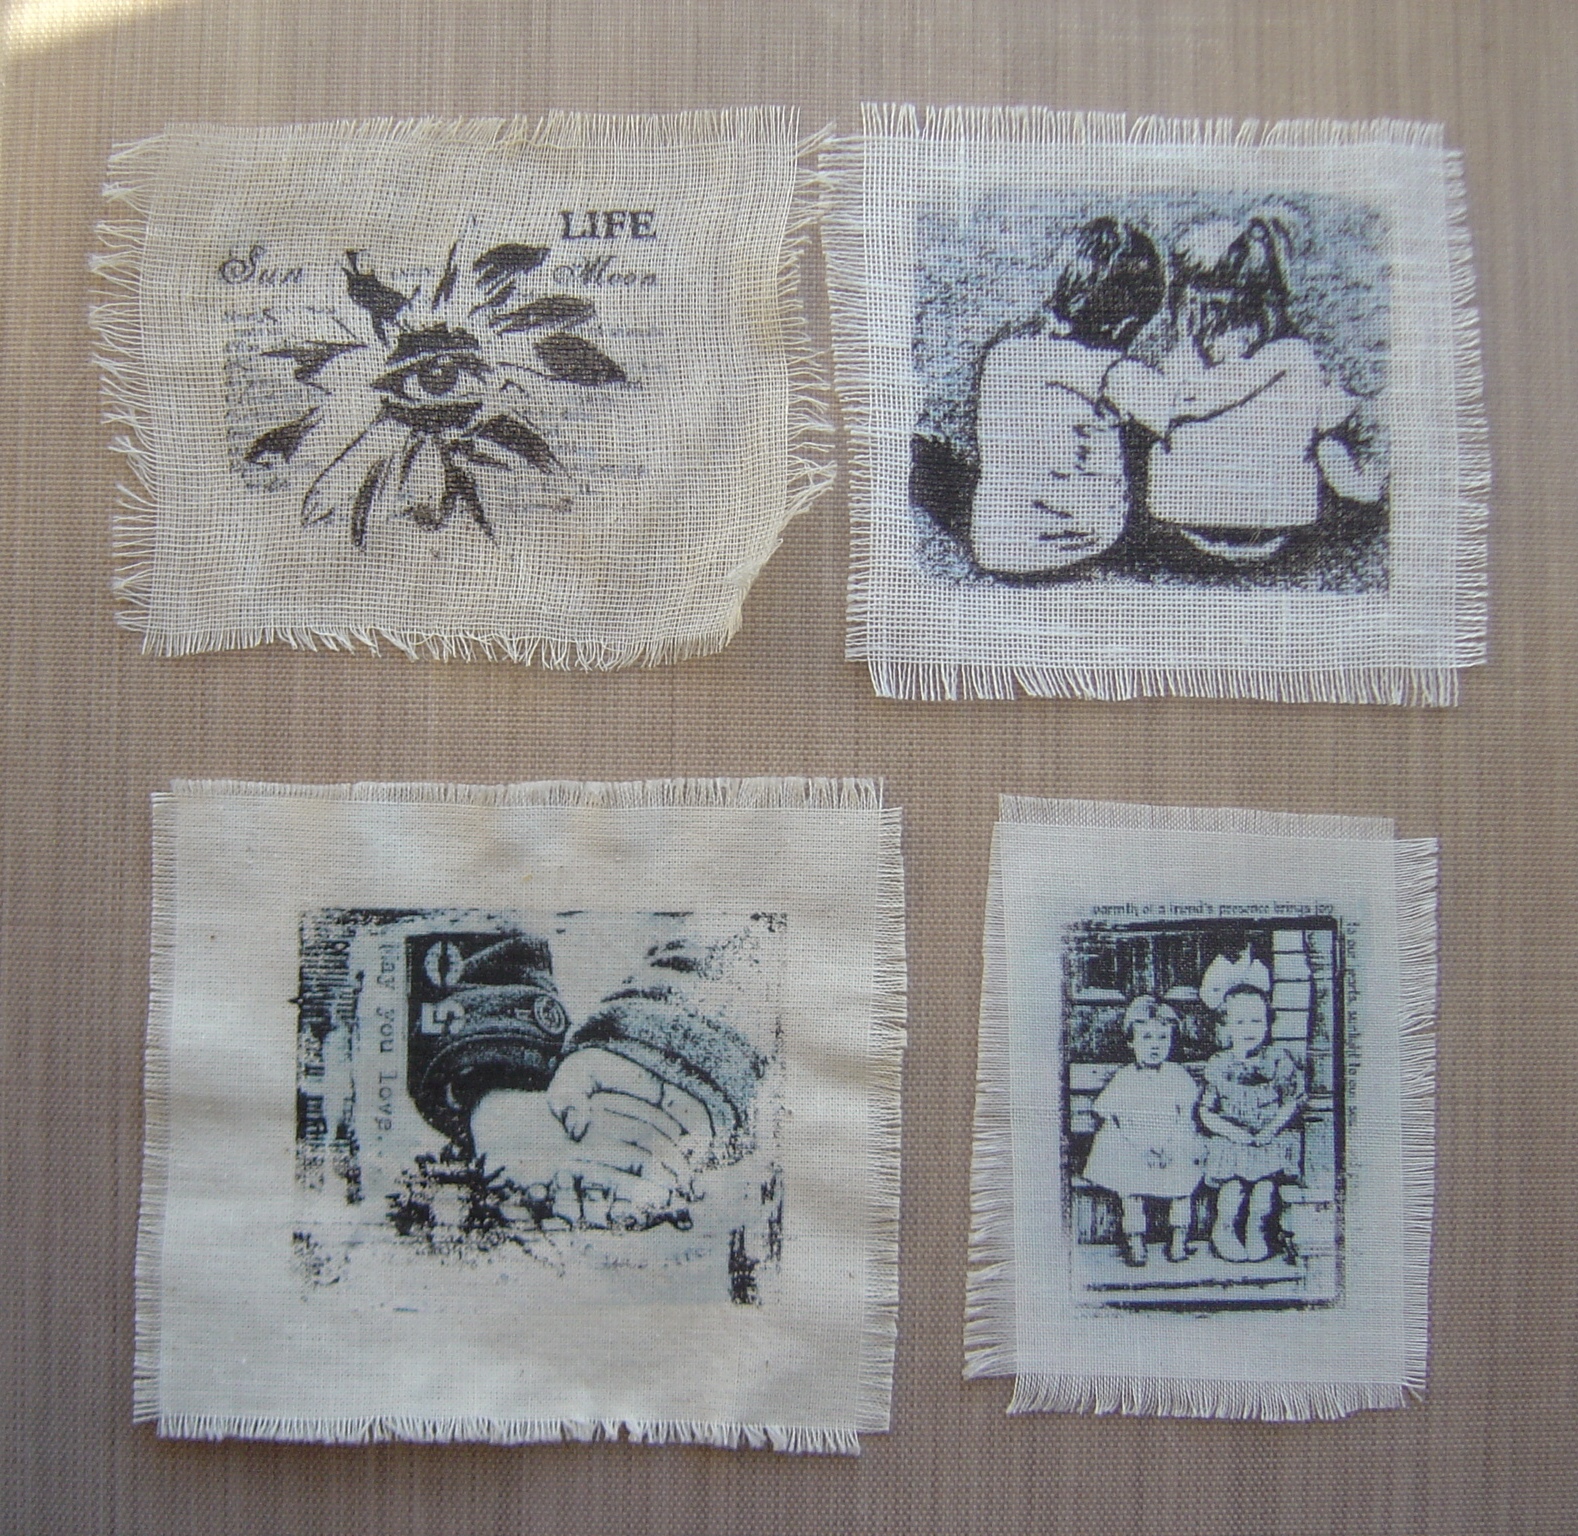
I tried them on all different weaves of fabric, this one is quite an open weave.


This weave is the loosest and it's the lightest of the fabrics.


This one was quite a heavy weight fabric with a tight weave.


And this was the tightest weave.


These are all 4 pieces together so you can see the different fabrics and weaves now they have been dried.  But as you can see the images have transferred perfectly.


Then I decided to apply some colour using the Paperartsy Fresco Chalk Paints.


I used pumpkin soup as a wash on this one, dried it and went back in with nougat.


For this one I turned it over and coloured it from the back as I wanted a more subtle colour.


And this is the view from the front.


I used Baltic blue on this one, I really watered it down, and I also coloured the images with it.


And finally, for this one I sprayed the fabric with water first and then applied the paint around the outside edges.  I used my favourite colour, Guacamole.


Thursday, 28 July 2011

JFF - Week 26 - Fabric and or Fibre


Fabric and or fibre is this weeks JFF theme.  I decided to use both.  The background is a piece of muslin which has been stamped with acrylic paint.  I heat transferred an image onto another piece of muslin which I frayed around all four edges.  I used a large zig-zag stitch to attach the thick piece of wool down the right hand side.  I unravelled a dyed silk carrier rod and using free motion sewing, attached it and added a piece of ribbon across the middle.  I left the threads so I could attach the button.  I stamped the word dream and added gems.  Down the left hand side I added a piece of deep green silk organza, once it was attached I blasted it with the heat gun.  Finally I added a piece of lime green ribbon to hang.

Sunday, 8 May 2011

FP Pellets Pendants


These pendants were made using the photo transfer technique as demonstrated by Linda Peterson of FPTV.  They are both covered in glossy accents.


The bezels and bails are also a Linda Peterson design.

Thursday, 7 April 2011

JFF - Week 10 - Circle(s)


It's Vons turn to choose this months JFF theme and she has chosen 'shapes' with the first one being 'circles'.  I covered an old cd with small pieces of lasagne and then painted with gesso.  I applied another layer of lasagne and then another layer of gesso.  Once dry, I painted with mushroom acrylic dabbers.  When dry, I rubber across it with my finger using gold to get a contrast.  The image is from one of the CI books.  The outside of the inner circle is covered in rock candy distressed stickles.  I put brads in the metal plate which says cherish and attached with silicone glue!!!

The other side is backed with a piece of background card that I'd previously made.  Ribbon and fibres were added underneath the backing.


Saturday, 26 March 2011

Tags with distress stains


I've been playing with my new distress stains today.  For this top one I put the ink on the craft mat and swooshed the tag through the ink.  I inked up my splodges stamp with walnut distress stain and stamped with it.  I used forest moss to stamp on the left side with a script stamp.  I added the cogs and distressed the edges with my paper distresser and edged with walnut stain stain.  I finished by adding the fibres.


I did the same with this one and ran it through a cuttlebug embossing folder.  I distressed the right hand edge and left it raw.  I coloured the image with the blue stains, faded jeans on the left and weathered wood on the right.


I was trying out different tags and this started off as a brown tag.  I ran it through the circles embossing folder and used walnut stain distress 'ink' to hi-light the raised area.  I added an old used stamp to the bottom corner.


I inked this tag up direct from the bottles and spritzed it with water before drying it off with a heat gun.  I inked the script stamp with forest moss stain and stamped the right side of the tag.  I ran the left side of the tag through the bark sam poole embossing folder.  Again I inked over the raised area with walnut stain distress 'ink'.  Added a piece of hessian, an image and a piece of tissue tape.

Saturday, 28 March 2009

Memories


I had this one on the go too whilst I was doing the one below, as I had to keep waiting for bits to dry on each one!!! I covered a piece of glossy card in gold acrylic dabber paint. Used a photocopy of the girl and transferred the image into the paint. When it was dry I slid the piece of card into the back of the canvas. I painted the wooden frame with sandal acrylic dabber paint and added a touch of gold. To the middle I added a copper skeleton leaf, gold heather, 3 yellow flowers and 1 white and finished them off with a bow. Around the frame, the label, arrow and hinge are grungeboard shapes covered with gold acrylic dabber, washers, wire, screws and a bracket have also been added. The squiggle on the left and the word memories were done freehand using gold outliner paint

Blog Archive