Showing posts with label Wooden & Metal Embellishments. Show all posts

Friday, 18 March 2022

Gothic Style Shaker Plaque

After watching a 'free' youtube video class by the lovely Anna aka Finnabair, I made this.


A shaker plaque made from recycled wood and a plastic dome.


Close up of the shaker part of the plaque.


The bat looked a bit plain so I added a rub on.


Close up of the bottom left corner.


Close up of the top right corner.


Close up of bottom right ish corner.


And the image of what is in the shaker is revealed.


Close up of the dome shaped shaker.


And finally a close up of the top left corner.

Saturday, 18 September 2021

Skull Sketchbook


I decided to use mostly wooden shapes on the front of this sketchbook cover.


I used purple and pink metallics on the front cover.


Painted all the pieces black and then stuck them onto the cover.


I used metallic paints to paint the black wooden and resin shapes.


Close up of the right side.


Close up of the left side.


Close up of the centre piece.


This is the back which I have kept flat so it's easy to use.


This is the front and back when it's opened out.


And this is the inside. The paper is a bit rougher and it's cream, it's called a sketchbook and measures approx 8.2" x 5.5".

For sale on my website - https://aviarto.com/workshop/sam-b

Saturday, 24 July 2021

Steampunk Style Polystyrene Torso


I picked up this fab little torso / mannequin for a bargain price of £5.


I covered it in a layer of black powertex.


And covered the back too.


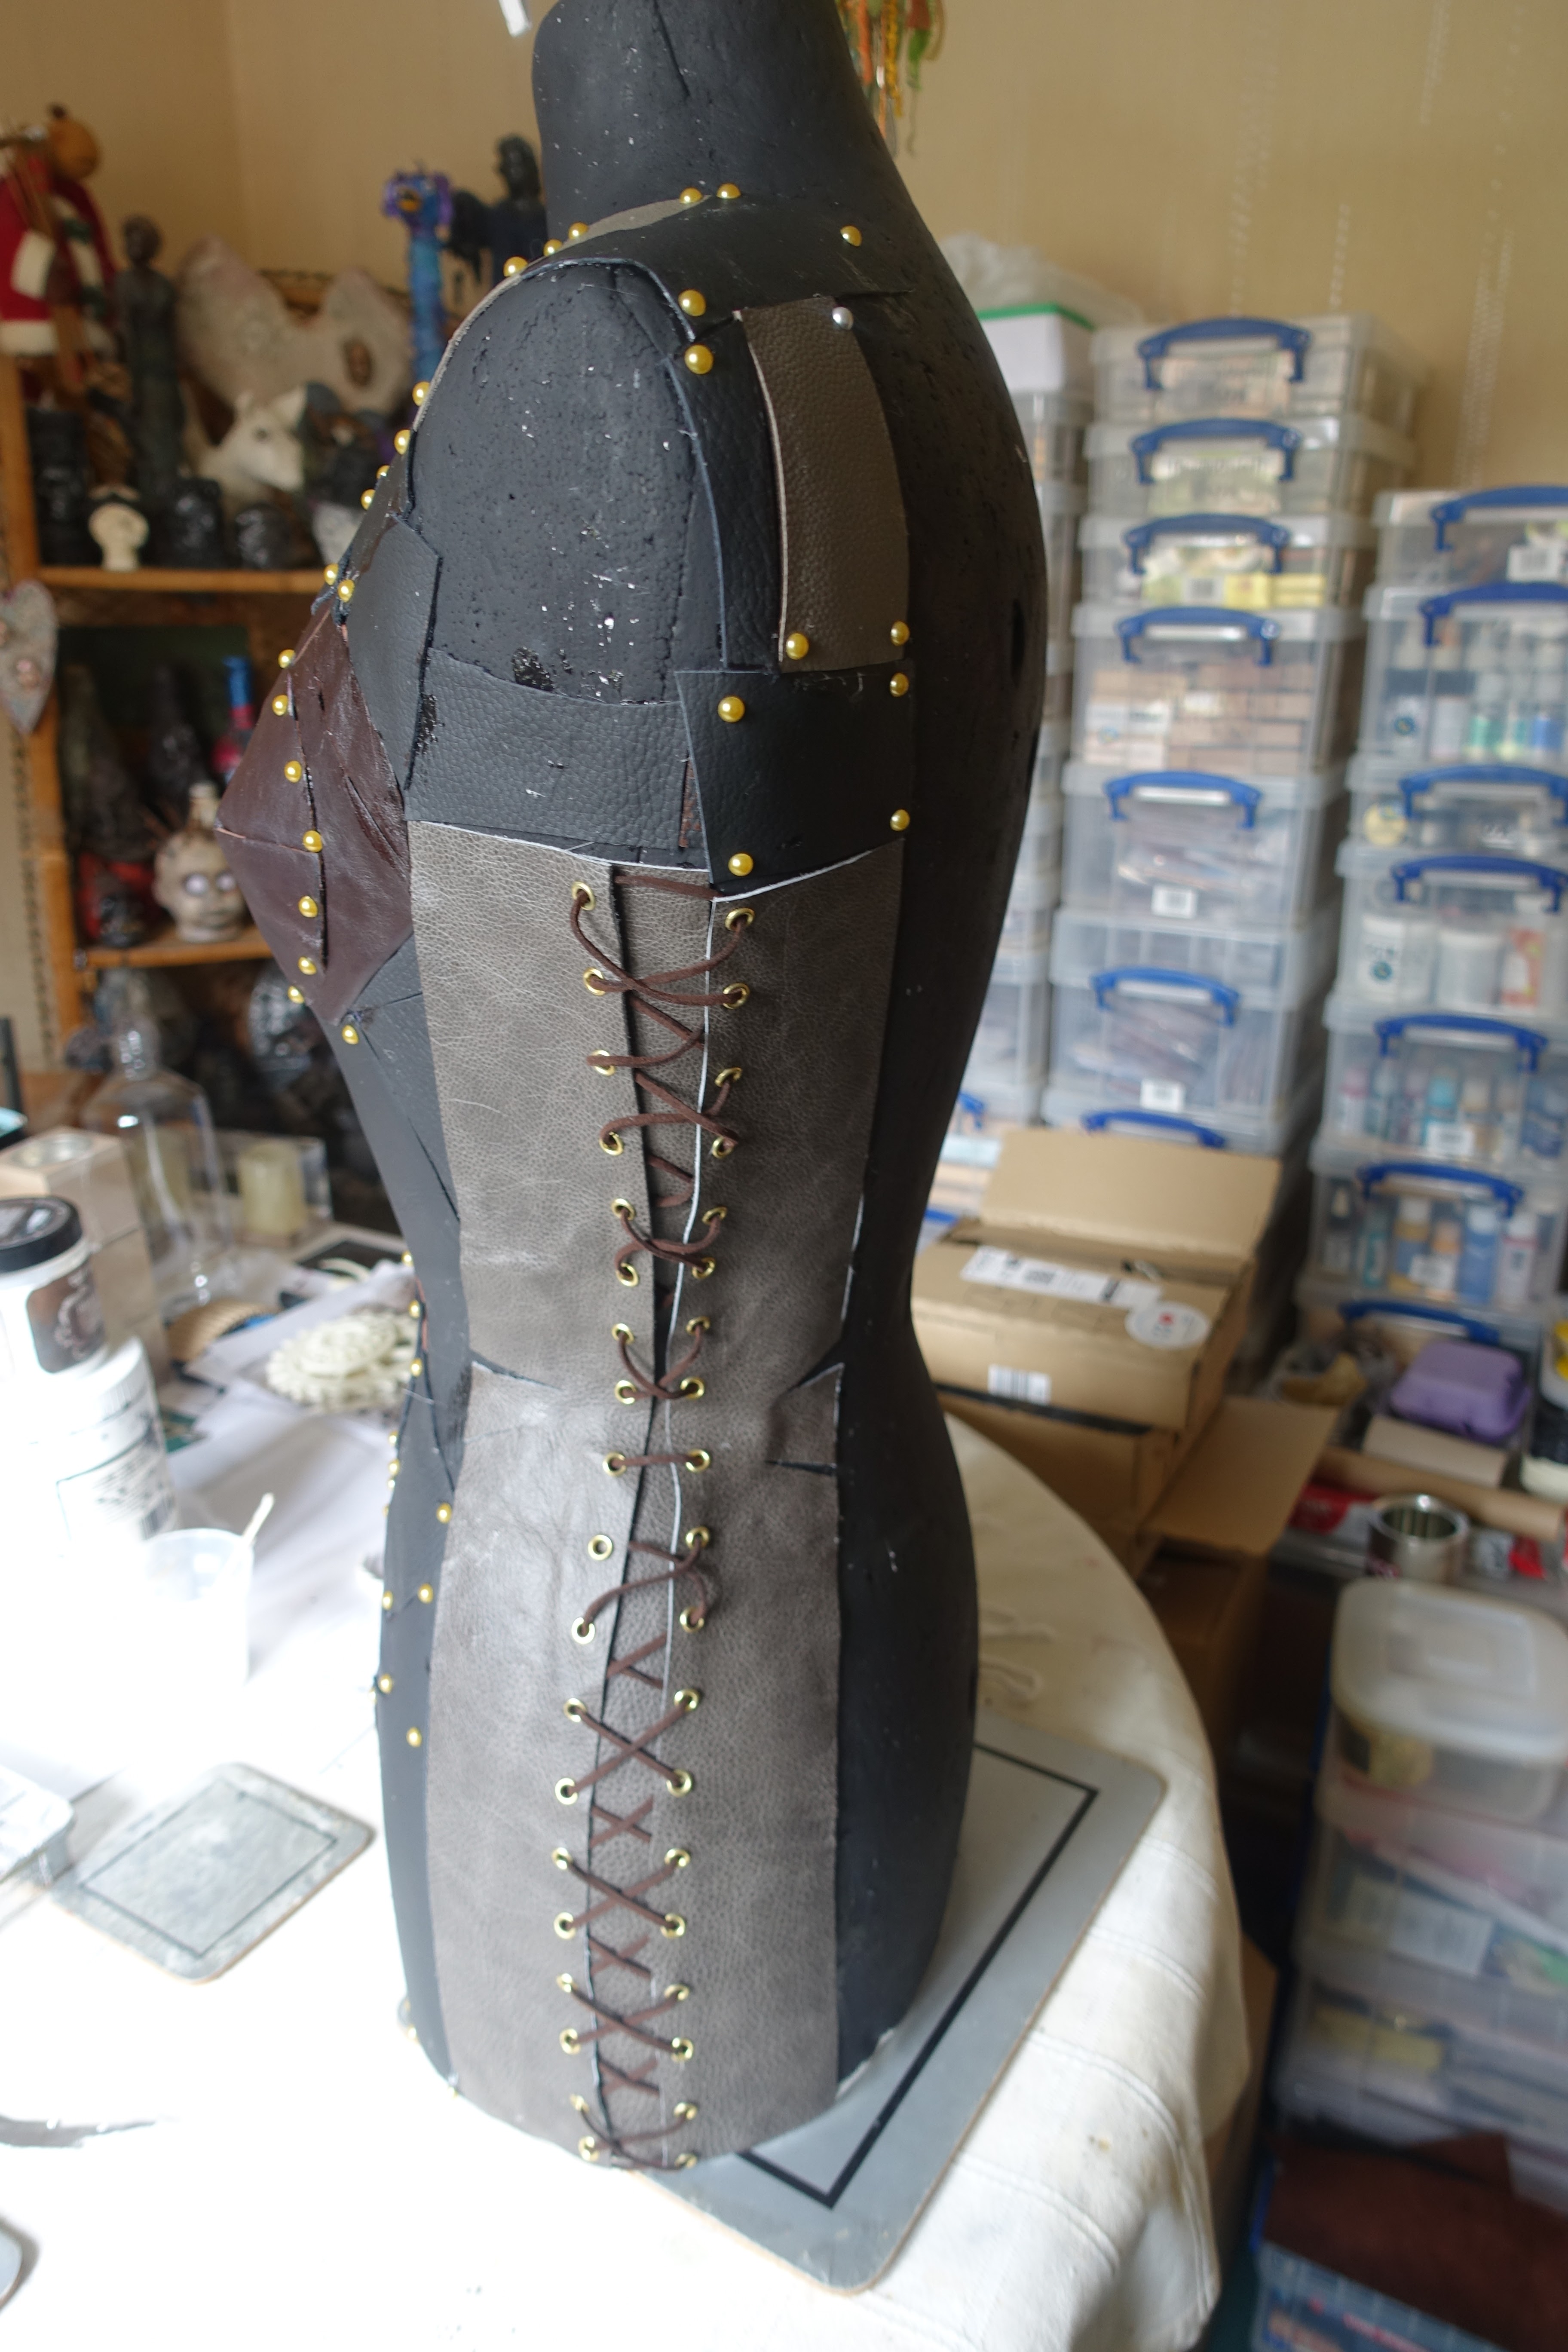
I cut up pieces of leather and stuck them on. Once dry I added gems to the corners of each piece to look like studs.


I added eyelets to two long pieces of leather on each side and used some leather lace to criss cross them over.


Then I coated all the leather in a layer of black powertex and left it to dry.

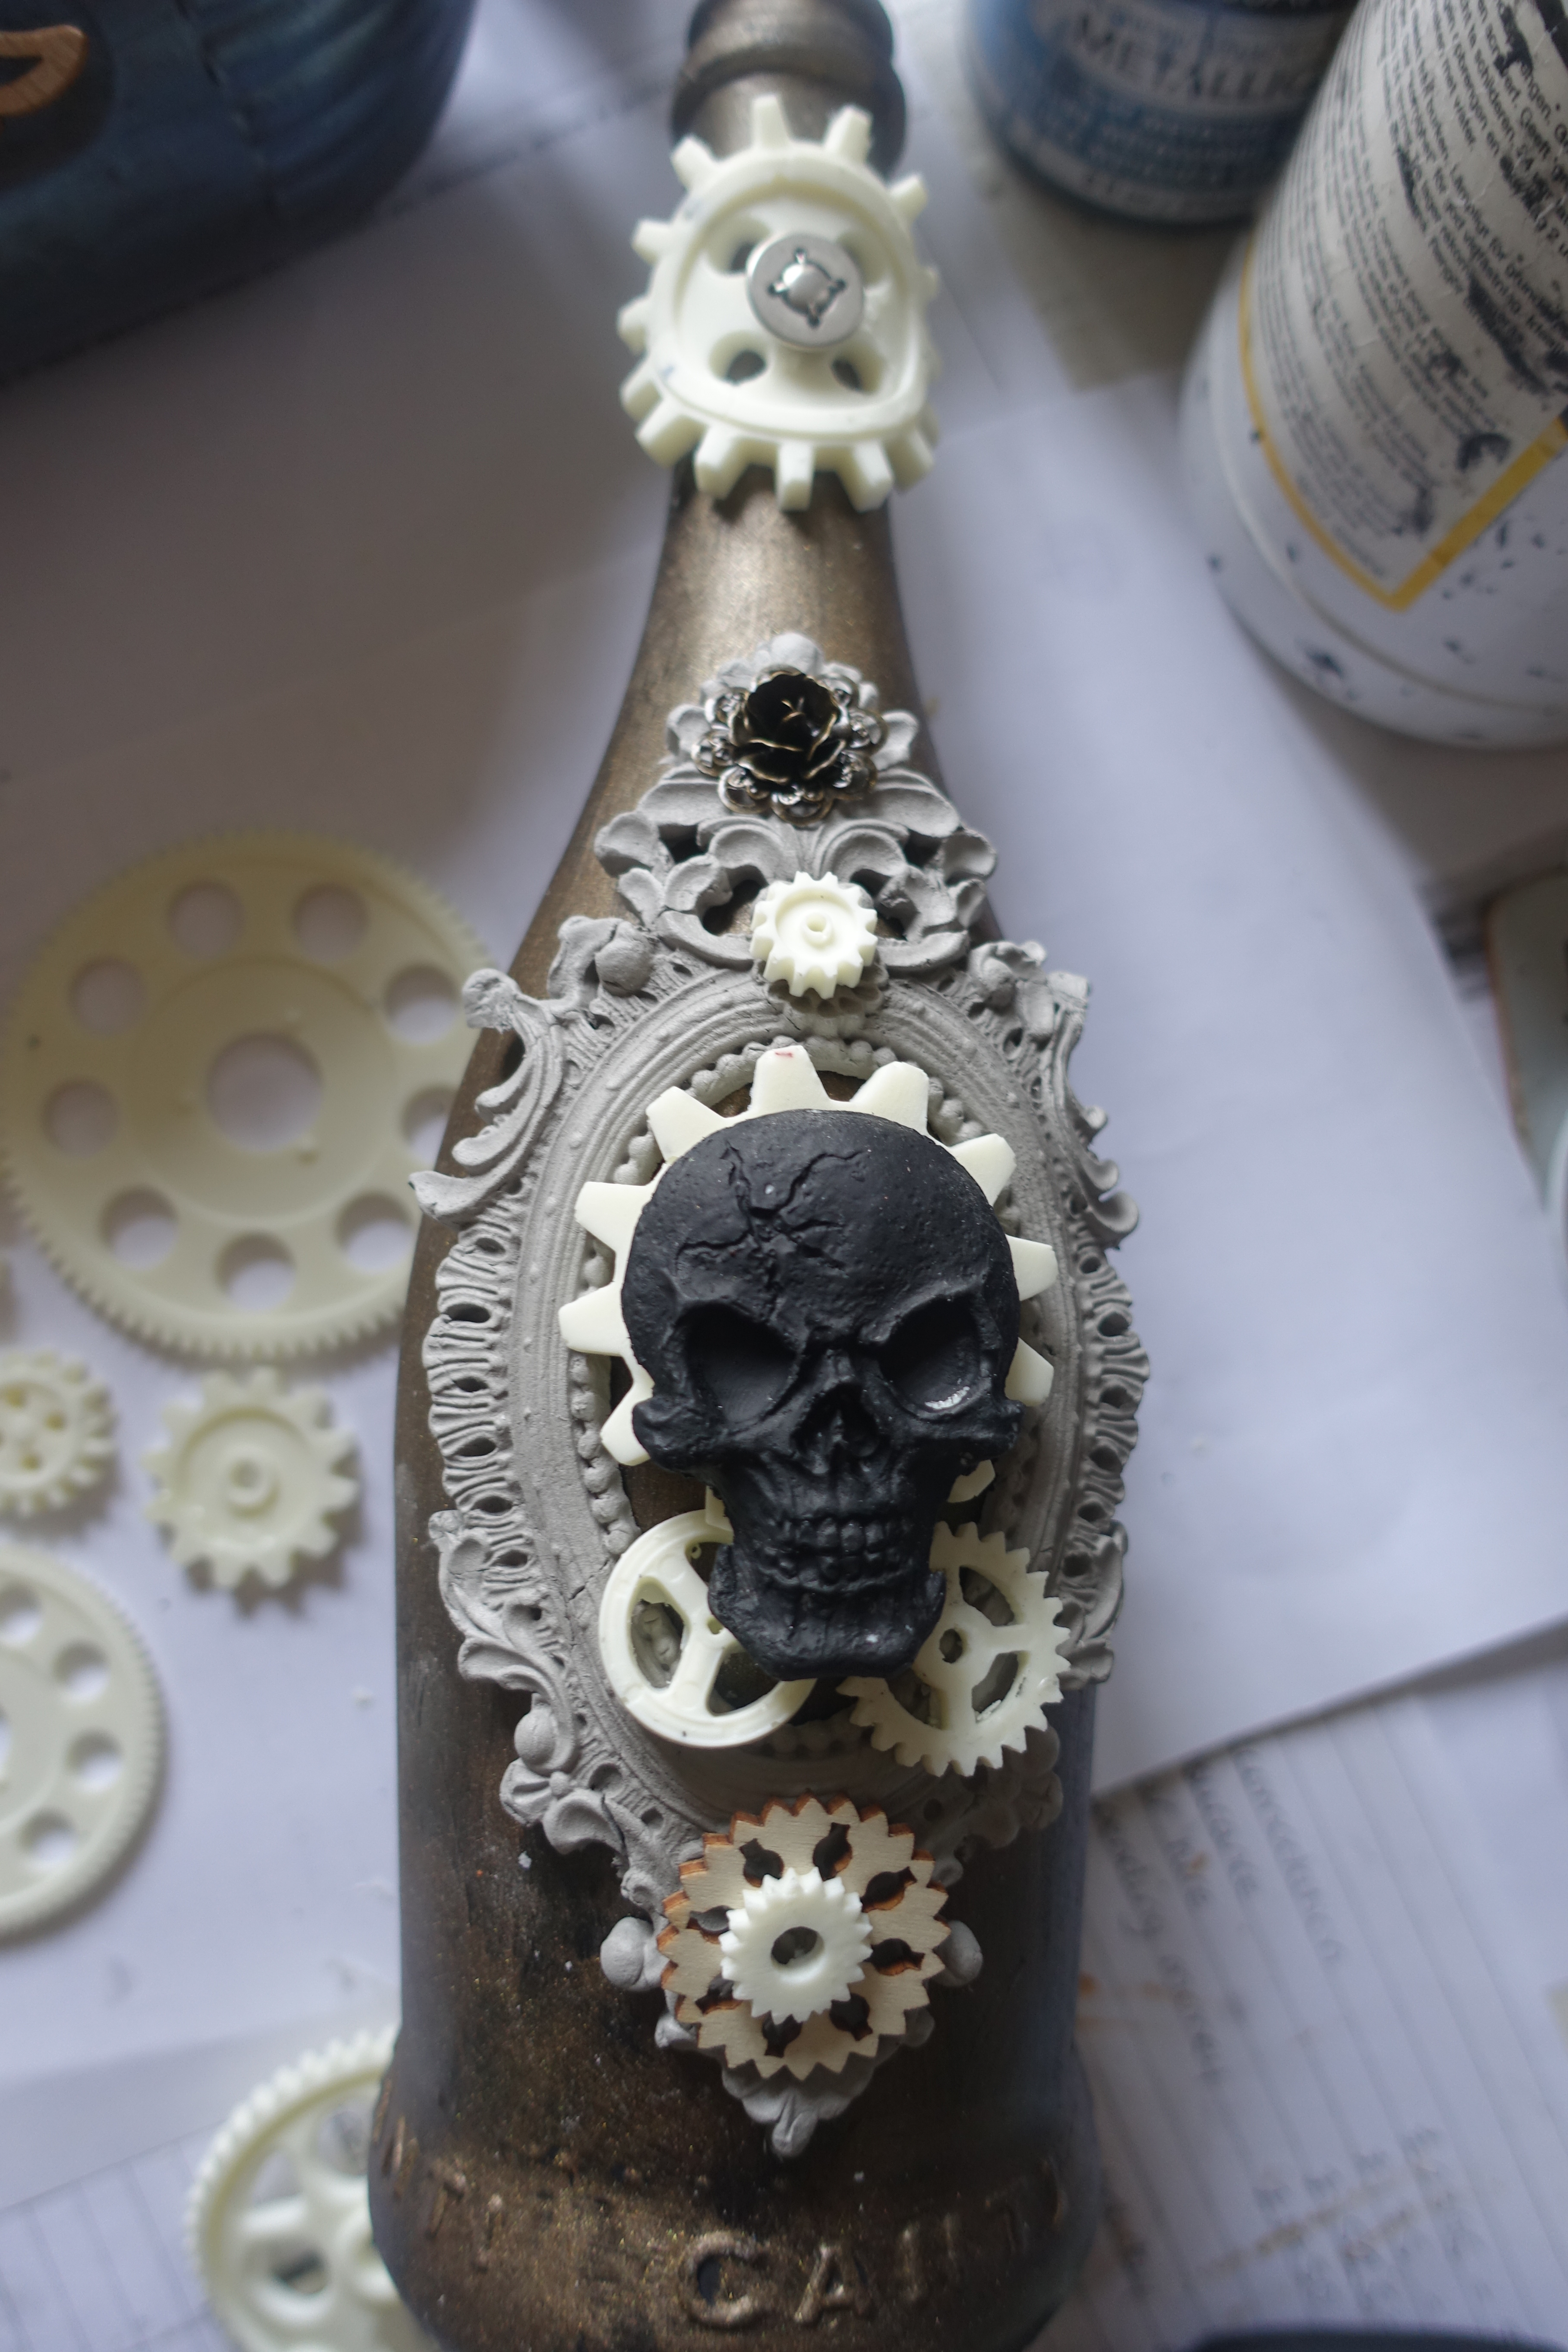
I used resin to make the cogs and painted them in black powertex.


Next I added a chunky zip.


Then I decided to fill the front in with leather.

 
And around the zip on the back with more pieces of leather.


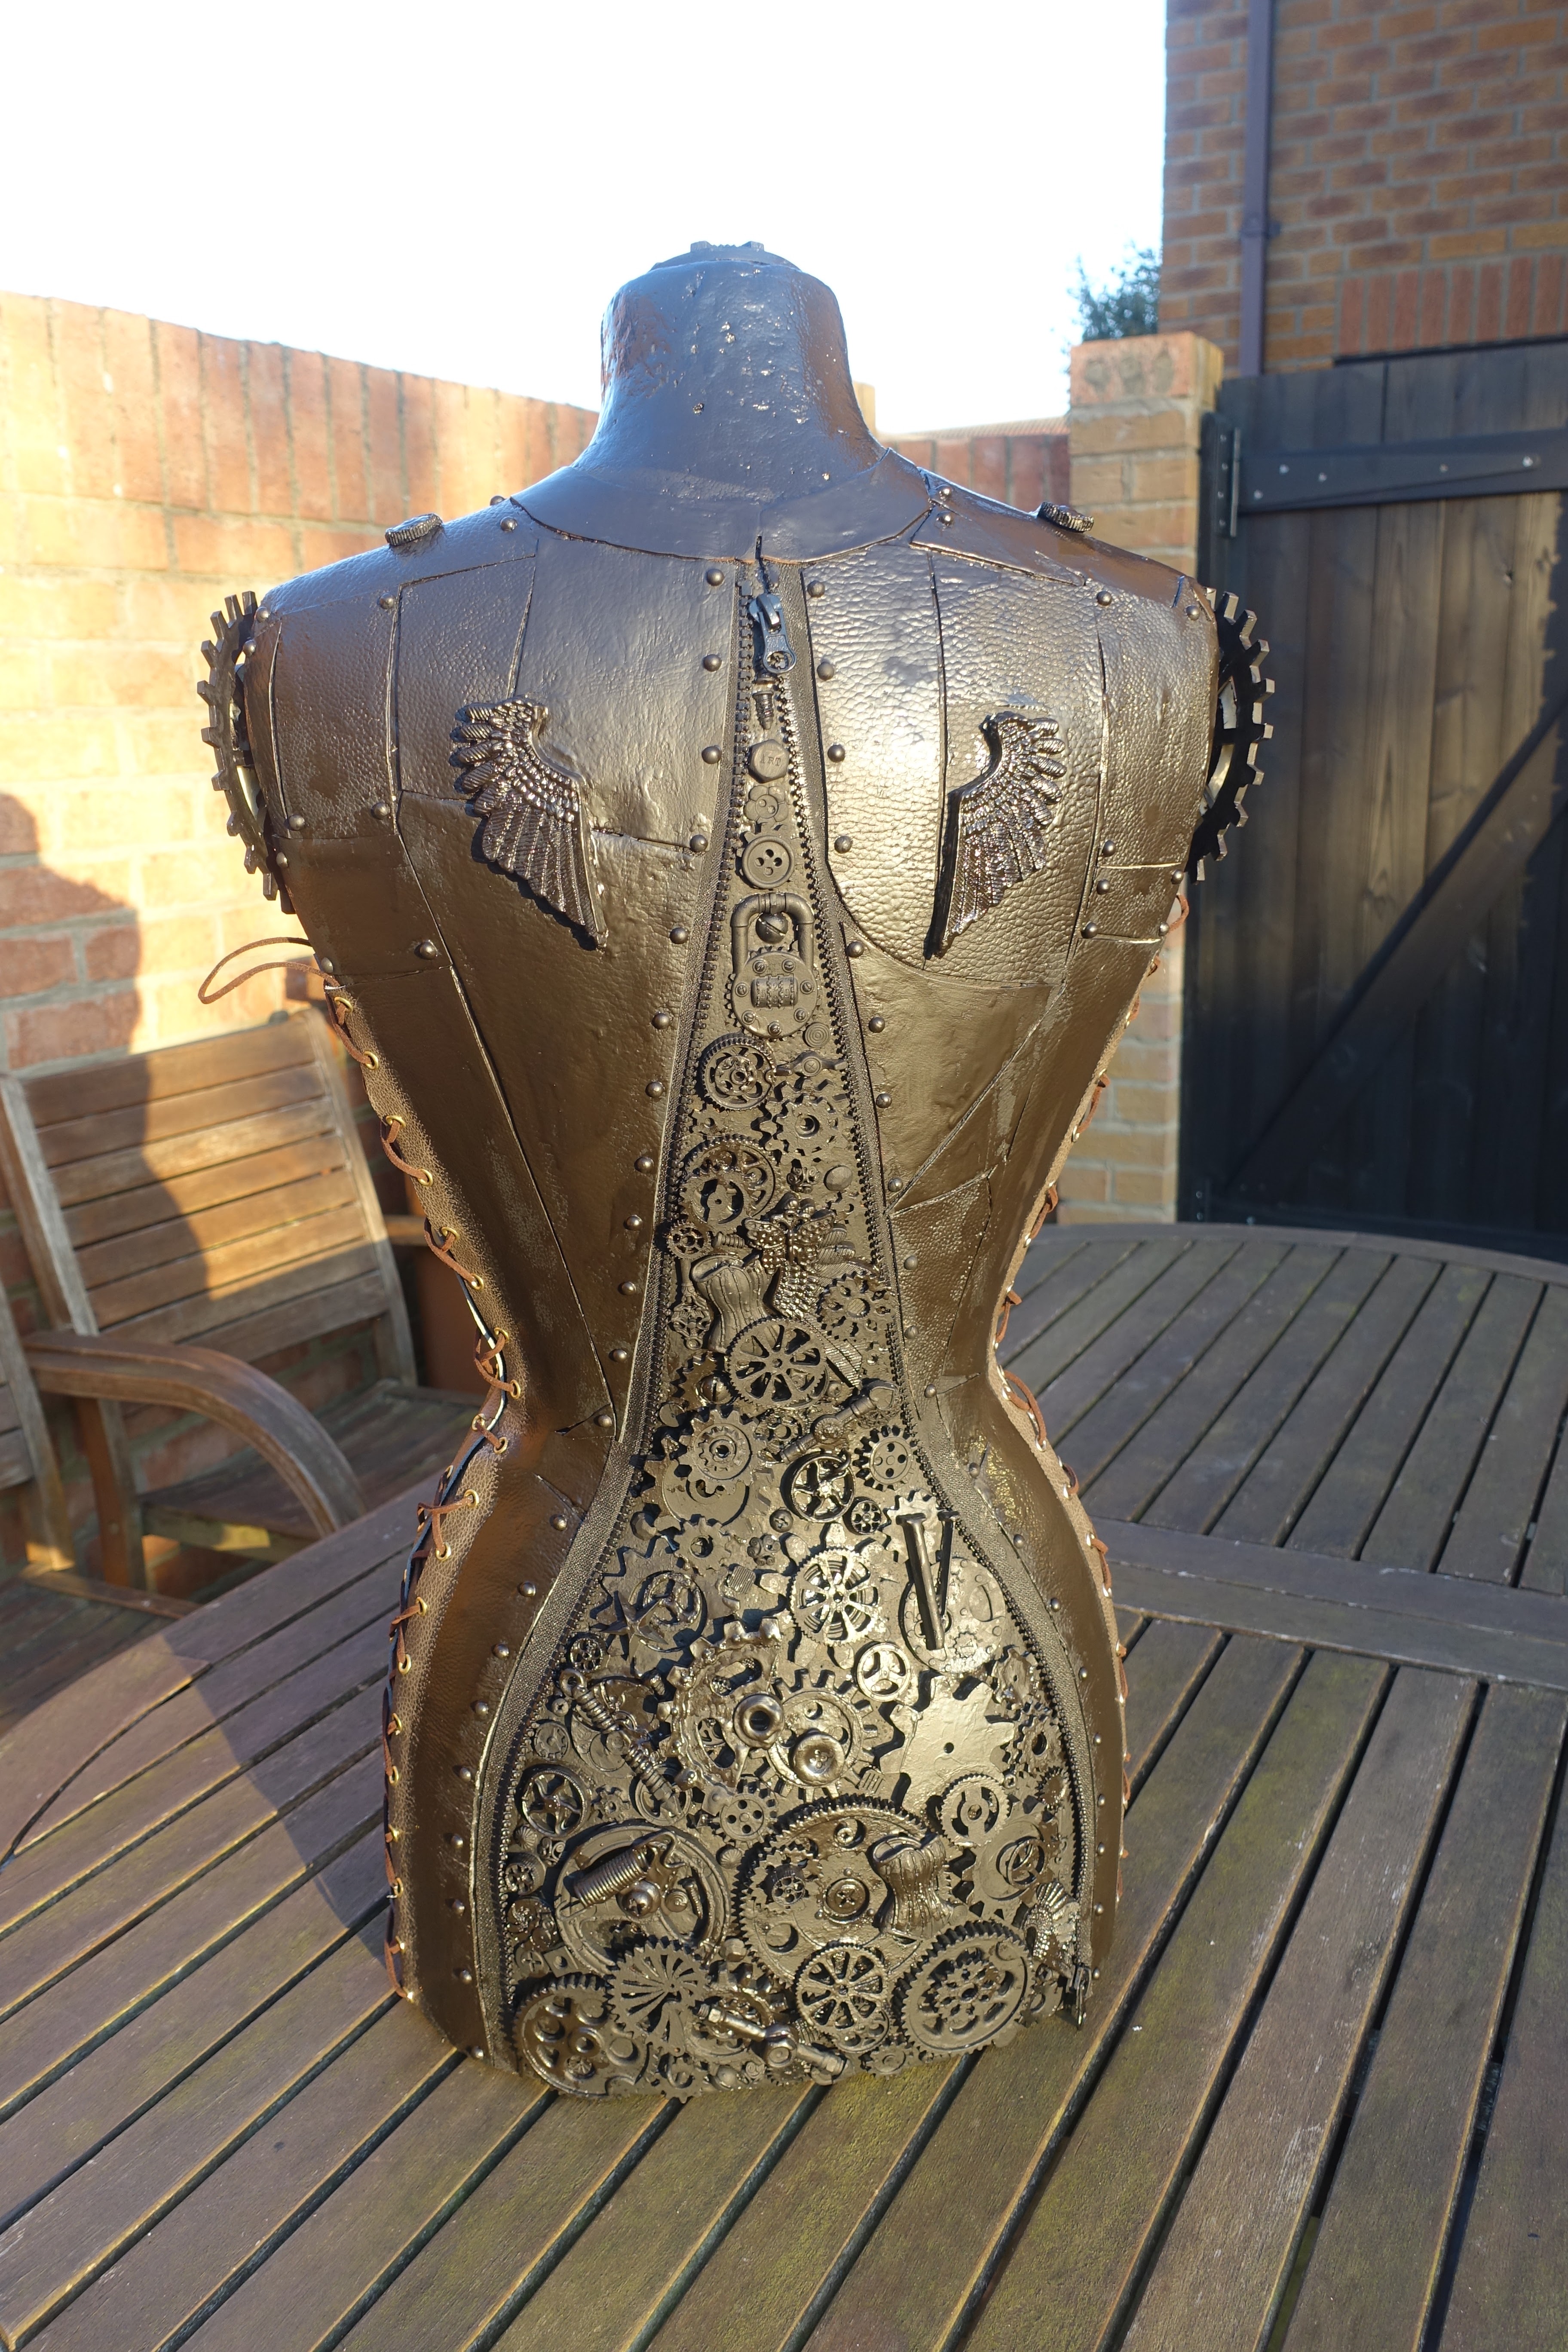
Next I started placing steampunk elements on the back.


I glued them on with black powertex and then gave everything a coat.


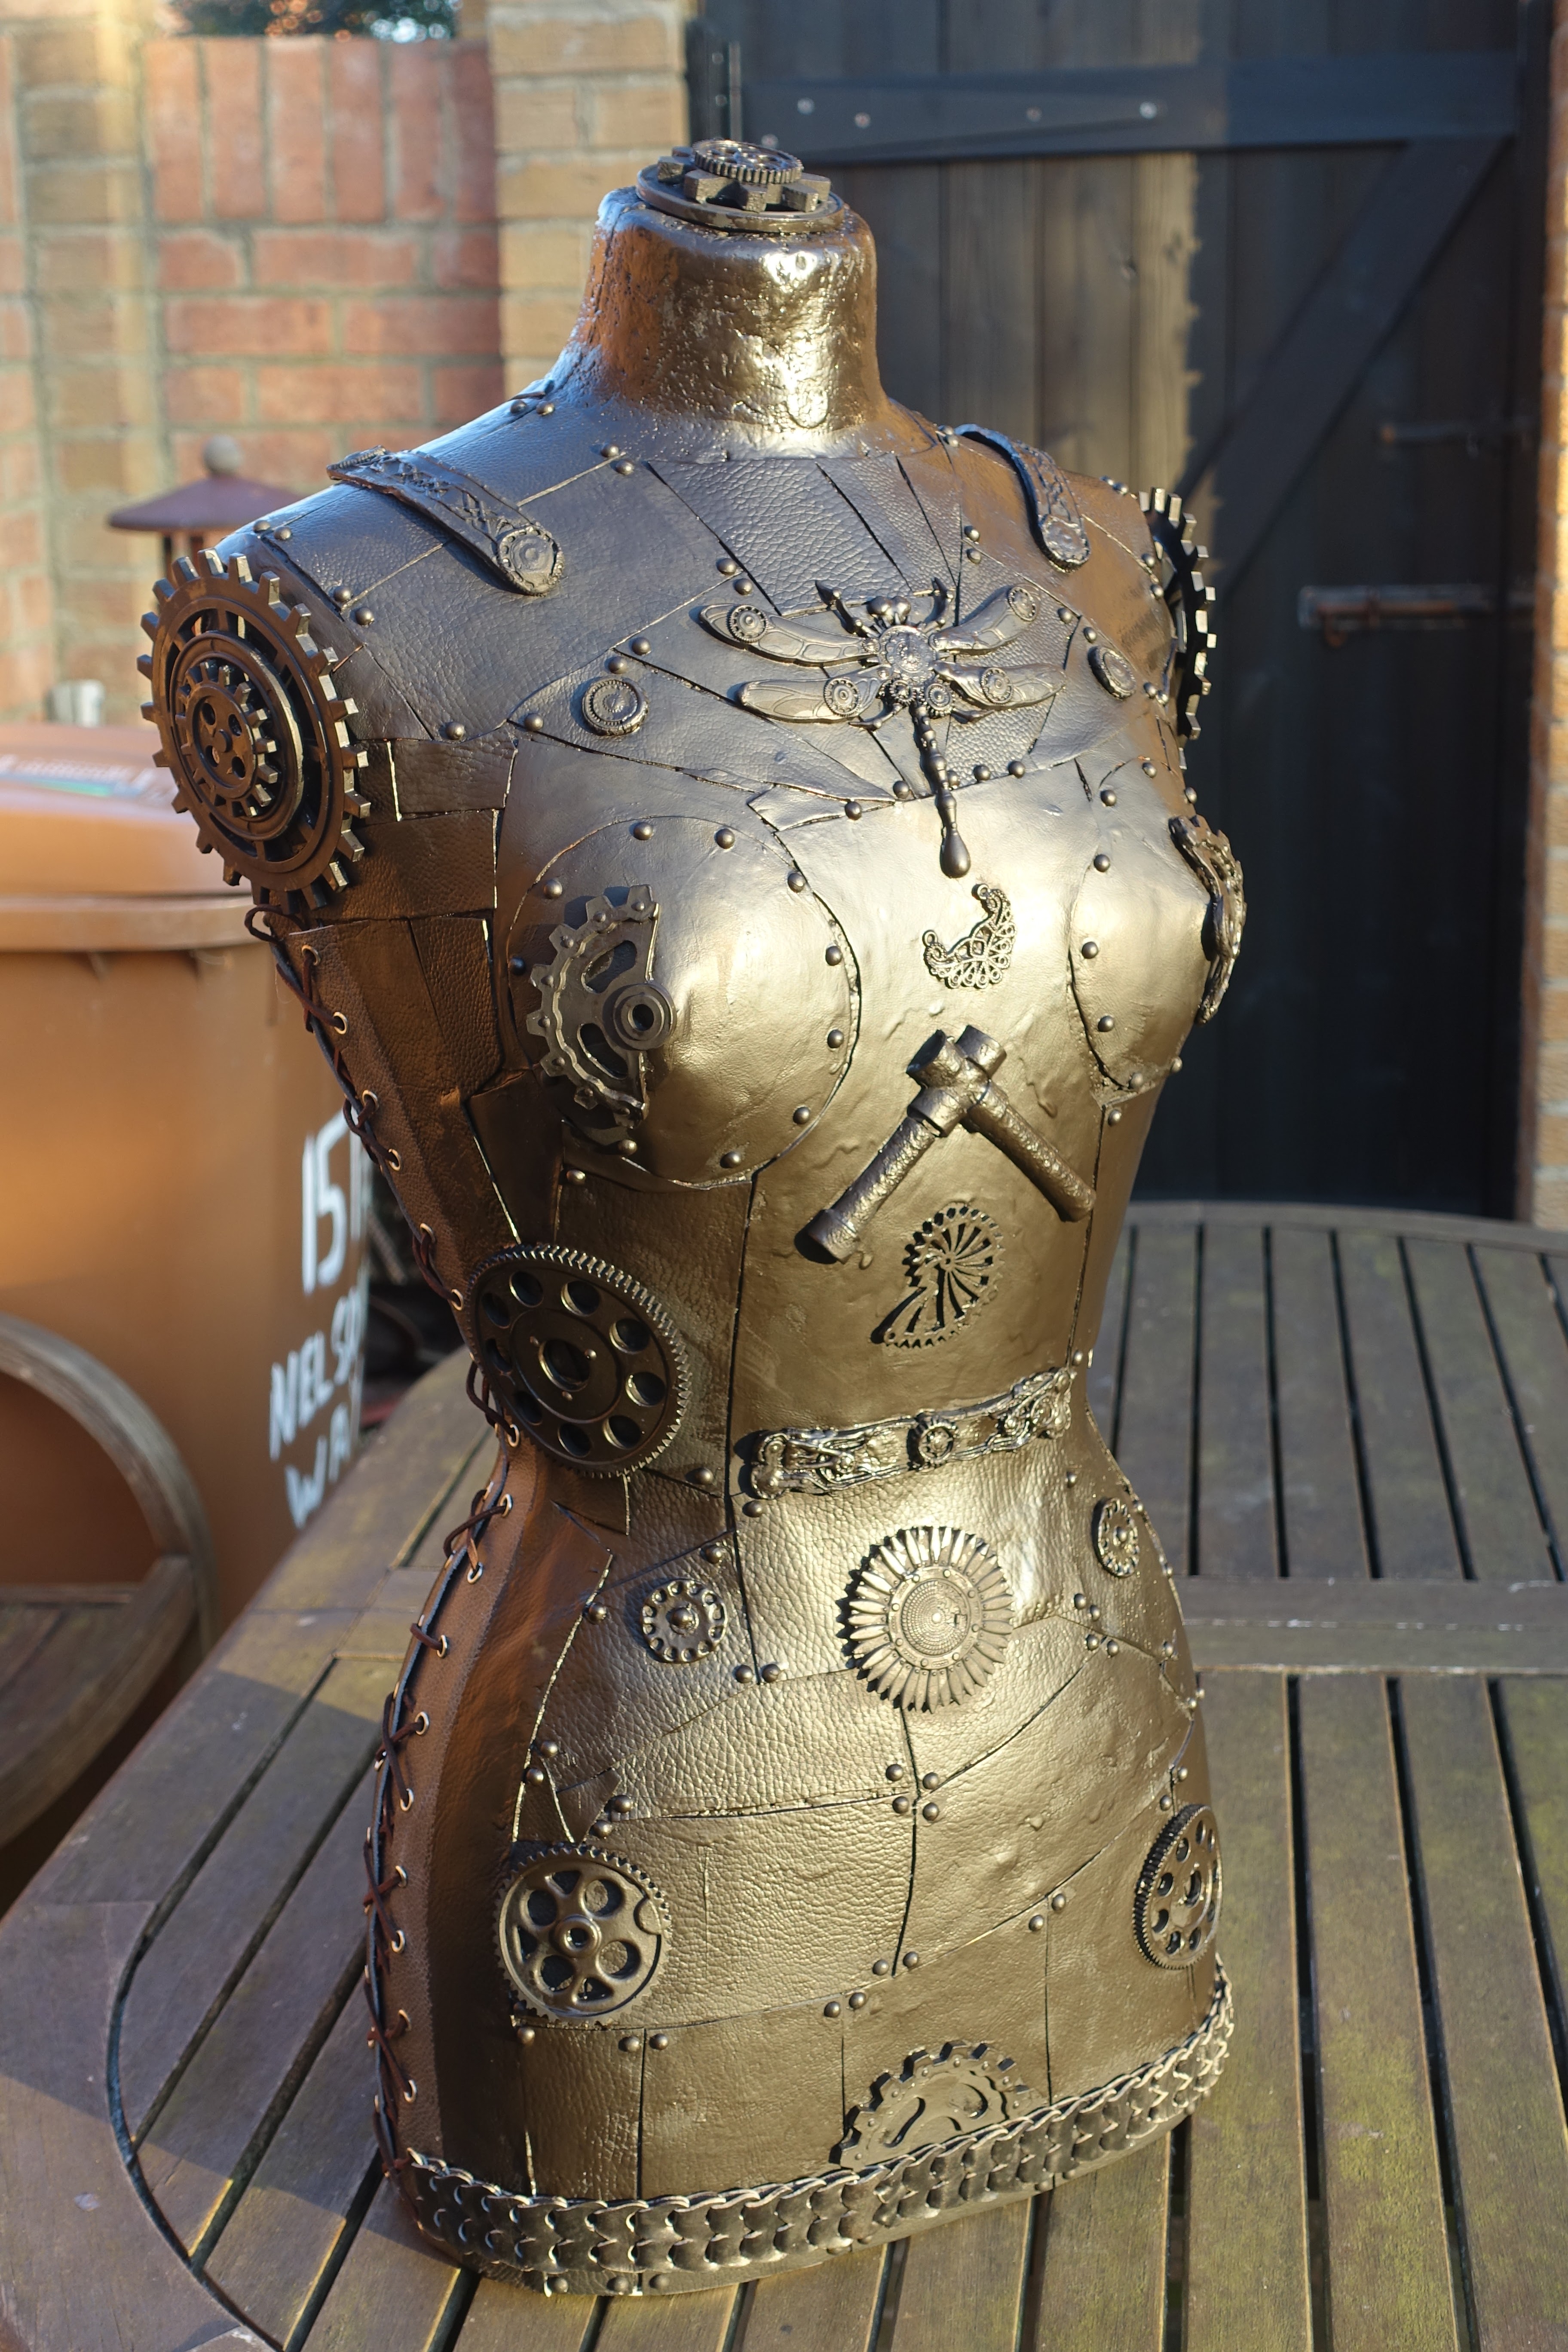
I made some more steampunk pieces from moulds.  I used stoneart clay on some and the dragonfly is from resin, but I took it out of the mould before it had completely cured so that I could shape it to fit the mannequin.


Then I added more to the front and attached the belt.


I painted them in black powertex.


I put a series of cogs on the arm holes.


I decided to add wings to the back.


And finally I gave everything another coat of black powertex.


Next I used various different metallic pigments and varnishes to colour the pieces. The reason the gold looks a bit hap-hazard is because the different leathers have different textures.


Close up of the front, the dragonfly is silver so it really stands out, but there is no sun today, so it's not a great photo.


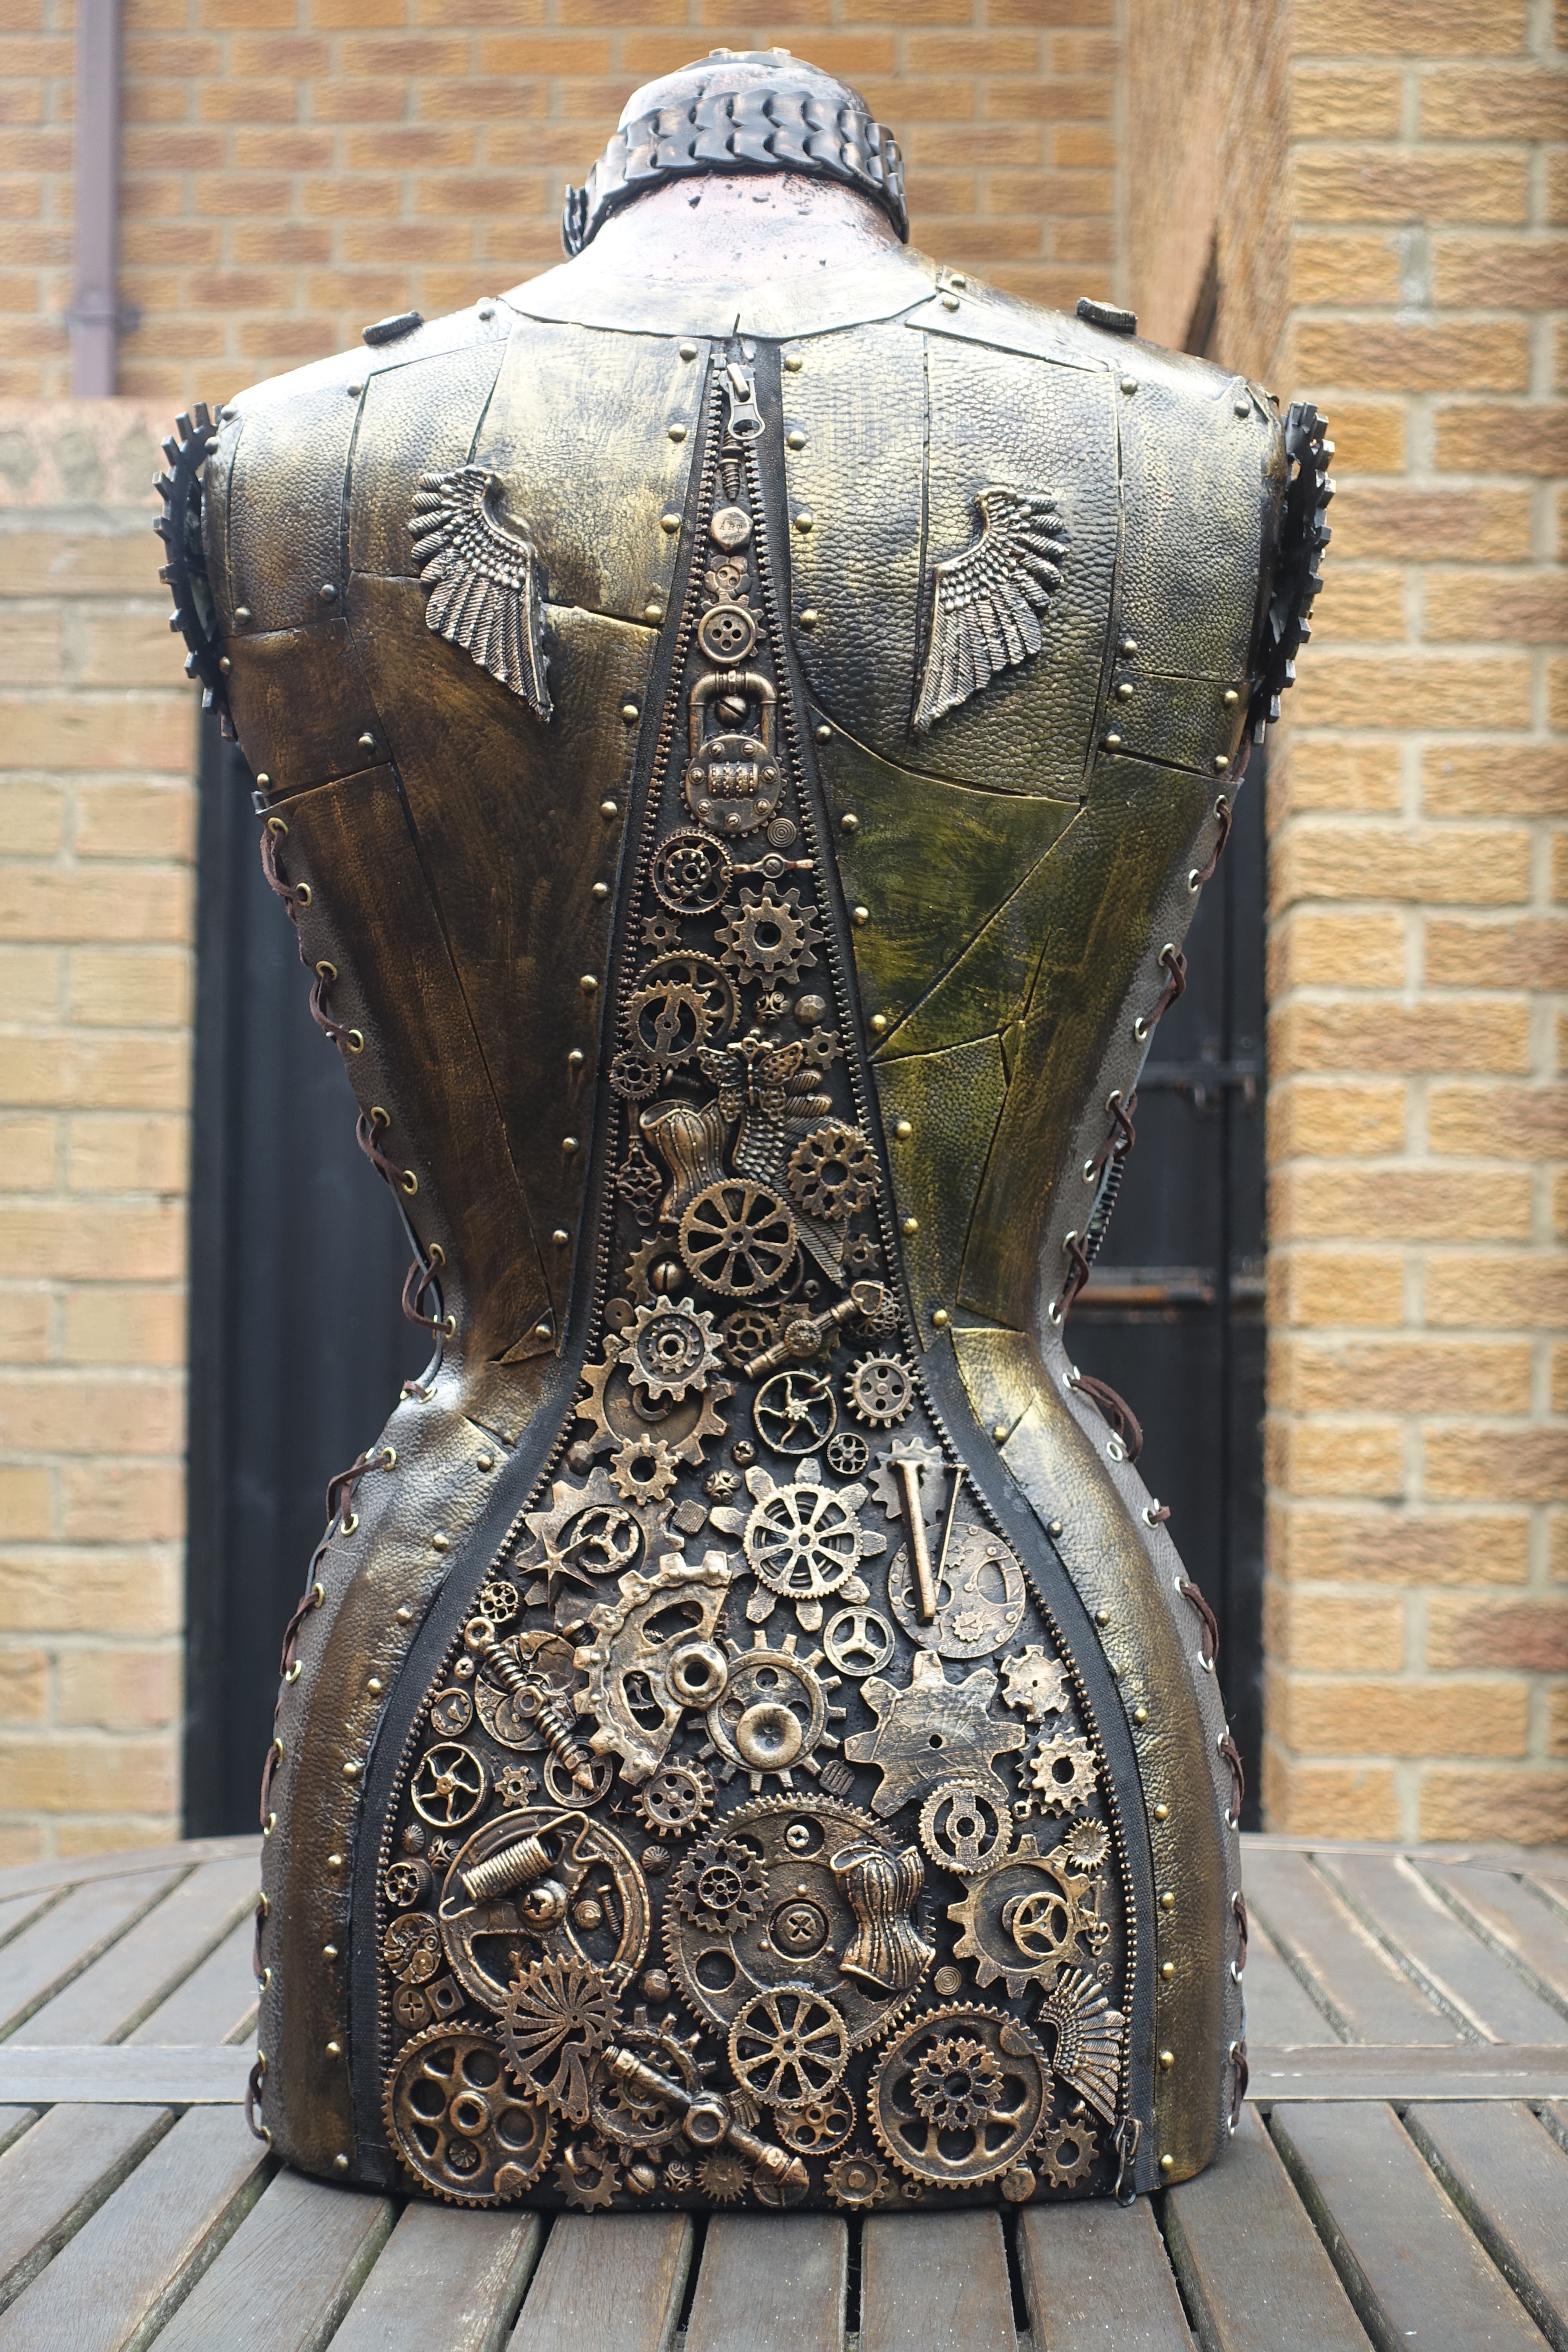
And from the back, coloured all the pieces inside the zips with the same colour.


View from the side.


And then the other side.


And off-set to the right.


And finally to the left.

#powertex #upcyclingchallenge #rusteffects

Friday, 16 July 2021

Altered Southern Comfort Bottle


Empty Southern Comfort bottle.


Using the stone art clay I carefully peeled out the very large cog and moulded it onto the bottle and left it to dry as I wanted it to hug the bottle.


Laid wooden, resin and metal embellishments out until I liked what I'd done.


Stuck and painted all the embellishments with black powertex.


Then I went a bit mad with the colours.

#powertex #rusteffects #upcyclingchallenge

Tuesday, 13 July 2021

Altered Canti Bottle


This bottle is really heavy even though it's empty.


Firstly I gave the bottle a coat of black powertex and once dry I coloured it with Pentart Deluxe Paste in the colour truffle.


I wanted the frame to curve around the bottle, so I mixed up a batch of clay using stoneart and powertex and used it in the Finn mould. I pulled it out very carefully and gently moulded it onto the bottle.  I left it there to harden.


I played around with some resin, metal and wooden embellishments until I created a layout that I liked.


Then I stuck everything on and painted everything in black powertex.


Once dry I painted everything in metallic paints.

#powertex #upcyclingchallenge #rusteffects

Blog Archive