Showing posts with label Halloween. Show all posts

Thursday, 16 September 2021

Skull Lantern


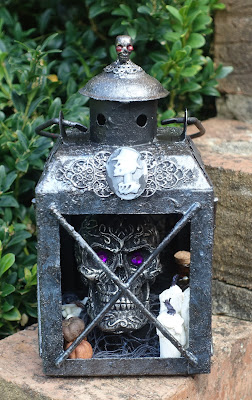
I picked up this small lantern at the car boot. It was red so I painted it with black powertex.


Thanks to Tracey Fox, I made these mini candles.


I filled the inside with 3 of the mini candles, 3 mini pumpkins, 3 small bones and a mini bottle with beads.


I added various metal pieces to the top and front edge.


I put the skull in as the centre piece.


One of the sides where I added webbed fabric to the window and two small bats to the top.


And the other side, where I added a large bat to the top and more webbing.


This will be going up for sale in my new website - https://aviarto.com/workshop/sam-b

Thursday, 9 September 2021

RIP Tombstone


I had an upright mdf plaque from That's Crafty. I painted the front of the plaque with black powertex and added in small sand balls to create some texture. Then added the resin pieces and the three die cut letters. I dry brushed with white and silver.


I made some mini books by putting a piece of card around a square of corrugated cardboard.


I filled some small bottles up with beads and added a sticker and some string to some of them. I added some black to them and the paper flowers.


This is the base of the upright, I coloured a piece of cotton scrim with black spray  paint and glued it on.


Once dry, I placed the upright back in the slots and arranged the embellishments along the bottom.  


When I was happy with the placement I glued them down.


Close up of the dry brushing.


And finally I added gems to the eye sockets.

Sunday, 18 October 2020

Halloween - Tea Light Holder


My nephew and his girlfriend have just moved into their first house together, so I rescued some pieces of polystyrene. 

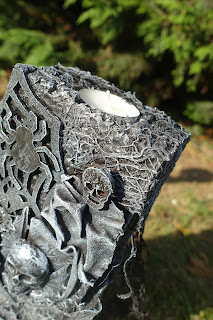
And as it's nearly the end of the month, I went for a Halloween theme.  This is the front with webs, skulls and spiders.


And the side with a skull and a web with spiders in.


I left the back pretty simple as you probably won't see much of it, but I did add gemstones in the eye sockets.


A mummy and a couple of skulls on the other side.


And as it's polystyren it's easy to cut into. I cut a hole in the top for a tea light to sit in.

Thursday, 31 October 2019

Hardware Skulls


It's been a while...............................


Black Powertex & shiny nuts, bolts, screws, hooks and rivets.


Black Powertex base, red Powertex with black bister & screws, nails, nuts and safety pins.


Yellow ochre Powertex, rusting powder, small sand balls & rusted screws, bolts, nails and bracket.


...............................Happy Hallow's Eve

Friday, 26 October 2018

Halloween Candlestick Holders


So here we are, all set up for another play.


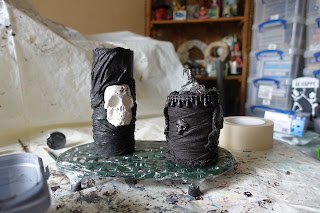
I took a cardboard tube, the core of a kitchen roll, drew around the clay skull and roughly cut it out without squashing the tube.


I checked that the skull fitted in the hole, but I didn't want it loose.


Using masking tape I created a shelf about an inch down from the tops of the tube.


I started covering them with black Powertex. 


I covered the battery tea lights with cling film.


I covered both of the tubes in fabric and other embellishments. Once the fabric was on the taller tube, I pushed the skull into the hole.


Added more clay pieces, lace and wool.


Added the clay wings.


I painted everything in black Powertex and then set them outside to dry.


I brought them back inside and left them overnight to totally dry.


Once dry, I took out the tea lights which were still covered in cling film. The fabric where they'd been sat was still a bit wet, so I left them out to let the fabric fully dry.


Once totally dry, I dry brushed them with silver and turned on the tea lights.


And these are the opposite sides, ie the back.

Had loads of fun making these and love how they've come out.

This step by step is over on the Powertex Blog today too. Why not pop over and check out what else is on there.

Wednesday, 24 October 2018

All Dressed Up


I picked up these candlesticks from the car boot, £1.50 for them all.


I gave them a coat of silver paint and then dry brushed with black.


I picked up the smaller skull and pumpkin from Hobby Craft and the middle skull is from a pack of four from Morrisons. The jaw moves on that one! Using Powertex and Stoneart I made them look like stone.


Next I made a couple of hats using cardboard and t-shirt fabric.


Adding scrim, fibres, charms and wooden embellishments.


And finally I added a feather. He is sat on both of the smaller candlesticks.


For the pumpkin I simply added a hat that I already had. 


For this hat I covered the piece of lace with transparent Powertex and added it to the rim once the black had dried.


And here they are all lined up together. 

It's such good fun and the possibilities are endless.

Blog Archive