Showing posts with label Distressed Embossing Powder. Show all posts

Sunday, 13 July 2014

Exhibit A


Started off with a piece of corrugated, exposed all the edges. Added a couple of different pieces of gelli plate prints. TH die cuts, pocket watch, picture wheel and tiny tabs.  Wheel and tab was covered in a mix of peeled paint and weathered wood distress embossing powder.


Close up of the embossed picture wheel and gelli plate print.


 Added film strip ribbon and a metal clock face.


And a couple more idea-ology pieces.

Simon Says Monday Challenge has a theme of start from scratch
PanPastelUk has a theme of inspired by Tim Holtz 
A Vintage Journey has a theme of dies and distressed
That's Crafty has a theme of masks, stencils, templates
Country View Crafts has a challenge of stencil it

If you are looking for the stencils, they were used on the the backgrounds to make the gelli plate prints!!

Saturday, 12 October 2013

Day 5 - Rusting


Finally we come to the last class of CC102 which is embossing effects.  The above chipboard pieces have been covered with distress embossing powder to give the rusting effect.


The background of the tag was also embossed in distressed embossing powder.


Coloured and distressed the background adding in water flicks.


Close up of the water flicks.


Finished tag.


Sunday, 9 September 2012

TIO - In a Heartbeat


Wow this was a hard one!!  This weeks Dragons Dream TIO recipe is 
a beating heart, a weathered timepiece and a bit of grunge..
How on earth do you show a beating heart I asked myself!!!  So I came up with the above.  The hearts are cut from chipboard using T!m's heart wings die and have been treated with everything under the sun!!!  Aged mahogany crackle paste, dabber paint (red pepper, copper, pitch black), clear embossing powder, fired brick distress embossing powder, so they certainly got the treatment.  I wrapped copper wire around the bottom one but this still didn't solve my problem of a beating heart.  I would of loved to add a flashing light bulb but my physics skills (or lack of) did not permit me to even try!!  So I decided on a large crystal, but then it looked a bit too blingy (and I don't do bling), so I toned it down a bit with a piece of silver mesh.

The background is Graphic 45 paper which has been sanded back.  Then I remembered I needed to include some stamping, so I stamped the word passion with timber brown stazon, cut it out and coloured it with black (800.5) and red (340.5) pan pastels.  But duh!!! the banner was stamped in timber brown stazon onto a piece of T!m's kraft resist, so I did have some stamping on there - never mind!!!

So I'll leave it to you to decide if I have accomplished the brief of a beating heart!!! 

Sunday, 10 June 2012

Texture Play


Well I had a right play making this piece.  I covered a piece of white card with various pan pastels, Orange Extra Dark (280.1), Orange Shade (280.3) and Yellow Ochre (270.5).  I added white gesso with a brayer to the background. I used the Creative Expressions large polka dots mask and sprayed worn leather and burnt orange pearl Dylusions sprays (these are old colours before Ranger got involved).  I turned the stencil over and brayered over it, so got the negative.  I added more pan pastel in the above colours.  I added more gesso through a piece of sequin waste, if you look closely you can see the 3 places where I put it!!!  Added more pan pastels. I then randomly used a glue glider, added tea dye distress embossing powder, heated it and rubbed off the release crystals. This was quite fun as the heat gun was melting the glue and it was bubbling up!!!  I then stamped a couple of my Dina Wakley stamps in Perfect Medium and lightly rubbed over them with Red Iron Extra Dark (380.1) pan pastel to reveal the images.  I took the sequin waste and used up the remaining pastel on the sponge.  I stamped the Dina image again onto a piece of corrugated cardboard in timber brown stazon, ripped around it and peeled the top layer off, leaving it on the brown paper.  I gave it a rub over with the same sponge with the red as above and glued it onto the background.  I edged the whole piece with walnut stain distress stain.


Simon Says Stamp and Show are asking for Some Texture, so I am entering this piece.

Thursday, 2 June 2011

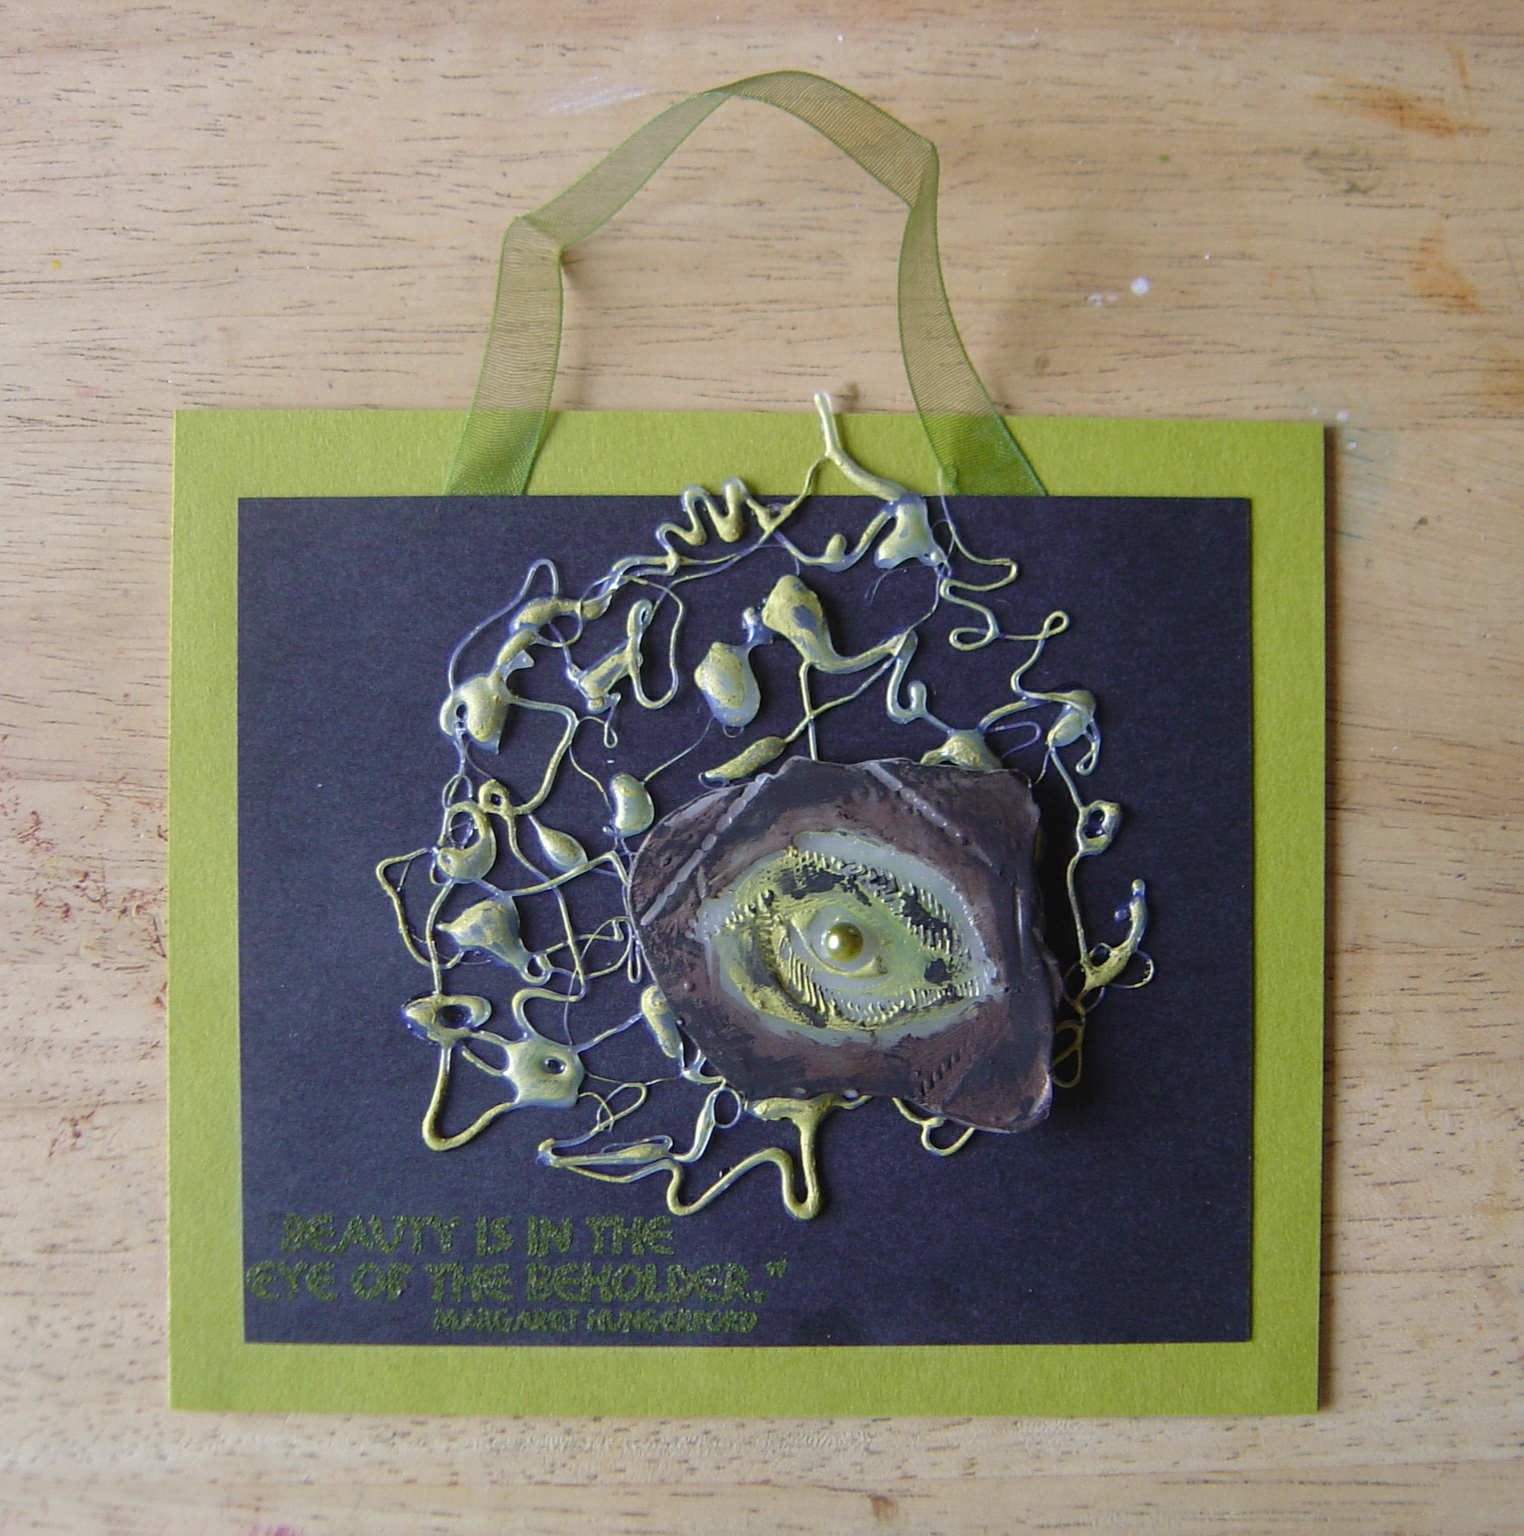
JFF - Week 18 - Eye Spy


A bit ago I had a play around with a glue gun and created some patterns.  When cooled, I coloured the glue with rub n buff.  I used the one on the left to make the hanging below.


I stamped an eye into friendly plastic pellets and once cooled, coloured it with spanish copper and jade rub n buff.  I added a large green gem for the inner of the eye.  I mounted it on the glue.  I stamped 'beauty is in the eye of the beholder' from the creative expressions spirit plate in peeled paint distress embossing powder onto the black card.  I then layered it onto green card and added a piece of organza ribbon to hang.

Check out the JFF challenge blog as there is a different challenge set every Thursday.

Thursday, 21 October 2010

Cards for Friends


Maz bought me this stamp (PBS) for my birthday too.  Again I kept it very simple.  The left image is embossed with weathered wood and the right with peeled paint. Crushed olive, peeled paint and pine needles were used to add colour to the green one.

The Park Bench


Maz bought me this lovely PBS stamp for my birthday. I used it to create these two simple cards. They were both stamped with versamark ink and covered wth tea dye (top) and weathered wood (bottom) distressed embossing powder.

Saturday, 9 October 2010

Triangle


My mate Maz obtained some triangular card and gave me a few sheets along with her Avant Garde stamps to try out which she got at the Doncaster Racecourse show back in July.  I slightly tinted the background of the card with antique linen distress ink. The sun, alphabet, one eye, two hands and the face in the circle were all stamped in versamark ink and embossed with T!m's distress embossing powder, vintage photo and tea dye.  I then went back in with tea dye and walnut stain distress inks and added more stamped images.  The word and the question mark images are from a paperartsy plate.  I coloured a piece of lace recently sent to me by SueP with walnut stain distress ink.  I sandwiched it between two sheets of card.  The bottom and right sides were paper distressed and edged with walnut stain distress ink.

Tuesday, 23 February 2010

Blue Board Book

Ok so you've already seen the front cover


These are some of the elements I used on the inside


These are a couple of the double page spreads


All the pages very plain and easy going. I could have done lots more to them but sometimes less is more and I like to keep it simple

Won't show you any more as it's not fair on the person who is going to get it. All I will say is that it's VERY blue!!!!!

Wednesday, 9 December 2009

More Improvising!!!!!


T!m's tags - day 9 - home made film strip with acetate and a utee moulded flower!!! Images provided by T!m


T!m's tags - day 8 - Lampost is Paperartsy from the Urban Snapshot range - Key is from Hilda!!!


Day 7 - really enjoyed the techniques for this one. Ended up using lime stickles for the holly and black diamond for the berries!!! Stamp is a Crafty Individuals one - CI-164


Day 2 - finally - as you can see my range of christmas stamps is very limited!!! But I made the shaker from the packaging that T!m's discs come in and found some silver micro beads to fill it with!!!!

At least I'm up to date now - just have to wait and see what tomorrow brings!!!!

Sunday, 6 December 2009

Playing Catch Up

This is my version of T!m's day 6 tag. I had to improvise and draw the tree myself, I think it could have done with being a tad bigger!!!! Oh and I didn't have any of the white flufy stuff either so I used white dabber paint


This is my version of day 5's tag. Didn't have any round fragments so have used the square ones instead and the images are from CI. My pine needles are a feather stamp from Paperarsty!!!!


And finally day 2 as I found a greeting stamp that I'd forgotten I had. Didn't have any mustard seed embossing powder though so had to use tea dye and it hasn't quite worked the same. Also didn't have the metal flowers and corners, and the mixing of the perfect pearls and flicking was easier said than done!!!!!

Saturday, 5 December 2009

T!m's Day 1 Tag and Lotstodo Challenge - Snow(flake)


Only managed day 1 of T!m's tags, didn't have the stuff for day 2, thought day 3 techniques were fab and day 4, again don't have the stamps for. I don't have many christmas stamps, just a couple of sets of CI ones. Also Hilda has set this weeks Lotstodo theme, which is snow or snowflakes, so this tag fits in perfectly

Friday, 6 November 2009

Distressed Atc's


This months UKStampers theme is 'distressed'. Here are mine. I used distressed ink to create the backgrounds. Stamped the images using versamark and embossed with black soot distressed embossing powder, then added various embellishments. Using my paper distresser I distressed the edges, inked them with black soot distressed ink and mounted them onto black card.

Saturday, 15 August 2009

Lotstodo Week 33 - Free Theme


Polly set us all yet another challenge. This is the bird house that she gave me to alter. Apologies too as she gave me it weeks ago, but I've only just got around to playing with it. Worth the wait though, I think!!!


I covered the whole thing in corrugated cardboard, ript and tore the top layer, painted them with acrylic dabbers and when dry added some metalic. I cut 'windows' out of the front panel and added some images behind. Added the flowers. I used my versamark pen to draw the squiggles freehand and I used black soot distressed embossing powder to colour them. The word 'hope' and the row of black splodges along the top were made with the Cricut machine.


This is a side shot so you get a better idea of the corrugated sides.

Saturday, 16 May 2009

Week 20 - Lotstodo Challenge - Working with Wood


I made this piece from all sorts of nik naks. I used mini wooden pegs, match sticks, coffee stirrers, tickets, string and eyelets. The image was stamped with versamark clear and then embossed with peeled paint distressed powder

Wednesday, 17 December 2008

A Few Tags


I created the background for this tag by inking a craft mat using my Nick Bantock inks, spraying water onto the ink and then putting my roller through the mess I'd created on the craft sheet, this was the result!!! I used the colours van dyke, damson plum and vermillion laquer. I used the Tim Holtz Carte Postale stamp with versamark, then added peeled paint distressed embossing powder. I used saddle and timber brown stazon to add the post mark images. I used the vermillion laquer ink pad with the journey stamp. I used diamond glaze on the word journey and added a mini grungeboard arrow which I coloured with timber brown stazon and attached with a brad. I added fibres to finish.


I created this background with the remains of what was left from the top one. I stamped some splodges on the background with Nick Bantock's van dyke ink pad. I used saddle brown stazon to stamp the main image. I added a flower image at the top of the tag and decorated one of the middles with a clear gem stone. I used my PaperArtsy frame stamps to stamp up the coffee stirrer with timber brown squares, attached it to the tag and added 3 further clear gem stones. Added fibres to finish.


I created this background by putting my flourish mask over the tag, sprayed it with walnut crystals and a metal mix to give it a bit of a shine. Removed the mask and swiped the whole of the tag with aged mahogany distressed ink. I then threw drops of water over the tag to create a watermark effect and gave it a blast with the heat tool. Then stamped 4 sets of flowers with walnut stain distressed ink down the right hand side. I then attached my main image which I had created ages ago on a 3 x 3 piece of card. Using stazon saddle brown, I stamped the veritas image and using vermillion laquer I stamped the quote 'nurture your dreams' bottom left. Added fibres to finish.

Friday, 14 November 2008

A Couple of Tags


Spiced Marigold distressed ink as a base layer, then I put my new TH masks on and added a bit of Shabby Shutters and Frayed Burlap. I stamped the image with versamark ink and used Peeled Paint distressed embossing powder. Once heated I rubbed away the crystals for the distressed effect

Did more or less the same with this tag except I stamped the top and bottom images with Peeled Paint distressed ink and the middle one is embossed as above

Saturday, 8 November 2008

A Few New Stamps


A few inchies. The eyes have been embellished with diamond glaze but it doesn't show up on the photo

This is a trinchie. I really love this stamp. I'm going to use it on a tag with distressed embossing powder
An arch. I stamped the swirl on the right and then used the gold stickles to trace over it

A couple of skinnys, nearly the same, but not quite!!!

Monday, 5 May 2008

Distressed Tag


I think I'm on a tag mission!!!! Decided to distress this one - used frayed burlap and aged mahogany distressed inks, spritzed them and ironed them dry. Added Sir Tim's Carte Postale stamp in clear embossing ink then covered with tea dye distressed embossing powder. Heated it and scraped all the loose bits off. Added more to the bottom and right hand side. Then used some Paris stamps from CI and Paperartsy and inked with latte adirondak ink and frayed burlap and aged mahogany distressed inks. Added some string to finish

Tuesday, 1 January 2008

A couple of Tags


Also made these 2 tags. I have used crackle glaze on the one on the left and the one on the right is weathered wood distressed embossing powder

Blog Archive