I joined a brand new group on FaceBook last month, simply called 'Fabric Books'. After going to the James class and making a book with recycled materials including fabrics and envelopes and also watching Teesha Moore YouTube Videos to create fabric book covers using small pillows, I now want to make a totally fabric book. This is one of the reasons I joined the group as I needed a starting point. A lovely lady in the group called Katie Williams has been working very hard to create lists of information for absolute beginners including searching for YouTube tutorials. I was immediately hooked and loved the way a lady called Janette of ScrapinHappyxo Crafts created her Bohemium Gypsy books. She has lots of tutorials on the various stages, I watched them all and was totally blown away and inspired by her creations, so here goes.

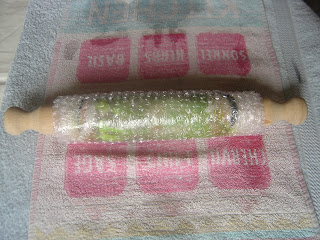
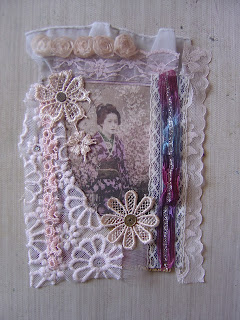
The first thing to do was decide on a theme, so I went for Oriental. I printed the above images onto fabric using freezer paper and couldn't believe how well they came out.
On Sunday I paid a visit to the car boot and picked up some lacey clothing, some doylies and...
Some lovely trim on a scarf which I picked up for 20p.
I started to compile the pages around the images using trims, ribbons, lace and anything else I could find in my stash to be honest. As I came across more bits I kept adding to the pages.
I glued all the pieces down.
I experimented wth different types of glue.
I sprayed the white pieces with red bister to give them some colour.
Next I prepared the pages and the cover from a thick upholstery fabric.
And sewed the pages onto the cover using my sewing machine. Sew the middle page in the middle of the cover and then another page either side leaving about 1/4 of an inch of a gap.
I started to assemble the pages in the book. These are going to be the first two.
And these the third and forth pages.
I really wanted these two images the other way around so they were facing each other, but I needed to have the black lace on the right hand page or it would have got crushed on the other page. Something to think about for the next one.
And the same happened with these two pages, I've had to put them the opposite way round to which I would have really liked.
I then took everything out so I could add trims to the inside edges of the pages.
I glued the pages together using a glue gun.
The back page will get some trim added when I put the front cover on.
I then set about covering the pages with some lace.
And once glued in, I cut them down so you could see the trim between the glued pages.
The pages are now glued in, these are the first two with a few additions to fill up the page.
Pages three and four and some extra doylies.
The fifth and sixth pages, again I added in more fabrics to the bottoms of these pages.
And the last two pages. Again added more fabrics to both the bottom and the top and some beads on the right of the right hand side page.
This is what the book looks like from the top with the pages all closed.
Next I made a spine from corrugated cardboard and covered it in some scrap fabric.
I glued the spine to the book to give it extra strength. I also manipulated it so it didn't go really stiff.
I finally completed the cover of my book today and here it is.
And this is the back. I wanted to keep the back fairly plain and flat so it sat okay and I'm happy to say it does. I just need to go back in and stick that last flap down as you can see it's a bit flyaway!
These are the first two pages of my completed book.
The second pair of pages, three and four.
Pages five and six.
Back set of pages, seven and eight.
And the back and front covers which won't squish down flat as I put the corrugated cardboard spine in to strengthen it.
Sorry the photos from today are a bit dull but it's a really gloomy day! May edit when and if the sun comes out!
I really, really enjoyed making my very first totally fabric book and I love how it turned out.


