Showing posts with label Stickles. Show all posts

Sunday, 28 March 2021

Finnabair On-line Workshop


As I didn't have any appropriate tissue papers, I made my own in prep for the class.


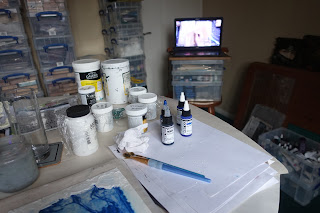
Saturday afternoon, all set up and ready to go.


And here we are, live with Anna.


I've just added crackle paste to the edges here.


And moving on to the next step. Keeping up with Anna.


Once everything was dry it was the building up of the elements.


Once I was happy I stuck everything down and then that's where I stopped for the evening as I wanted to wait until it was all properly dry.  So this morning I gave everything a coat of white gesso.


Then I painted both pieces using shades of blue, grey and black, trying to add shadows, but I never have been any good at that!


Once the paint was dry I moved onto the waxes.


And lastly, added a bit of bling.


Close up of the front cover.


And close up of the back cover.

Really good on-line class, well paced and easy to keep up.

Thursday, 10 December 2020

Snowflake Pegs


I dismantled some wooden pegs and then glued the two halves together.


Once dry I gave them a couple of coats of white powertex.


Then I stuck them together in a star pattern.


Then I took two smaller wooden snowflake shapes, painted them in white powertex and stuck them on top of the peg formation.


Added some glitz and bling and here are the finished snowflakes.

Friday, 4 December 2020

Christmas Wreath


I started off with cutting myself a polystyrene ring with my new cutter.  I wrapped it in t-shirt fabric and powertex and left it to dry.


Once completely dried I coloured it with gold pigment to bring out the textures all over.


Then I started playing with some natural elements and arranging them on the wreath.


Close up of some of the natural elements.


I didn't have a merry christmas, so I made my own.


I started to powertex bits down and then stopped as I had an idea of how to attach the letters.


Once I'd figured out the letters, I continued to use the powertex to secure everything in place.


Once everything was totally secure, I went over everything again with another coat of powertex.  I also used lime stickles on the letters.


And here is my finished wreath, I decided to go down the green and gold route although I realise you can't see it very well in this photo as it's so dark and still raining!!


Close up of some of the dry brushing.


And some more.  I used the gold first and then the green on top.


The Merry ended up too far to the left so I made some more holly leaves to fill in the gap.


Close up of the first set of leaves and berries which hopefully represent holly!


And again, finally the finished wreath, which I am really really pleased with as I was meant to be going on a wreath workshop tomorrow, but unfortunately due to being in tier 3, it's had to be cancelled.

Saturday, 8 August 2020

ATC's


I created a couple of masterboards, the backgrounds are distressed oxides and I stencilled with stazon.


Then I chopped them into ATC sized pieces and decorated them using images in the style of india.  I also used lots of bling, trim and sparkles.

Saturday, 7 December 2013

Frosty the Snowman


Over at Tag Along their theme this week is 'frosty the snowman'.


To make him 'frosty', I added some dry glitter and coloured it with salty ocean distress stain and added blue distress stickles on the buttons and the ear muffs.


I created the background using pewter, faded jeans and broken china distress stains. You can just see the pewter popping through.

Also PanPastelUk have a theme of winter wonderland using metallics and one other colour, obviously my other colour is blue. 

Friday, 22 November 2013

The Green Goddess


Over on the PaperArtsy blog Liz is back and on day 3 created a background using cling film. I used sage on an mdf plaque.


Don't know if this shows up very well or not, but this is after the cling film has been removed and the paint dried.


Close up of the cling film background.


I then mixed sage with grunge paste and applied through a stencil.


Using my new wooden TH stamp I stamped in olive green stazon in opposite corners.


Now this 'was' my last piece of crackle tissue paper which I was saving for a very special moment, but.....


look what popped through the letter box earlier this week from Emma - ooooooh, thank you xx


So I stamped my LP Acey Duecy image onto the crackle tissue, turned it over and painted the back.


Once dry, I painted the whole of the back in snowflake.


Cut out the pieces that I needed.


Used satin glaze to stick them to the background. Added extra stamping in black archival and green stazon, applied treasure gold to the raised GP areas, the middles of the flowers and around the edges. I also applied 3 layers of gloss glaze.


And it still needed something else, so I put gem stones in the middles of the flowers and on the darker sides of the symbols.


And randomly dabbed on some peeled paint distress stickles.


And finally added a piece green of fibre.

I'm also entering into this weeks Simon Says Stamp Monday, who have a theme of it's a mystery.  My mystery is the cling film and distress stickles.

Think Monday, Think Atc's have a theme of all one colour and my colour is obviously green!!

And finally Tag Along have a theme of bling this week, so with the treasure gold, the gems and the stickles, that's my bling!!


Blog Archive