Sunday 30 January 2011

Postcards


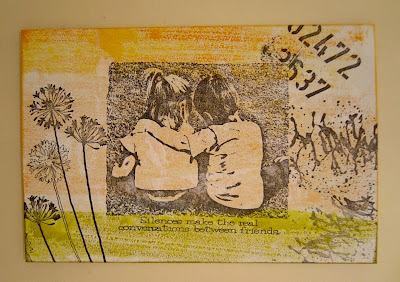
I made these postcards from the gesso'd background.  The main image has been masked off on both. The top one is all stamped in black stazon.


The circles and numbers at the top have been stamped in black and/or sand eco friendly paint.  The squiggles top left have been stamped with lake mist and all other images have been stamped in black stazon.

Backgrounds


Alison inspired me to make these backgrounds as she put a post up earlier on how she made the background for a card.  The same colours were used for both, crushed olive, wild honey and tea dye distress inks.  The top card is glossy and has water splashes in it.


This one is created using matt cardstock and gesso has been added.

Saturday 29 January 2011

Atc's - In the Woods


March's UKStampers theme is 'In the woods'.  I've made mine before I go so I'm not rushing round too much when I get back.  I'm also hoping to have some new stash to play with!!!

Friday 28 January 2011

Atc's - H is for .....


I am hosting an atc swap on UKStampers for February and the theme is an atc each with the word, hope, happiness and heal on it.  As I'm not going to be around much, I decided to get straight to it, so here they are.  All the backgrounds were previously created with spray inks and paint, for more info click here.  The hope caligraphy and the bottom images are by crafty individuals and the top right is by stampede.  I used stazon ink on the backgrounds.  The image on the top right is stamped onto a separate piece of card with a brown from the colorbox options pad - autumn and the time heals is stamped with a green from the same pallette.  They were both cut out and attached with 3d foam pads to give a raised effect.  I added gems to finish.

Thursday 27 January 2011

Canvas and Clay


This is a flat canvas measuring 10" x 8" just to give you some idea of size.  I put a good thick layer of texture paste around all the edges.  I added about 6 pieces of text book pages with mod podge, but didn't like it so I painted the whole canvas in silver acrylic dabber and added black to the edges.  I added gold and bronze to break up the solid black.  I then decided that the middle was too silver so I added some gold, pearl and bronze. I didn't like that either so I covered it with tan eco-friendly paint, but used an old credit card to scrape it over.  Once this had dried I stamped various images with black stazon.


The heart shape is made from pearl, gold and bronze polymer clay.  Once I'd got the shape I more or less wanted I started adding bits and pieces to it.  Screws to each side, smaller screw heads to the top left, a cog from a watch top, an open safety pin, a cog, brads, chain and pin linked togehter, a button and an 's' shape at the bottom.  Once I'd pushed them into the clay I used my TSS tools to make the dots and dashes marks.  The gold colour hoop at the top is a curtain ring with copper wire wrapped round it.  I baked it all in the mini oven.


Once cooled, I put the two pieces together and added a few more cogs and wires to the canvas.

Saturday 22 January 2011

Fp wired heart


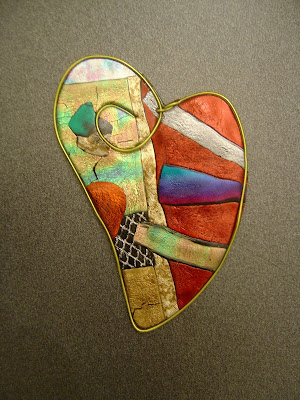
I bent a piece of gold coloured fun wire into the shape of a heart.


I heated various off cuts of Fp and pushed the wire frame into it using cooking oil so as not to get my fingerprint impressions all over the Fp.


Once cooled, I cut it out.

Tuesday 18 January 2011

Brown & Pink


This is the set of atcs I've made for a brown and pink swap on KCUK yahoo group.  The backgrounds have been swiped with tattered rose distressed ink and pink sherbert adirondack ink.  I was very limited for choice as they are the only two shades of pink that I own!!!! No surprise there then!!!  The images are stamped in timber brown stazon, tea dye and walnut stain distressed ink.  I've also used.....wait for it.......Mother's Day Pink........embossing powder!!!  Obviously this is very old and it was one of the first embossing powders I bought, I did have to go and hunt it out!!!  It's got a bit of glitter in it too.  I think you can probably just see it down the right hand side of the boys forever atc, bottom left. 

Sunday 16 January 2011

Pay It Forward

Ok, I got this from Jo's blog.  The idea is, I promise something hand made to the first 5 people who comment on this post. However to be eligible, you must repost this status offering something handmade to 5 other people. The rules are that it must be handmade (homemade) by you and it must be sent to your 5 people sometime in 2011. Ready, set, GO!


The first 5 get a handmade gift, no promises when, but soon, remember you have to do it too - so I shall check before I make it and if you have not 'paid it forward' I shall move to the next person on the list that has commented.


ENJOY- HAVE FUN-MAKE PEOPLE HAPPY

PAY IT FORWARD

Nails, wood and corrugated


I finally managed to get crafty and make something this weekend.  I've been so busy producing PowerPoint presentations for sessions at work and yesterday I spent the whole day writing 3 assignments for my college course which I have to hand in on Wednesday.  I was hoping to have them done and finished whilst I was off in-between christmas and new year but unfortunately I was succumbed to this flippin flu bug come chest infection and was laid up for at least 4 days!!!

Anyway, back to the piece.  To find out how I created the texture for the heart and wings go check out the technique zone blog as I've put a tutorial on there.  Unfortunately due to the poor light and gloomy day you can't really see that the background colour is silver and the heart itself is metallic green with bronze rubbed over the top and edged in black.  I used one of T!m's alteration dies for the scroll, painted and edged it and stamped the word 'honour' in black stazon.  The background is one of my favourties, a piece of corrugated, ripped and torn.


Saturday 15 January 2011

Exciting News

I am pleased to tell you that a few of us have been working behind the scenes on a new challenge and tutorial blog.


I can't say too much at this time but there will be a new weekly challenge every THURSDAY, that's so you have time to get your thinking caps on to create at the weekend!!!


The first challenge will be posted up on THURSDAY 03 February, but other useful information may well be posted before that.


But if you'd like to help us spread the word, take the button from my side bar and display it on your blog which will officially open next Thursday.  Below is what you are looking for.


The new blog is called 'Just for Fun' as that is what it is meant to be.  No winners, no losers, no prizes, no sponsors, purely just for fun.  When we stop having fun, we stop the challenges!!!

Wednesday 12 January 2011

Look what I got


Liz sent out little pressies to all those who emailed into her last C&C show.  I was fortunate enough to get a Lizzie doll.


Liz also has another site where she show techniques and gallery pieces, go over and check it out.  You can also purchase her fab dvd and all the materials you wil need to get you started, including a fabulous range of colours of friendly plastic.

Saturday 1 January 2011

Corrugated Hangers


I tied knots in a couple of pieces of string and glued them to the corrugated. I painted over them with gold, silver and copper acrylic dabbers.  Once dry I applied black to certain areas to highlight.  Using a template found on google, I cut the torso shape out of thick card, stuck small nails and shaved pieces of wood to it and covered with tissue paper.  Once dry I painted it with bronze eco friendly paint and again used the black to highlight.  Attached it to the background between the two pieces of knotted string and added a couple of nails and piece of string to hang.


I covered three pieces of a straw with text paper and painted them silver along with the corrugated.  Once dry, I dripped green patina eco friendly paint over the corrugated.  I singed a piece of light green organza and using wire I sewed the friendly plastic piece to it.  These are the leftover pieces from the key ring and brooch projects.  Using silicone glue I attached the organza and friendly plastic and the painted straws to the background. I added a piece of string to hang.


All the items that I've made over the christmas period have been inspired by articles in the following books which I got for christmas:


Friendly Plastic 101
Raising the Surface
Fusing Fabric


DVD's
Bend it, Shape it - Liz Welch
Polymer Clay Treasures - Lisa Pavelka

Happy New Year


Happy New Year everyone


Hope last night wasn't too heavy for you and you are looking forward to a great 2011


Here's to more crafting and more bloggin - cheers


xxxxxxx

Blog Archive