Showing posts with label Merino Wool. Show all posts

Saturday, 29 September 2018

Wet Felting Workshop - Spikes and Craters


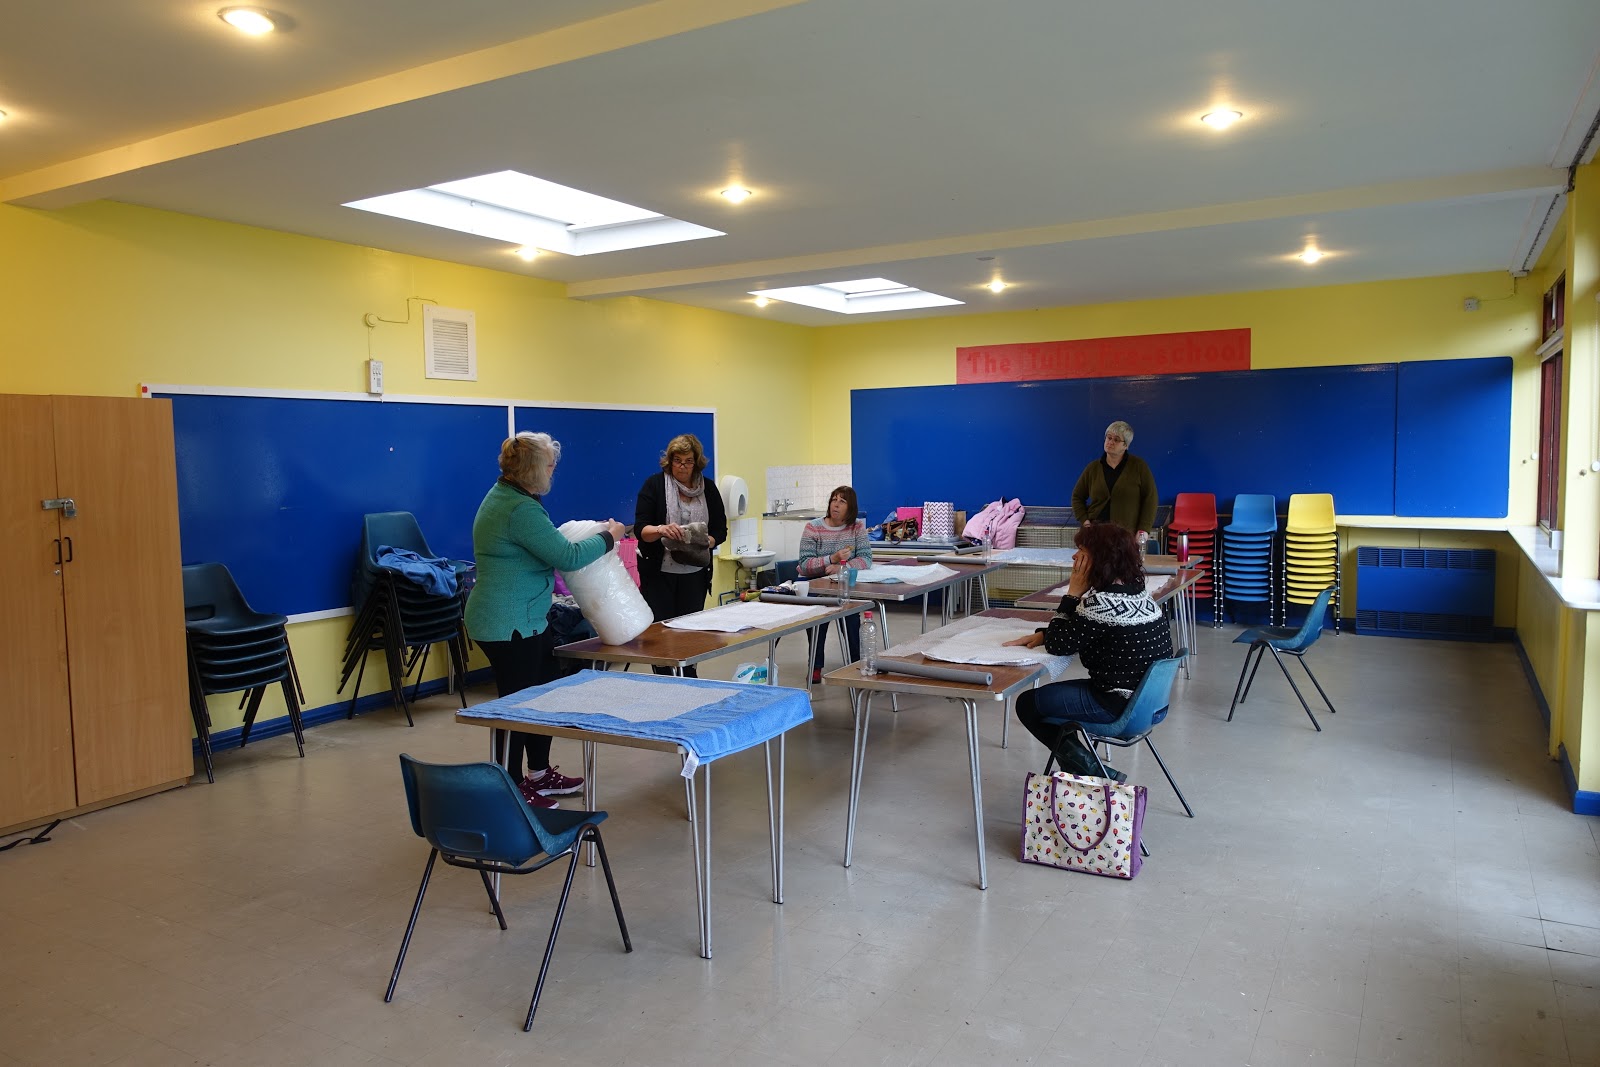
So today I attended a wet felting workshop with felt maker, Jenny Pepper. It was a lovely day, which was lucky, as I travelled to Scarborough for it.


The first thing we did was laid out three layers of Merino wool and created a pre-felt.


This is Liz creating her prefelt.


This one belongs to Jenny who came all the way from Cumbria, somewhere near Hadrians Wall.


Jenny (the tutor) helping Liz out with her prefelt as it was quite thick and she needed to add more soapy water.


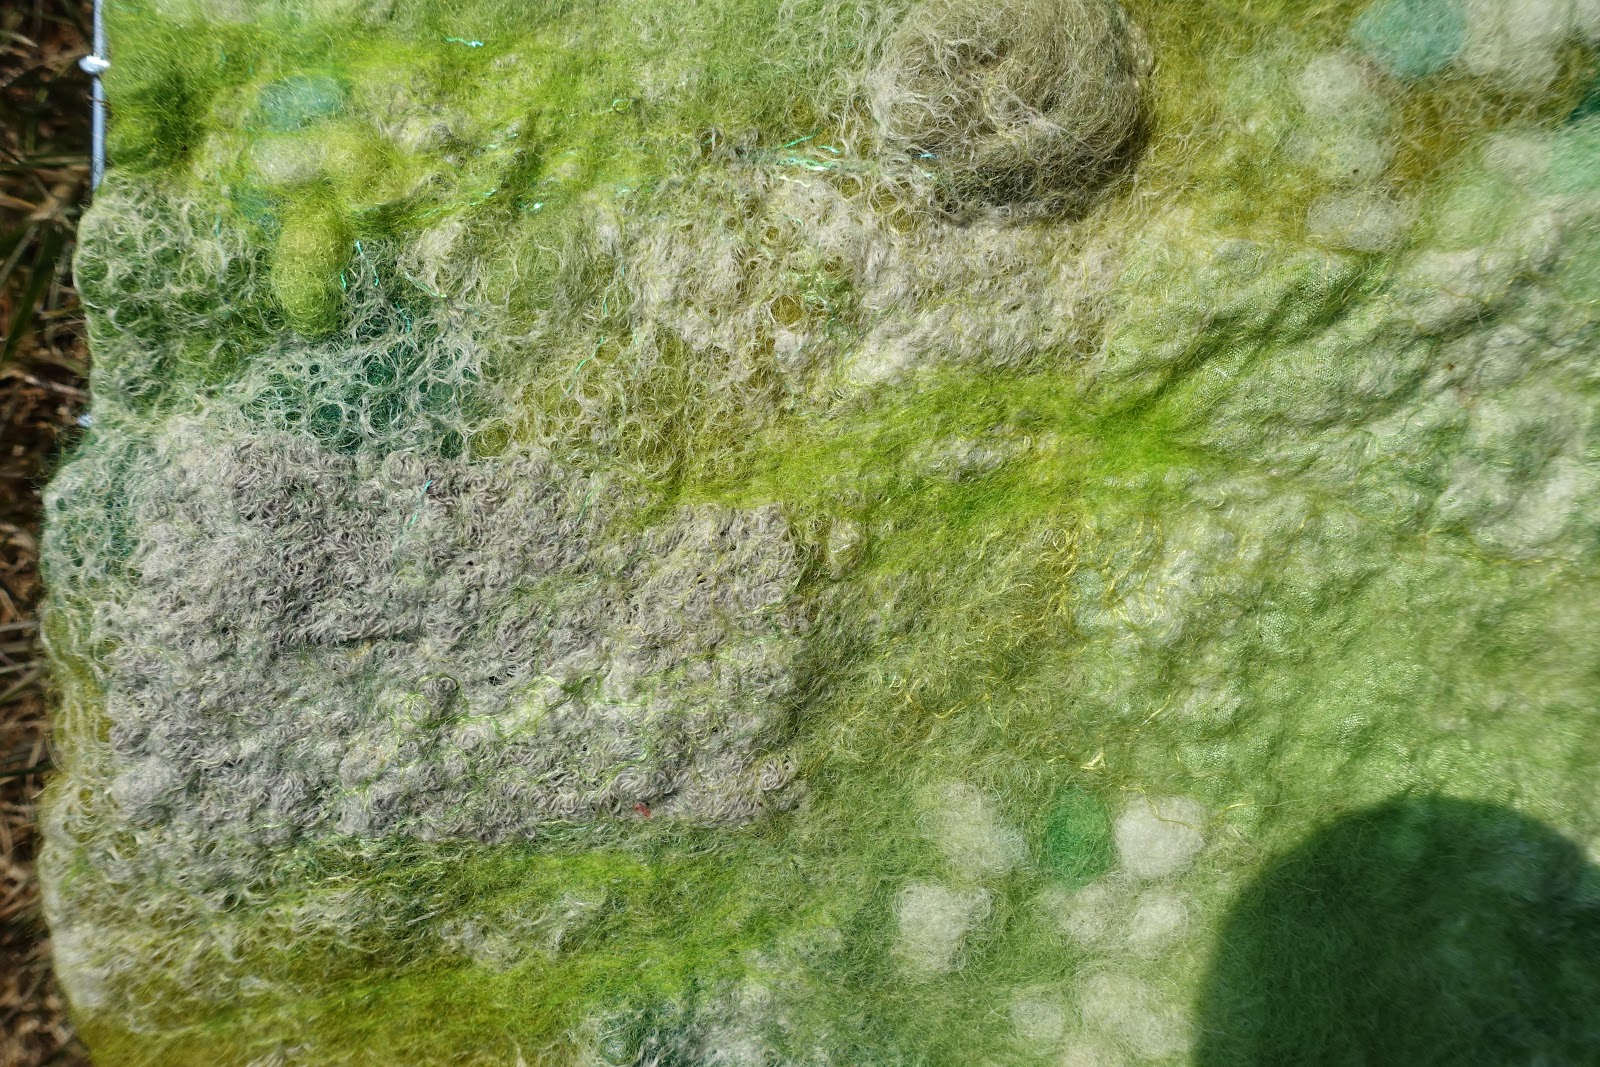
This was one of Jennys samples showing a few different techniques that I wanted to try.


We each created a base and then stopped for a bite of lunch. I just went with a plain cream. Jenny gave us a demo of how to create the different craters and spikes and flaps and then we had a play on our own pieces using the previously made prefelt.


We used the prefelt as it has still got some felting life left in it, so it will adhere easily to the background piece which was just laid down (3 layers), wetted and left until we needed to use it.


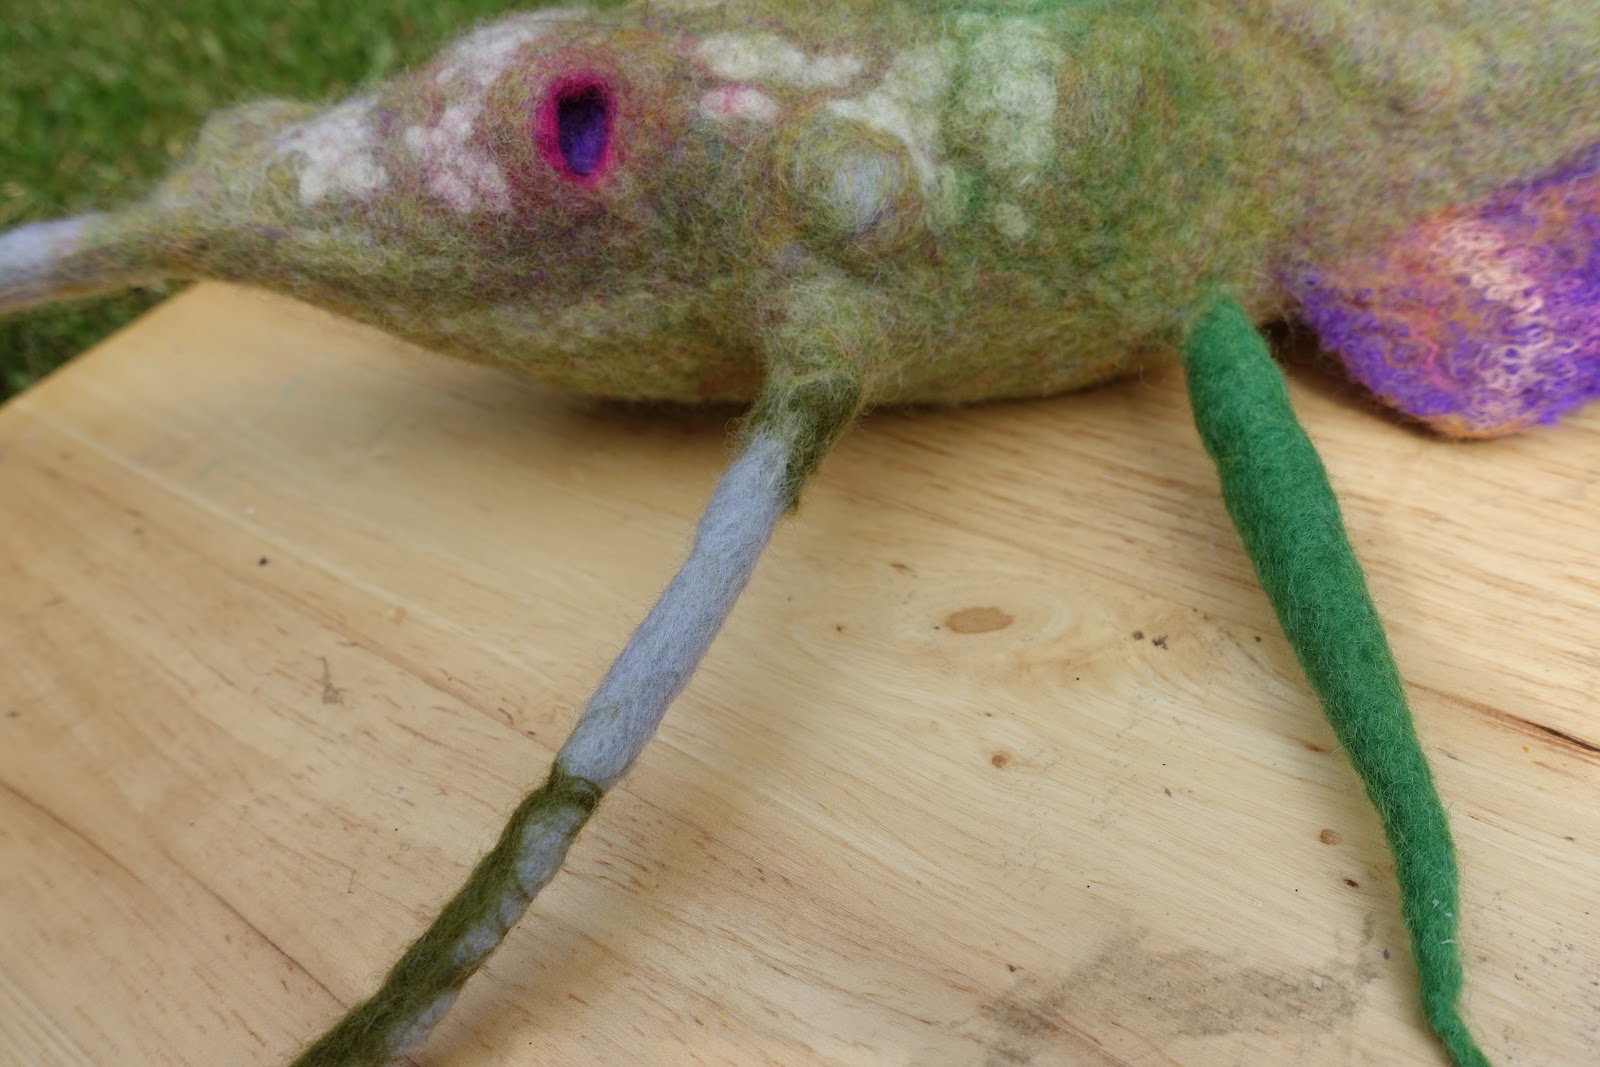
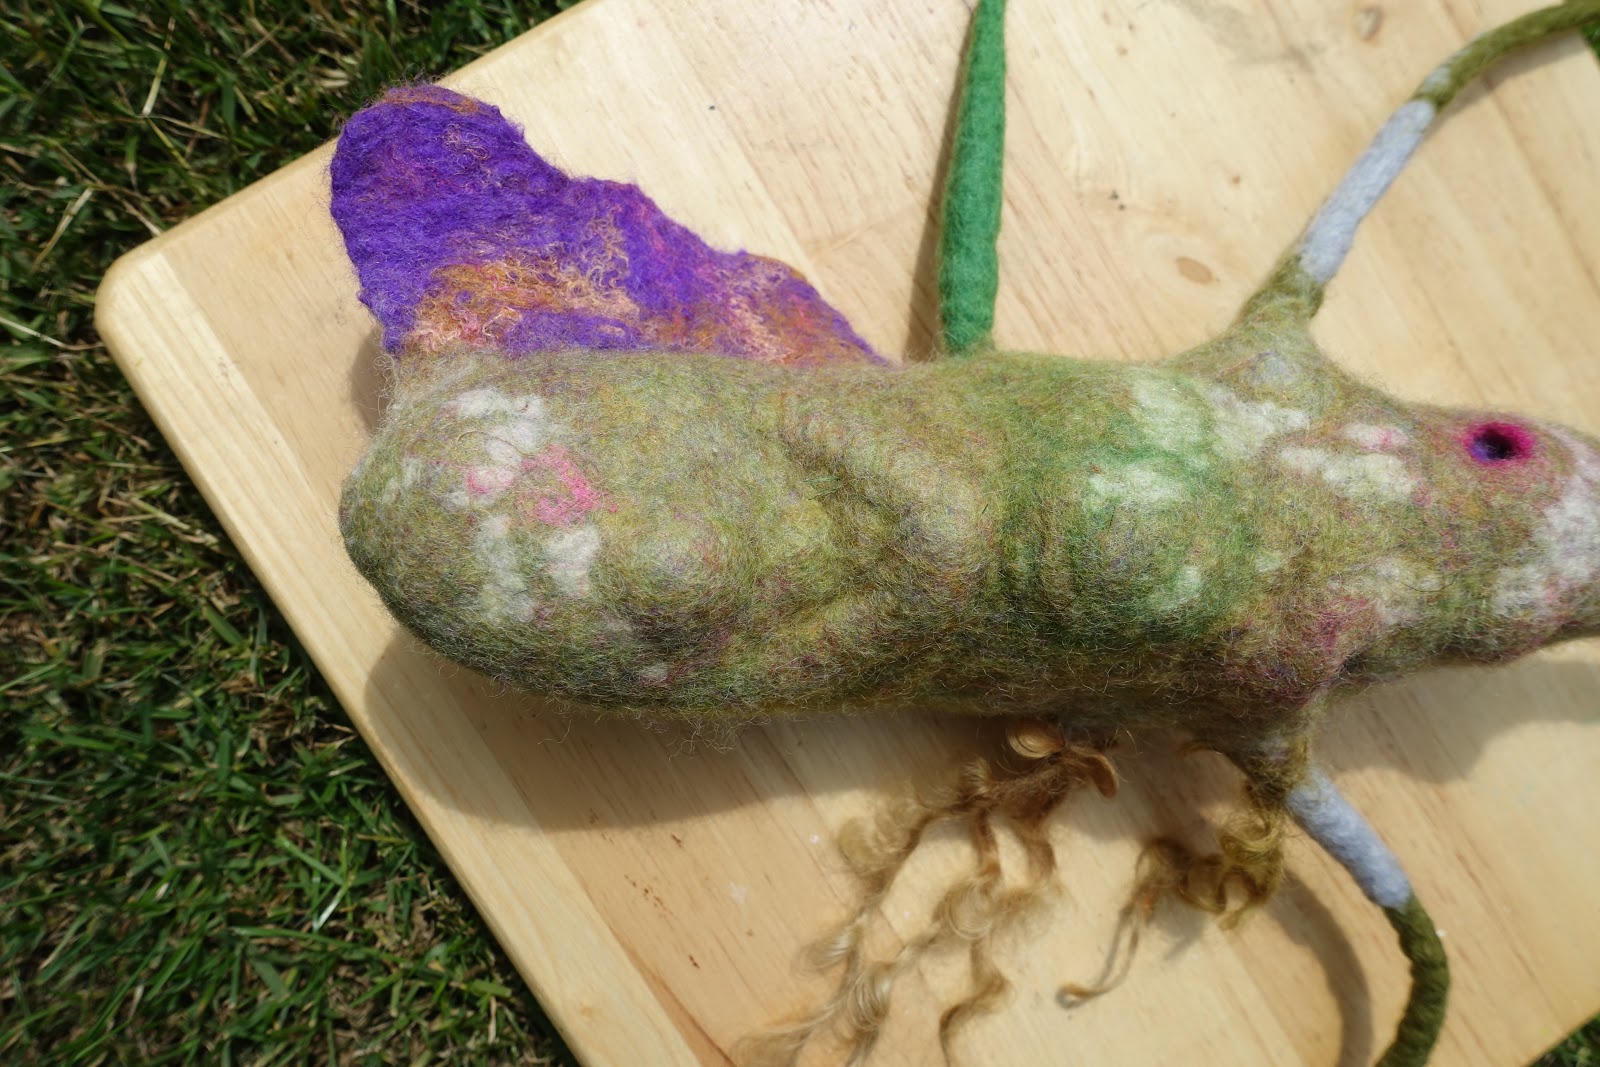
The after much rubbing and rolling and more rubbing and rolling and hot and cold water shocks x2 finishing with cold and rinsing out and cutting and sealing the cuts, this is what I ended up with.


I love how it came out, I forgot to say about the spikes on the bottom, they were the last thing to be felted after everything else had been wetted out and rubbed.
 

And this is how Carols turned out. I didn't get a photo of Jenny's and Liz's finished pieces as they left pronto, as their lifts had arrived before I got chance.

Had such a lovely day and my piece is now drying in the airing cupboard.

Thursday, 26 July 2018

Felt United - Textures


Over on the Living Felt Facebook page, Marie is asking for contributions to the above. There are certain rules you have to follow, but not many. Has to be square or rectangular, no side bigger than 16" or smaller than 4". One colour family and has to have texture, as that is the theme.


As it can be wet felted, I decided to see what I could do. I rummaged through all my boxes of stuff and pulled a few things out to try.


About two hours later I ended up with this. I wasn't that happy with it to start with, but once it had started to dry a bit the textures started to appear. It ended up being 15" by 9" approx.


The silk really ruckled up when it was drying out creating some great texture.


This was a long lock that I twizzled round and stuck in a heap.


This was cotton scrim, which again eventually created some ruffles.


Another piece of silk.


Not really sure what this is but it's like big baubles of wool on a string.


And this is piece of textured material, it's like the mulberry bark paper, but it's a material.

Shall be posting it off to the USA this weekend.

Sunday, 10 June 2018

Wet Felting Techniques


So yesterday I attended a workshop at Needle and Thread. For me it was all about learning the techniques, so I wasn't really bothered what I was going to end up with. So if you are asking what it is, it's not meant to be anything!!


The craters worked out great with a colour showing underneath and one around the hole. The nepps worked out really well too. They are the patches of white.


The spikes were added and they've attached and blended in really well too.


If you can just make out the ring of dark green circles, this is where I created a piece of prefelt, cut it into circles and stacked them on top of each other.


Spikes, craters and wool locks. Love how the spike at the top just looks like part of it.


This is a fin in the purple and orange.


Here you can just about make out the ring of one of the rope canes and a ball on the left hand side.

Saturday, 9 June 2018

Wet Felted Vessels Workshop


Today I went to the lovely Needle and Thread near Lincoln run by Sally, to do a wet felted workshop with Robyn. 


Firstly we had to decide on the shape of our vessel. We all (I say all, there were only two of us) chose to keep it simple and do a bowl shape, so we started off with a circle. Covered both sides in two layers of merino and put it to one side.


Next Robyn showed us how to make various things including canes, balls, spikes and prefelt.


This is my cane in the making. Once you get it started you can roll it in bamboo and it really helps to stiffen it up.


I decided at the eleventh hour to change my shape to an eye sort of shape. just so I could get all the elements on that I'd made.


Anchored the pieces down, but looking back I think I used too much, especially around the top of the larger cane circle.


Robyn had brought her drum carder and kindly let us have a go with it, so we were able to make our own batts for the top coat and blend loads of different colours together. Nepps and silk waste was also added. Eveything was then wetted down and we worked around each element for which seemed like ages to make them all 'stick' together.


Robyn laying her top layer down.


Wendy working her individual elements into the main piece over a piece of thin plastic.


In the room next door they were using free machine embroidering to create pictures.


After working around all the individual pieces to make sure they are all linked with the wool.


This one is Robyn's.


This one is Wendy's.


We then rolled about 40 times, turned 90 degrees and turned it over to until all 4 ways had been done and the resist started to buckle. 


Once this happened we took the resist out by making a cut through all the layers and pulling it out through the hole. Did the hot and cold shrink thing, threw it on the floor a few times to shock the fibres. Soaped it again in hot and cold, worked the edges so we didn't end up with a seam and basically worked it until we were happy with the look and feel of it.


Once happy with the way it had felted, inside and out, we cut the small resists out that we put in to make the craters.


Once worked and shaped, we stuffed them with carrier bags to help them keep their shape.


And a view from the top.

I will be back tomorrow once it's dried to show you close ups of the different elements.

Saturday, 28 April 2018

Wet Felted Bag Workshop


So today found us in a different location for our wet felted bag workshop with Dawn of Dawn Allen Fibre Artist. Lin and Chris had just arrived and were getting settled in with a cuppa.


Dawn explaining to the group what a resist is, how to use it and the types of material you can use for one.


In the morning we made a smaller tester piece to get a feel for the wool and the shrinkage values. First thing to do was decide what we were going to make and what size of a resist we would need.


Once we'd decided, we started to add the wool. For the first layer we used a Bergschaf batt, which I thought was gorgeous. You can see it in the photo above. 


This has two layers on each side and I added a random design on the front side using some locks and nepps.


Here you can see the locks on the bottom. I covered them to do the rolling as I did't want them to felt.


Lin decided to add colour to hers. The colours are made up using Merino wool, nepps and masham wool locks.


And Chris laying her design out again using Merino wool, locks and nepps.


Chris's landscape design.


Everyone adding the finishing touches to their designs before the wetting and rolling process begins.


Lin taking a photo of Chris finishing her design as Chris forgot her phone.


And then the rolling begins. This is where you get your exercise!
  

Testing and looking - is it done yet??? Dawn giving Sue a bit of advice.


Lin is happy with with how her piece has come out after, rolling, hot and cold shocking and wringing out.


Chris is still rolling to try and shrink hers down to mobile phone size. We then stopped for some lunch.
 

After our practice this morning we went for it and made a bag in the afternoon using exactly the same process and taking into account what we learnt from this mornings make.


The first thing we did was to make a handle for our bags. Then we covered each side of the resist using the Bergschat and for the second layer we used the Merino, locks and nepps again to create the design of the outside of the bag. 


Then more wetting and rolling to get the wool felted and to the required size.


Chris cutting the resist out of the felted wool.


Dawn showing Linda how to felt the raw edges once the resist has been removed.


Front of Dawn's bag, she added a bright pink flap to hers. I really love how she felted along with us.


This is the back of Dawn's bag.


This is the front of Sue's bag. She's just removed the resist and is felting the raw edges after making a cut.


Moving along the cut edges of the bag to seal them.


This is mine, I've just cut the resist out and seeing how the flap looks.


These are what Carol made. In the morning she made a phone case and in the afternoon a matching bag. 


Carol decided to add a bit of needle felting to her pieces.

For some reason I don't appear to have a photo of either Lin or Chris's finished bags.


When I got home I found something to stand in my bag whilst it dried so I could mould it to the bag shape that I wanted. Here it is standing on the draining board with an empty biscuit tin inside standing on a cooling tray to help it dry out.


Once they are properly dried tomorrow I will add the clasp and I may add some needle felting to them.

Thanks to all, had a fabulous day and learnt loads.

Blog Archive