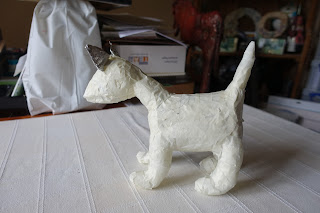
Inspired by lovely makes dotted all around the grounds at the Powertex garden party, I knew I needed to have a go at a little dog after seeing Tracey's fabulous make above.
I have no idea how she made hers, but this is how I started with mine to get a basic shape. Garden wire, half a kitchen roll tube and bubble wrap stuffed inside the tube holding the legs, head and tail in place.
I used tin foil to build up the legs, head and tail. Then covered it in paper tape to hold it all in place.
I used bubble wrap to fatten up the legs and give the belly a bit of bulk and again covered with paper tape.
I rolled out some clay and put a thin layer over the back and head and under the belly. I took the foil ears off and made some clay ones. I only put the tinfoil ones on to see where they were going to go whilst building the head.
I used small strips of hessian dipped in ivory Powertex building up textures to cover everything but the paws. I left them until the rest of it was dry.
Once dry, I went back in and covered the feet, also making sure he would stand up.
I gave him some eyes. I decided to use transparent Powertex on the cotton for the eye so it stayed white and didn't get lost on his face.
However I did use ivory to stick it on and also on the other eye, but I should have stuck to the transparent. Remember though, transparent isn't water / weatherproof, so will need to be varnished if going outside.
Close ups of the fab texture the hessian makes.
View from the overhead.
I went back in and painted over the ivory Powertex I'd got on his eyes!
Just saying 'hello' to Fraz.
So now he is finished. I'm not going to add any colour to him because when you try and add pigment or bister to ivory Powertex, for some reason it just looks mucky.
He roughly measures 10" long by 8" high.


No comments:
Post a Comment