Friday, 31 August 2018

A Boot Pour


Remember my £1 pair of boots I picked up at the car boot? Well I decided to play with one of them today. (BH Monday).


I had/have no idea what I was doing but I decided I wanted to do a paint pour over the boot! I mixed about 8 colours of paint, including black and white and took the lace out of the boot.


Once I'd mixed all the paints I poured them all into one big coke cup. This is what I ended up with.


And this is how much the cup was filled up. I had no idea how much I would need!


Before I got to this stage I needed assistance. Once I'd poured the paint and covered the boot I was stuck. I never thought about what I was going to do with it or how it would dry. So I shouted Martin who put a carrier bag over a cooling rack for me and I stood it on that. I took it outside and paint is still dripping off it three hours later. That tells me I used far too much paint, but hey ho.


The only problem is, with the paint still moving, the pattern is changing all the time and it's difficult to 'save' something that you like. This is still soaking wet and the paint is still sinking down.


From the zip side, but again still very wet and the paint is still moving.


I was asked the other day if there is much wastage, and the answer is yes, lots! I'm not sure if you can see from this photo as the excess paint is caught on a piece of thick cellophane in a tray and it's quite deep. It may be my fault as I may have used too much, but I've been caught out before not having enough. I did contemplate tipping it onto a canvas, but as I wasn't too far away from making mud with all the colours, I decided just to leave it to get a skin on it before I dispose of it, as I reckon it will take weeks to dry! 


Three days later, totally dried, this is what I've ended up with and I love it.


View from the non zip side.


Close up of the front of the boot. Here it's held the colours and shape better because it was a flatter surface and didn't have far to drip.


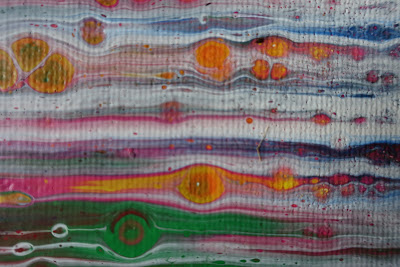
Close up of the outside of the boot, some great colour combos going on.


Love this section here where the yellow has come through.


Another close up, love how it's come out.


And how the paint has continued and dripped over the sole of the boot.


And this is the zip side of the boot.


I really love it and not bad for a first boot pour.

All paint products are from the DecoArt range.

Tuesday, 28 August 2018

Paint Pour and a Stencil


Remember my first huge paint pour from a few days ago using some metallic paints?


Well I decided to add some interest by stencilling over the white area. I used black modelling paste and a stencil.


All products are from the DecoArt range.

String Paint Pour


I picked up a pack of cheap canvas's yesterday morning in Lidl, 20 x 30 cm (8" x 12" approx). I mixed my paints, just using three colours and black.


These are the colours I used and mixed them approx 1:1 ratio with the pouring medium.


I was doing really well until I decided to try and be clever and spoilt it. On the left hand side I'd done the pink but I decide to put another white one over the top and totally washed the pink one out and spoilt it. But at least I know where I went wrong. Luckily I can paint over it and try again!


And today now that it's dried properly, I actually like the way it's turned out. The purple is much darker and lays over the pink and white, it's quite effective really in the end! So I'll be leaving it as it is.


Sunday, 26 August 2018

More Paint Pouring


Yesterday I had another play with paint pouring, but decided to try on a smaller scale.


This time I tried the swipe technique with a damp kitchen towel.


And this is what I ended up with. I would have liked more cells and probably less white, but it was only my first try!


Then I tried one on watercolour paper. This one is still drying this morning! Still not many cells to speak of and the green has somewhat taken over too, but I have less white showing.


This morning, this one is dry and I'm quite pleased with how it came out.


Close up of the cells which came out pretty good, but they are quite small.


And this one wasn't quite dry, as you can see, top left, I stuck my thumb in it!! I cut out a face profile, drew round it and painted it black.


Close up of the cells, again not many of them for some reason.


I think I've left too much white paint over the colours, ie I didn't swipe enough off. 


And just an update on this one, I added an image.

All paints and pouring mediums are from the DecoArt range.


Friday, 24 August 2018

Paint Pouring Play


Today I decided to have a play with paint pouring. I mixed the paint with the pouring medium to a watery consistency.


I started to pour each of the colours over the bottle bottoms which created the flower shapes.


I stopped when the paint started to flow over the edges. Used a wooden tool to pull the paint to give the petals more shape.


As I had loads of paint mixture left I did the puddle pour and then blew them out with a straw, which sort of created a flower. I forgot to go back in whilst they were wet and drag some paint to define some petals and add a bit of black to outline them. But not to worry, it was only my first go. 


Here they are just leveling out a bit, but as you can see, I still had loads of paint mix left. I did move them outside to dry, but then it rained and I forgot about them, so they got a bit wet again!


So with the excess, I used the white, black, orange, red and purple and also mixed up some pewter and old gold metallics. I added some silicone oil into the mix in the hope of creating cells, but that didn't work out.


Close up of the middle part of the canvas which is quite large at 20" x 16".


And this is a close up of where a lot of the white came through.

This one is still on the dining room table drying!

All the products are from the DecoArt range.  I used the Americana acrylic paints and pouring medium.

Sunday, 19 August 2018

Cracked Vase


Remember the pot vase that I picked up at the car boot?


I gave it a coat of prussian blue paint.


Then I mixed up some 3d flex, ivory powertex and a bit of water to create the mix to spread on the to make the cracks.


I mixed up batches at a time, so I wasn't left with way too much.


I used a pallet knife to spread the mix on this side and it created lovely large cracks.


And when I applied it to this side I used my hand to press it onto the vase. As you can see it's still created cracks, but in a different way.


I coloured it using lots of different mediums. Firstly I sprayed it with Dylusions inks in orange. Then used golden hi-flow inks in napole red and quinacridone red and finally once it was all dry I used the Powerwax mixed with ginger and peach pigments to cover all of the vase.

And this is the other side. I also painted the neck and bottom with black paint.


Close up of the side that was applied with a pallet knife.


Close up of the other side applied with my fingers.

***Edited***


When I went for a walk with Fraz this morning, I picked up these dried poppy pods that had broken off and were lying on the pavement.

Blog Archive