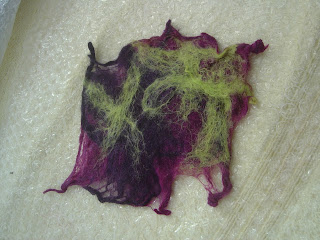
I have to say that I very nearly didn't go to this workshop due to feeling so ill, and it wasn't the workshop that put me off, it was the drive, but anyway, I thought I'll set off and see how I feel and I'm sooooo pleased I did. I had a fabulous day.
Just to get a feel for the merino wools and how to layer them up, we started off making a brooch. You layer the first colour, then the second, then the third directly on top.
Totally dowse it all in a soapy warm water mix.
Place the second piece of bubble wrap over the top and then start the tickling process which is basically running your fingers along the lines of bubble and pressing lightly. By this point the felting process has already started to happen.
Next step was to roll everything around a long cylinder.
Then roll everything in a towel and roll backwards and forwards about 10 times, unroll everything and turn the felt around 90 degrees and do the whole process again, and then turn another 90 degrees, complete the process again, and then again with another 90 degree turn, until you end back up where you started.
It's one of those processes where you don't really know what you are going to end up with until it's finished. You can also wet it again in the soapy water and then slightly wring it out and then literally throw it at something hard (like a concrete floor) and it felts even more. It has the same effect as putting it in a tumble dryer apparently.
We made a ball of felt to go in the middle and then just shaped the felted piece around it, sewed it in and added a brooch back.
The class was meant to be about making a picture of flowers in a vase, but I didn't want to do that, so found this picture by Picasso and asked if I could do this instead. I was delighted when Dawn said yes!
We started by covering about an A4 sized area with white wool. Then from here on in, it's all about breaking down the layers. So my next layer was pink for the outside edge. The next layer was black. I forgot to take photos of those stages, but the next step was the green and blue for the hair. This is a different type of wool and was curly at the ends.
Then I simply built up the remaining layers.
Added more blue for definition.
And I decided at this point it was finished.
These are everyone elses in the group, they all chose to do the flowers.
Then the wetting and rolling process as shown above with the brooch was started. So this has been dowsed in warm soapy water and I used the bubble to press it down, it's meant to be flat so if it's still puffy in any areas, more water needs to be added. The 'tickling' process also has to carried out before it is rolled.
This time we rolled it 50 times for each 90 degree turn and you can tell if it's felted or not by pinching the back, and if it doesn't pull away fluffy then it's done.
This is my finished piece, as you can see the mouth moved sightly but now she has some expression - lol. Absolutely loved the process and loved the finished piece. It's still wet at present and will take approx 24 hours to dry, so I think I'm going to mount it on black card and then frame it.
Dawn, third from the left was the tutor for the class and the other three ladies took the class with me.
And of course, I couldn't go all that way without buying a little something.
Dawn has a FB page where she lists the events she has going on, why not pay her a visit here, you won't be disappointed.


3 comments:
some of the woyww deskers do felting all the time, and they make some fantastic things. I love your picasso picture, Sam. So glad you felt well enough to go and also that you enjoyed it. Have just done the AP post!
That's fantastic Sam....not something I've tried but looks great...would love to try it one day.
looks fab!
love
Amanda X
Post a Comment