Sunday, 24 June 2018

Biker Skull & Biggles


I was inspired by this photo that someone put up on FB of a biker skull that they had bought whilst on holiday in Mallorca. I thought she'd made it but she hadn't, so I had to give it a go.


Firstly I created a mould as all the skulls ones I have are quite small. I was bought a skull candle which I haven't burnt yet, so I used mold and pour around it. This mould measures approx 4" x 3" x 3".


I mixed up a batch of clay using ivory powertex and stoneart.


I didn't want to totally fill the mould with clay as it would take forever to dry. I just made sure it was thick enough to give me a good outer coat. I peeled it very carefully out of the mould and then put a round polystyrene ball in place so it kept its shape whilst it dried.


I also cut some goggle and side pieces from the clay. As the sun was out, I put everything outside to dry. I left the googles on top of the head so that they dried with a bend in them as opposed to being flat.


Once dry I took out the polystyrene ball.


This is what they look like from the back.


I started to fill the gap with small pieces of tinfoil, (approx 4" x 4").


And moulded a head.


Look at it from all angles.


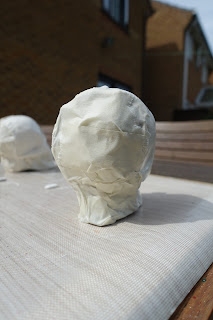
Covered it masking tape and then gave it a coat of ivory powertex.


Took them back inside and covered them with cling film, as I wanted to create the helmet. I cut a piece of bubble wrap to the approx size I wanted the fabric to be.


I don't have any photos of this next step as I changed my mind. I decided to add a layer of clay over both of them and also create a rim for the helmet.


I put the goggles back on and set them outside to dry again.


And here they are finished. I ended up with a biggles and a biker as the fabric helmet didn't work out as I wanted it to. I broke one and the other worked out okay, hence biggles on the left.


Front view of Biggles. He is not stuck to the piece of wood, just perched! I may even add pigments to his helmet.


I decided to just paint his helmet in black Decoart premium paint and outlined the rim in silver.


Biker skull from the right.


View from the top with their googles on their heads.


And then the sun really came out!!


Had great fun making these!!!


Sunday, 10 June 2018

Stencil Transfers


I took a piece of A4 card and using PVA glue pasted on various pieces of paper including book, tissue and map and also added some washi and tissue tape to the mix.


I did exactly the same with this piece but coloured the background first.


Once dry, I added various colours of decoart premium acrylic paint. The right hand side ended up more green than what I wanted it so I added a watered down layer of white.


And this one I left bright.


I added some marks in silver and gold.


To both of the pieces. I then gave them both a coat of matte medium to seal them.


I printed out a background using my cheapo inkjet printer. Remember if you are using words, they need to be the wrong way round for this step.


Next I placed the stencils were I wanted them on the background and used a bit of masking tape to hold them in place.


For the music stencil I coloured in the image using a black sharpie pen.


And for Eve I used black decoart modelling paste.


Once they were completely dry I took a couple of photocopies, again using my cheap inkjet printer.


Next I completely covered both of the images with decoart tinting base.


In total, I did three coats of the tinting base and once dry, one coat of the matte medium and again left it to completely dry.


I gave the coloured base another coat of matte medium, and whilst it was still wet I placed the photocopy on the top.


This is the photocopy placed on the top of the coloured background.


To ensure it was totally stuck down I used a brayer.


Then I left them overnight to dry.


I dampened them slightly with warm water and a sponge.


And started to gently rub away the top layer of paper.


And the second one. Don't get paper too wet and don't rub too hard or you will rub the transfer away.


All the paper has been removed from each piece.


Once dry, I gave each one a coat of decoart ultra matte varnish which makes the colours pop.


Next I cut them to size.


And mounted them onto black card.


They look completely different with different coloured backgrounds.

I really enjoyed making these and I know some of you will be thinking, why didn't you just stencil the image straight onto the backgrounds, but I wanted to show how they could be used in a different way.

Wet Felting Techniques


So yesterday I attended a workshop at Needle and Thread. For me it was all about learning the techniques, so I wasn't really bothered what I was going to end up with. So if you are asking what it is, it's not meant to be anything!!


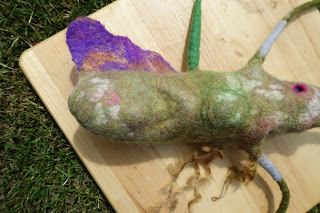
The craters worked out great with a colour showing underneath and one around the hole. The nepps worked out really well too. They are the patches of white.


The spikes were added and they've attached and blended in really well too.


If you can just make out the ring of dark green circles, this is where I created a piece of prefelt, cut it into circles and stacked them on top of each other.


Spikes, craters and wool locks. Love how the spike at the top just looks like part of it.


This is a fin in the purple and orange.


Here you can just about make out the ring of one of the rope canes and a ball on the left hand side.

Blog Archive