Thursday, 28 April 2016

Know in your Heart


Used soft gel medium to adhere bits and bobs to a square canvas. Black and white gesso used to cover the background including splats. Metal embellishments added to finish.


Wooden heart painted in white crackle paste, coloured with red chalky paint and wiped back the black antiquing cream.


Close up of some of the textures.

All products are from the DecoArt range.

Mdf Atc's


Been playing with DecoArt products and my new sets of Andy Skinner stamps.


Black gesso base, hair clay adhered to act as a resist, top coat, serene chalky paint, wiped back and Andy Skinner images stamped in black stazon.


Base layer white gesso, edges coated in mix of texture sand paste and matte medium and given a coat of raw umber media paint and quin gold when dry. Stamping in black stazon and finally a coat of 'dirty wash' applied to tone the white down.


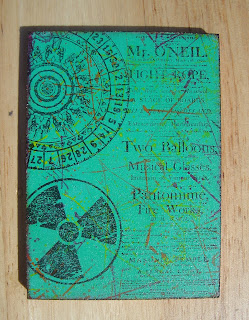
After a couple of coats of deep turquoise multi surface satin paint and a top coat of blue green media paint, I stamped the background in three colours of media paint, red, yellow and orange. Again using the AS stamps in black stazon.

All products are from the DecoArt range.

Tuesday, 26 April 2016

Crackle Atc's


I've been playing with mdf atc's today, Decoart clear crackle paste and interference paints.


This is after they have completely dried and hopefully you can pick up the shimmer and the crackle.


And this is the other one. I only used two colours on this one.


Close up of the crackle.


To enhance the crackle, I covered each piece with white antiquing cream and wiped back. 


Hopefully you can see the crackle much easier now.


I stamped over with black stazon using a script image.


Close up of the crackle and stamping after a couple of coats of media gloss varnish.

All products are from the DecoArt media range.

Inspired by Jean


I usually try and drop in on Jeans streams if I'm not out at netball on a Monday, but for whatever reason, last night it wouldn't load up and let me in. But when I saw her journal pages on FB today I just had to go and watch the recordings which you can find here and here to find out what she did.


So basically I painted the journal page in rainbow stripes using Decoart chalky paints, added the image from a magazine, whilst waiting for it to dry, painted the page with chalky black, then used a baby wipe through a couple of stencils to wipe back and reveal the colours underneath. Once dry I outlined some of the images with a white sharpie to define them and make them pop.

All paints are from the DecoArt range.

By using a gel medium, this kind of makes the image transparent and you can see the colours of paint through it.

Saturday, 23 April 2016

Andy Skinner Style Box Frame


I've been reading about, and seeing the pieces made at the Ministry of Mixology class earlier this month hosted by Andy Skinner and wanted to have a play myself. The actual kit they used can be purchased at Tando Creative, but I decided to make my own.


Cut the pieces of the top frame and glued them on the bottom piece. Used a hole punch to punch out the tiny circles to make the rivets on the right hand side frame.


Given a coat of gesso which was stippled on to give a rougher texture.


Painted the inner frame.


Once dry, totally covered both pieces with black antiquing cream.


Wiped the antiquing cream back until I has happy with what I had, then dry brushed with gesso.


Added a wash of media paints until I was happy with the results. Hi-lighted the edges of all the individual pieces with quin gold.


Next I took some Andy Skinner stencils and used titan buff to stipple through them.


Made a 'dirty wash' and painted over the stenciled areas so they blended in with the background.


Close up of the dirty wash over the stenciled figures.


So onto the inside of the frame. I just used a piece of corrugated, laid the inner frame on and drew round it so I knew the area I was working in. Painted the background and stamped some of my new Andy Skinner stamps in black stazon.


My new stamps which just happened to pop through the letterbox yesterday lunchtime!


Decided what I wanted to put in middle and ended up a cog and a heart collage.


Next I built the sides up to make a recess.


And finally I attached the lid!!

The techniques I've used are the ones I learnt on an Andy Skinner workshop I took in June 2014 which you can see here.

All products are from the DecoArt Range.

Friday, 22 April 2016

CAS Journal Page


PaperArtsy have a theme of white space for their current challenge, so this was a perfect way for me to get back into it after not being too well this week. I stamped the largest of the images from Seths Solar System Set in Cactus green stazon. I chose three colours of chalky paint and stamped with a bottle top. I then chose a darker green and scraped some paint with a credit card, lastly stamped the word hope.

All paint products are from DecoArt.

Thursday, 14 April 2016

Gelli Plate Play


I'd had an idea brewing for a while. I pulled some gelli prints and chose the ones with the most white space to brayer on DecoArt multi surface satin neon paints. 


This is a good way to extend to the edges of the paper so you end up with a full A4 sheet as opposed to the 8 x 10 you get from the gelli print.


Added some background stamping using my new to me set of Seth Apter Solar System stamps and various colours of stazon inks.


I chose four of the prints and cut them into four (A6), added marks with paint and a sharpie pen to each piece.


And finally I made them into cards and added a main image to most of them.


I used a PA mini image in a frame as the focal piece for this card.


A Tim Holtz image stamped onto tissue, you can actually still see the background underneath through the tissue.


And I haven't used my Stampotique stamps for a while, so out they came. The images were coloured with distress pens.


And as I had some strips of gelli print left, I stuck them on the inside of the insert. 

I purposely haven't put any sentiments on any of them as I don't know what I want them for yet.

Tuesday, 12 April 2016

Tag Playtime


Well as it was chucking it down all morning, I decided to do something I've not done for a long time, play with some tags!


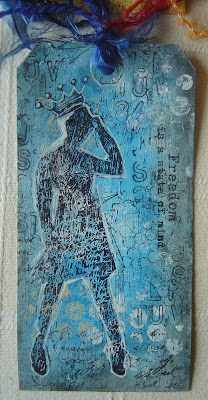
The backgrounds are mainly Crayola Twist Stiks but they don't blend very well and need 'help', so gesso was applied to the tags first which helps them move across the page better.


Close up - stamping with inks and chalky paints.


And pretty much the same thing for this one, just stamped until I got the look I wanted. I added some white pen work to this one.

Monday, 11 April 2016

Boy Armature


Another armature from wire, tinfoil and covered in masking tape, just the same process as the others I've previously made.


I wanted to try and 'dress' him as opposed to just draping and wrapping fabric over him. So here I've made him some trousers which have dried. After wrapping his top half and again dried, I wrapped him in cling film as I wanted to try and make a jumper for him.


Once the jumper was added and dried, I carefully pulled out the cling film. Next I gave him some shoes and added a scarf, which unfortunately you can't see that well on this photo, but I can't move him as he is drying. He will be moved to the airing cupboard later.


And here he is in the garden, fully dried out after a night in the airing cupboard.


Out came the gold to hi-light the textures.


And from another angle.


Next I had the issue of making him stand up. So an mdf atc, a wooden skewer and a piece of polystyrene later, here is the frame I made.


As you can see, from the front you can't see the rods behind his legs and up his back supporting him.


I decided to add some red to the scarf and as you can see, the base is now covered and he is stood up.

Again, for a first attempt, I'm really please with how he has turned out.

Blog Archive