Saturday, 17 September 2016

Larger Fairy Sculpture


I wanted to attempt a bit bigger fairy sculpture, so this time I cut three lengths of wire, 2 x 22" and 1 x 20", made my armature, bulked it out a bit with tinfoil and covered with masking tape, adding half a polystyrene ball for the head. The ball measures 20 cm across.


As you can see, the arms are way too long, but rather them be too long than too short as I wanted them to cross over.


I simply snipped them off with wire cutters and re-masked the ends.


Next I added one set of wings.


I prepared the second set, but haven't actually attached them yet.


Next I covered the head in a thin piece of t-shirt material and extended it down over the neck and shoulders. Once this had dried for an hour or two I went back and wrapped the arms in t-shirt yarn.


The following day I wrapped the legs with t-shirt yarn and covered the attached wings with t-shirt fabric and the second set I covered with dishcloth material, but still haven't attached them.
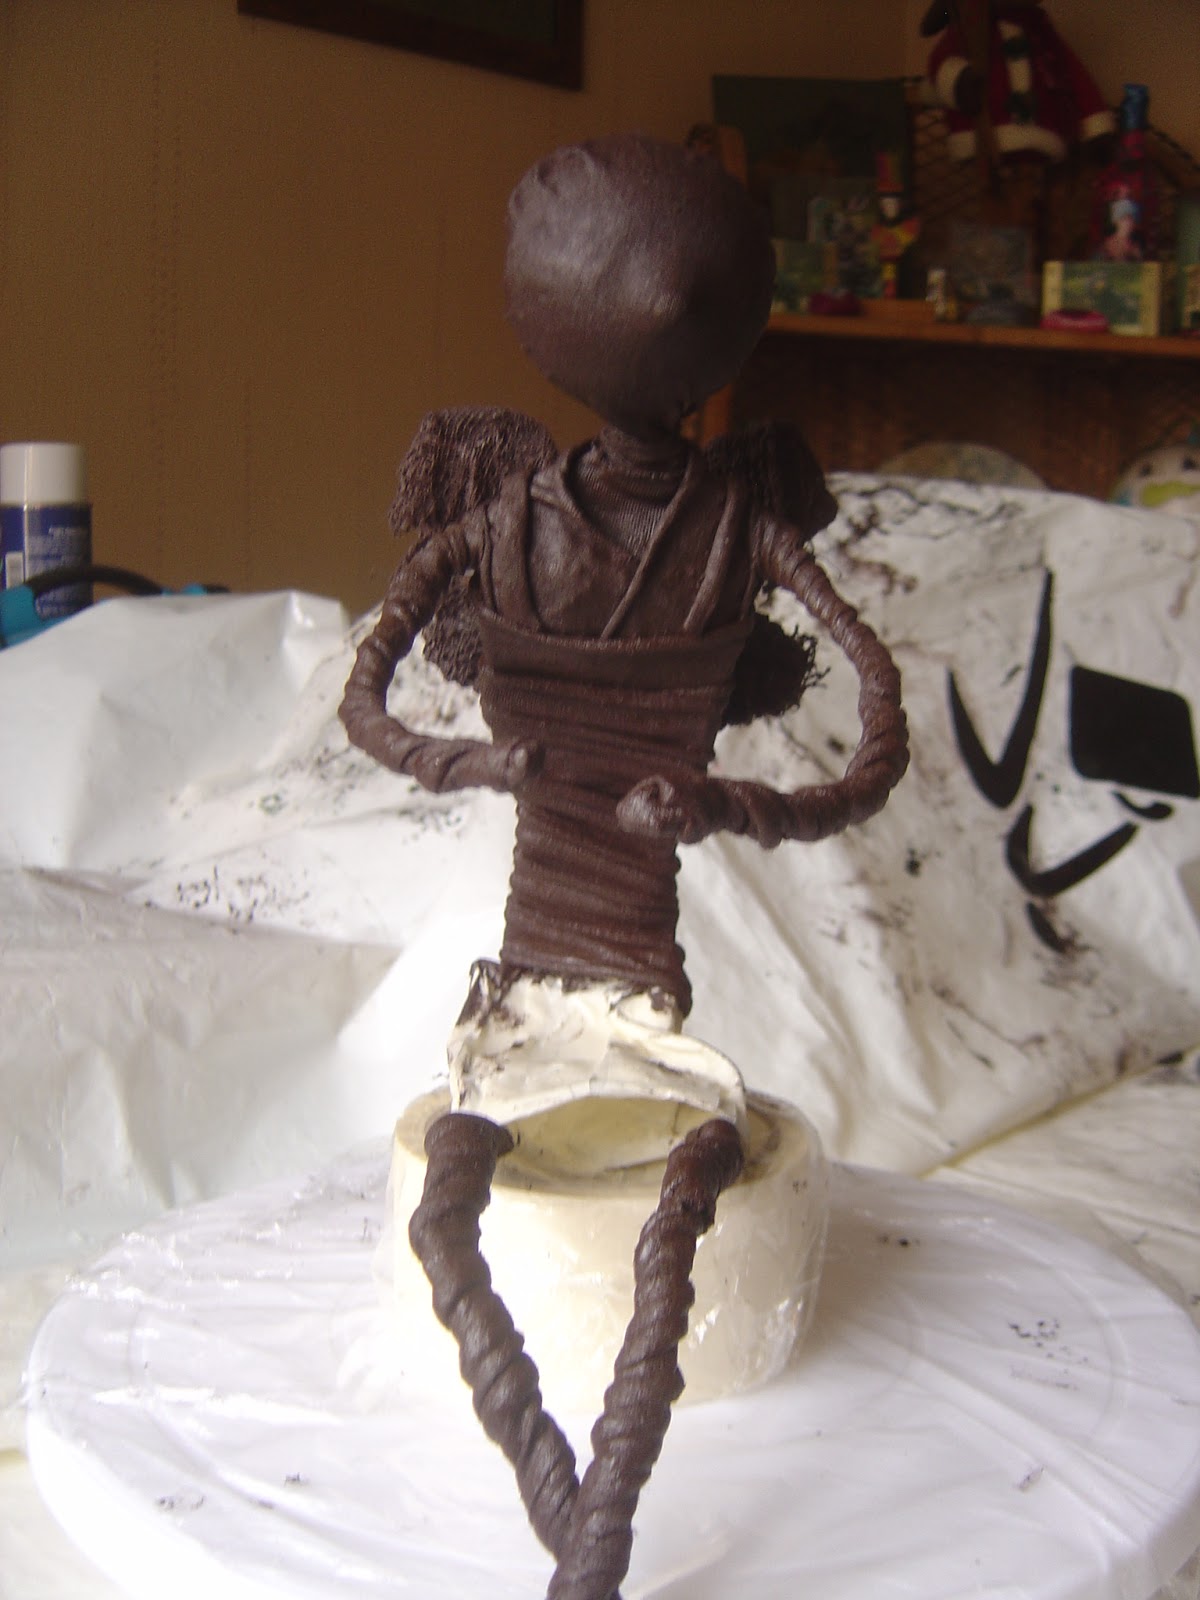

The following day I wrapped the body again with t-shirt fabric and because it was tightly wrapped to give some good ripples and textures, I attached the second set of wings between the wrapped layers. I also created a skirt out of wire and masking tape.


This is a view from the back of the double set of wings and the tight wrapping.


And here she is the next day with her skirt on drying. I used the heat tool to shape the skirt at the front but needed the base to be flatter so she could sit down with her legs crossed and hanging over.


View from the other side, arms crossed, legs crossed, just needs some hair and may add more to the wings depending on how the hair sits.


She is now coloured up, but still needs some hair. I'll be back to show you the finished figure once she has some.

Most of these photos were taken at night with the light on as I built her up over a few nights giving each stage drying time. I personally think it's easier to move onto the next step when other pieces have dried a bit and you can still manipulate the elements days after. I covered the head and arms on Sunday and by Wednesday they were still pliable enough for me to place them where I wanted them after I'd dress her.

She measures approx 9" x 10" x 4".

***Edited*** - The sun came out today


Hopefully these photos give you a better idea of the colours and the pigments which hi-light the textures.

Fairy Sculpture Part 2


Remember my fairy sculpture that I made a couple of weeks ago, if not you can see how I made her here.


Well she has now been coloured up after I got some new pigments last week whilst I was at a powertex workshop in Spalding.


And the view from the front.


I just love how her hair came out.

Unfortunately the photos don't do the piece justice. I was really hoping to take some photos outside in the sun, but it's not going to happen today, it's really dull and gloomy outside today.

***Edited*** - The sun came out today


Hopefully the pigments show up a bit more on these photos.


Saturday, 10 September 2016

Fairy House Workshop


Fairy House workshop with tutor Lesley, Chris, Lin R, Lin S and my chair.


The process, mixing the stoneart with the ivory powertex to get it to dough consistency, you can see mine in the container at the top of the red board. Then rolling it out like pastry using talc instead of flour on the board and rolling pin!


Chris and Lin mixing their products together, it really does start off as a very sticky mess, but with a bit of working in it comes together. At this stage we added some coloured powertex to give the mixture a base colour.


Once we had some rolled out we started to mould it onto the plastic bauble.


Lin, Lin and Chris all used the blue as a base colour, this is Lin holding hers up by the wire.


We then did the next mixing process to make the roof. This time we used bronze powertex and 3d flex, again mixed it together to make a dough and then rolled it out with the board and rolling pin, again using talc, which is the white you can see on the brown roof.


Everyone building up the roof of their house.


Next we cut some shapes out, made some holes, added some other bits of the stoneart/powertex mixture mainly to create textures.


Because we used the 3d flex on the roof it naturally starts to crack and as with most cracks, you have no control as to where or even if they are going to crack.


We'd had lunch, and the food in the tearooms is fabulous, but in with the price of the workshop was a drink and a slice of cake. They brought it out to us and it was set up like afternoon tea.


Just look at the size at that wedge of cake, which was to die for. Lin and I had orange and Lin and Chris had coffee and walnut.


Whilst we had been having our coffee / tea and cake (& more shopping), Lesley had placed our makes in a drying box ready for the next stage.

Group photo, thanks to Lesley for taking it of us.


The next stage was to add the pigments. We started by choosing a matte colour for the bottom of the house and adding another colour if we wanted to. Next we added a ghosting of white to the bronze roof followed by one or two matte colours.


Next we added pearl ex pigments for a bit of bling, followed by powertex rich gold and bronze gold.


Close ups of the roofs with the gold pigments.


Obviously I had to have a shop whilst I was there. Lin and I split the powertex pigments which is why mine are in sealed bags, apart from the white which is still in it's pot as we got one each of this colour.


This is what was in my lovely decorated bag from Lin & Chris, I love that Kate Crane cube stamp, I have wanted it for ages, but it's always out of stock, everywhere - thank you so much.


And these are from Lin. Stamped images, duplicate stencil, loads of clay flowers, dragonflies and other bits and bobs, paper flowers and a fab little creation on corrugated.


And wow, lovely pieces of fabric, all different textures, will be great when powertex'd!!


Wooden stuff, a couple of mdf skulls, a 3d heart, wooden frame and a fab deep box, stirring sticks and jenga pieces.


And finally some lovely ceramic pieces and a barbie doll, all for powertexing.  And she brought all this lot on the train for me - thanks Lin, really appreciate it.

It takes about 5 days for the products dry properly and the cracks to form, if there are going to be any, so I will be back with an update and a finished product photo in a few days.

Thanks, Lesley (tutor), Chris, Lin & Lin for a fabulous day.

Sunday, 4 September 2016

Fairy Sculpture


I made the armature from three pieces of sturdy garden wire, two measuring 18" and the other 20". The head is half of a 1 1/4" polystyrene ball with a tiny one stuck in the middle for the nose.


Next step was to cover everything in tinfoil. I did this on the settee whilst watching tv.


Covered everything with masking tape and attached the head.


I wanted to create a skirt and there were two ways I thought of to do this, one was to use a toilet roll inner tube.


The second was to create in effect a wire tube and cover it with masking tape. 


I also needed some wings. I decided to go with a small pair.


I decided on the wire tube so covered it and the wings with masking tape.


I attached both to my figure.


Then out came the Powertex. I found a thin piece of t-shirt fabric which I used to cover the head and the top part of the body. You need to try and pull this back so you get the fabric smooth over the face.


I let that dry for a while and then covered the wings with stockinette.


I left the wings to dry for about an hour and then using strips of t-shirt yarn I covered the arms and the legs. This fabric gives them great texture and it's a great width to work with. I pulled the arms and legs out straight as it was easier to cover them. They can easily be re-shaped afterwards.


Again I left the arms and legs to dry for about another hour, re-shaped them and then dressed her. I forgot to take a photo at this stage. I also added more fabric to the wings.


And lastly again after waiting about another hour, I added some hair.

I found it easier to do all these steps in stages and by letting the Powertex dry for a while after each stage, the figure was so much easier to handle.

This figure was inspired by Allison Turner whom we have taken some workshops with. We were meant to be doing a workshop on this project, but for whatever reasons it didn't come off, so I decided to have a go myself and I'm really please with how she's turned out. I've named her Ellie.

I'll be back with part 2 after I've been to a workshop next Saturday, as I need to buy some of the rich gold and bronze gold pigments to colour her with.

Blog Archive