Wednesday, 21 April 2021
Sunday, 18 April 2021
Silicone Rubber Mould Making
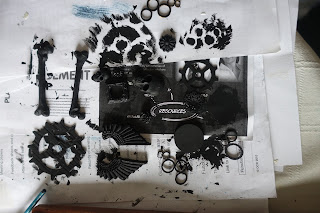
All set up ready to make some moulds from pieces I already had.
I was overly ambitious as this is all I got out of a 1kg kit!
They came out pretty good for a first try, and I learnt a few things for next time too.
To make these moulds I used the Pebeo Siligum Moulding paste as some of the pieces weren't flat.
These are the resin casts that came out of the moulds I made - very happy with them all.
I made some more moulds.
These came out great but the skull one is really really thin on top so it will probably split. I didn't seal the bottom well enough and it spilled out more than I expected it to. Live and learn!!
Thursday, 15 April 2021
A box of Skulls and Cogs
I painted a cabinet drawer with black gesso.
I then made a mix of gel medium, acrylic paint and the small sand balls and painted the inside.
Then I took out some of my moulds and started to arrange them inside the box.
Then I painted them all in black gesso.
I coloured all the pieces before I put them back in the box and stuck them down using heavy gel medium.
Wednesday, 14 April 2021
Skull and Cogs Candle Jar
I covered the jar in a piece of lace and laid out some of the resin, chipboard and metal embellishments.
Then I painted them all black.
Once I stuck them on, I coloured them with the waxes.
Then I decided to add some micro beads.
I put a tallish candle inside which flickers.
And because the lace is still see through and the jar was clear, you can see the candle and the light it gives off through the back.
Then I put in a battery tea light that changes colours.
From the back.
And then it went to orange.
And a yellowy orange.
And the back of the orangey one.
And my favourite, the green light.
And the red colour.
And the pink coloured light.
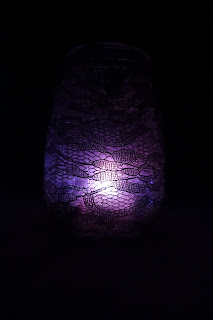
And this is the purple light colour from the back.
I took inspiration for this from the mixed media tutorial by Anat Weksler Finnabair Art Files Youtube.
Monday, 12 April 2021
Mini Heart
I painted everything in black powertex and then sprinkled in some micro beads.
Once they had dried I dry brushed with white powertex.
Then I used pigments and varnish to colour them. This is a photo taken in the shade.
And this is the same piece but taken in the sun.
Labels:
fast cast resin,
Heart,
MDF Shape,
micro beads,
Moulds,
Pigments,
Powertex,
Varnish
Thursday, 8 April 2021
More mould creations on pieces of wood
I wanted to try out my new colours of waxes. The substrate is just wood from our old green gate - it works great.
I picked up the clear crackle instead of the clear modelling paste, but it was okay.
Sunday, 4 April 2021
Canvas
I stencilled black modelling paste onto a canvas board.
Whilst it was drying, I laid out a few of the resin mould pieces.
I coloured the canvas board with metallic paints.
I gave all the pieces a coat of black powertex.
I'm not sure if you can see any difference on this photo, but I went over the raised areas with oxynite treasure gold, which is like a metallic brown colour.
Next I added waxes to the powertexed mould pieces.
I felt I needed something to tie everything in, so I used some gold coloured gilding flakes on the cogs.
Close up of the chain, cog frame and skull.
Close up of flower on frame.
Friday, 2 April 2021
Mini MDF Plaque
Another mini mdf plaque with cogs and queen of steam elements.
I stencilled on the mdf plaque and then covered everything and stuck it down with powertex.
I was dying to try out my new blue and purple Finn waxes.
The purple is just gorgeous.
Labels:
alchemy waxes,
fast cast resin,
MDF Shape,
mini plaque,
Modelling Paste,
Moulds,
plaque,
Powertex,
Stencil,
Treasure Gold
Thursday, 1 April 2021
Heart, Skull, Cogs
From the selection of resin moulds I made previously.
I picked out the ones I wanted and laid them out until I liked what I saw.
I stuck them all down using black powertex.
Then I coloured them with the waxes.
Labels:
alchemy waxes,
Cogs,
fast cast resin,
MDF Shape,
Metal Embellishments,
Moulds,
Powertex,
skull,
Stencil,
Treasure Gold
Subscribe to:
Comments (Atom)


